Welcome to the SVX9000 User Manual․ This guide provides comprehensive information on installing, configuring, and operating the SVX9000 system, ensuring optimal performance and safe usage․
1․1 Overview of the SVX9000 System
The SVX9000 system is a high-performance, advanced control solution designed for industrial applications․ It integrates seamlessly with the 9000X AF Drives, offering precise control and monitoring capabilities․ The system features a user-friendly interface, robust parameter settings, and flexible configuration options․ It supports various communication protocols and is suitable for a wide range of motor control applications․ The SVX9000 is known for its reliability, efficiency, and scalability, making it a preferred choice for industrial automation․ This manual provides detailed guidance on its operation, configuration, and troubleshooting․
1․2 Purpose of the User Manual
This manual serves as a comprehensive guide for the SVX9000 system, providing detailed instructions for installation, configuration, and operation․ It ensures users can maximize the system’s capabilities while maintaining safety and efficiency․ The manual covers technical specifications, troubleshooting, and best practices, offering a clear understanding of the system’s features and functions․ It is designed to assist both novice and experienced users in achieving optimal performance and resolving common issues efficiently․ Refer to this manual for accurate and reliable information to ensure proper system utilization․ It is a vital resource for anyone working with the SVX9000․

System Requirements and Specifications
The SVX9000 system operates at 575V, supporting 2 to 2000 hp for induction motors and up to 2300 hp for torque applications, with precise current ratings defined․

2․1 Technical Specifications of the SVX9000
The SVX9000 operates at 575V, supporting 2 to 2000 hp for induction motors and up to 2300 hp for torque applications․ It features precise current ratings, with a maximum intermittent operating current rating determined by the motor’s torque vs․ current characteristics․ The system supports various control interfaces, including OPTCI for Modbus TCP, OPTCJ for BACnet MS/TP, and OPTCQ for Ethernet/IP, ensuring seamless communication․ Additional features include application package loading and a user-friendly interface for parameter configuration, as detailed in Chapter 4 of the manual․
2․2 Operating Conditions and Limits
The SVX9000 operates within specific conditions to ensure reliability․ Undervoltage limits are outlined in Table 4-2 of the manual, while maximum intermittent operating current ratings are motor-dependent․ Environmental factors, such as temperature and humidity, must be controlled to prevent damage․ Proper installation and adherence to specified torque vs․ current characteristics are crucial․ Additionally, the system supports various communication protocols, but setup must follow guidelines to avoid issues․ Always refer to Chapter 4 for detailed specifications and Chapter 5 for operational guidelines to maintain optimal performance and longevity of the SVX9000 system․

Installation and Setup
Proper installation and setup of the SVX9000 are crucial for optimal performance․ Follow the guidelines for hardware, software, and wiring to ensure a seamless and safe setup process․
3․1 Hardware Installation Guidelines
For the SVX9000, hardware installation requires careful planning․ Ensure all components are mounted securely, and connections are tight to prevent vibration issues․ Use the provided mounting brackets and follow torque specifications․ Grounding is essential for noise reduction and safety․ Install the control panel in an accessible location, away from direct sunlight and moisture․ Verify all terminals are correctly labeled and match the system’s wiring diagram․ Refer to the manual for specific installation steps and safety precautions to avoid damage or electrical hazards during the process․
3․2 Software Setup and Configuration
The SVX9000 software setup involves installing the provided PC-based application tool․ Connect the device to your computer via the recommended interface and follow the on-screen instructions to load the application package․ Ensure all parameters are configured according to the system requirements, referring to Chapter 4 of the SVX9000 User Manual for detailed guidance․ Use the menu-driven interface to customize settings, such as motor ratings and operational limits․ Verify connectivity by testing communication between the control panel and the frequency converter․ For advanced configurations, consult Chapter 5 for step-by-step instructions and troubleshooting tips․ Always update firmware to ensure compatibility and optimal performance․

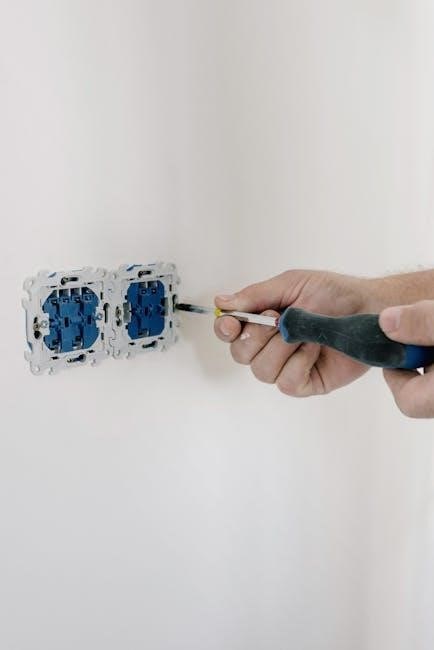
3․3 Wiring and Connectivity Instructions
Proper wiring is essential for the SVX9000 system․ Connect the power supply to the terminal block, ensuring all wires are securely tightened․ Use shielded cables for communication ports to minimize interference․ Refer to the wiring diagram in Chapter 4 of the SVX9000 User Manual for specific terminal assignments․ Connect the digital output DO1 on the OPTA1 board to the designated control point․ Verify all connections before powering on the system․ For network configurations, enable Modbus TCP or BACnet MS/TP interfaces by following the setup instructions in the manual․ Ensure all safety protocols are adhered to during installation to avoid damage or operational issues․

Configuration and Parameter Settings
This section guides users through configuring the SVX9000 system, focusing on parameter settings and application-specific configurations to optimize performance and meet operational requirements․
4․1 Understanding Parameter Settings
Parameter settings are essential for customizing the SVX9000 system to meet specific operational needs․ Key parameters include motor ratings, torque, and voltage limits, ensuring optimal performance and safety․ Users can access these settings via the SVMulti-line panel or keypad, with detailed instructions provided in Chapter 4․ Adjustments should be made carefully, referencing the manual to avoid errors․ Proper configuration ensures the system operates within specified limits, maximizing efficiency and longevity․ Always refer to the manual for guidelines on parameter adjustments and troubleshooting common issues related to configuration․ This section provides a foundation for advanced customization in subsequent chapters․
4․2 Configuring Application-Specific Parameters
Application-specific parameters enable tailored operation for diverse industrial needs․ Users can customize settings such as communication protocols (e․g․, Modbus TCP, BACnet MS/TP) and motor control parameters․ The SVMulti-line panel simplifies this process, allowing selection of predefined or custom configurations․ OPT modules like OPTCI and OPTCJ expand functionality for specific applications․ Refer to Chapter 4 for detailed instructions on loading and configuring these parameters․ Ensure settings align with the motor’s torque vs․ current characteristics for optimal performance․ Proper configuration is critical for seamless integration and operation across various industrial applications․ Always follow the manual’s guidelines to avoid errors and ensure system reliability․

Operation and Control
The SVX9000 system offers intuitive operation via the SVMulti-line panel, enabling precise control of motor functions and digital outputs․ Refer to the manual for detailed operational guidance․

5․1 General Operation of the SVX9000
Operating the SVX9000 involves navigating its user-friendly interface and configuring parameters․ The SVMulti-line panel provides easy access to motor control functions, while digital outputs like DO1 enable precise system management․ Users can monitor real-time data and adjust settings to optimize performance․ The system supports various control modes, ensuring flexibility for different applications․ Refer to Chapter 4 for detailed instructions on parameter configuration and Chapter 7 for advanced operation techniques․ Always ensure proper startup and shutdown procedures to maintain system integrity and safety․ Regular monitoring of operational parameters is recommended for optimal functionality․
5․2 Using the SVMulti-Line Panel
The SVMulti-line panel offers intuitive control and monitoring of the SVX9000 system․ Navigate through menus using the Menu button and numeric keypad․ Access key parameters like motor speed and torque to customize operations․ The panel displays real-time data, enabling precise adjustments․ For advanced settings, refer to Chapter 7 of the manual․ Ensure proper training to optimize functionality and safety․ Regular updates and maintenance are crucial for sustained performance․ Always consult the manual for detailed instructions on specific features and troubleshooting․
5․3 Digital Output Configuration (DO1)
Digital Output Configuration (DO1) enables control of external devices based on system conditions․ Access the DO1 settings via the SVMulti-line panel by navigating to P1․3․3․7 and pressing the Menu button․ Configure output type, activation triggers, and timing parameters to suit your application․ Ensure proper wiring to the OPTA1 board for reliable operation․ Refer to Chapter 4 for detailed parameter descriptions and activation protocols․ Always follow manual guidelines to avoid configuration errors and ensure safe system operation․ Regularly review settings to maintain optimal performance and adapt to changing requirements․ Proper setup is crucial for seamless integration with external controls․

Troubleshooting and Maintenance

This section addresses common issues, provides solutions, and outlines maintenance practices to ensure optimal SVX9000 performance․ Regular checks and updates are essential for system reliability․
6․1 Common Issues and Solutions
Common issues with the SVX9000 include communication errors, parameter mismatches, and power supply problems․ Solutions involve checking connections, resetting parameters, and ensuring stable power․ For example, if the system fails to start, verify the digital output configuration (DO1) and motor ratings․ Undervoltage issues can be resolved by referencing Table 4-2 in the manual․ Additionally, menu navigation problems can be fixed by consulting Chapter 5 for detailed instructions․ Always ensure firmware is updated and consult the troubleshooting guide for specific error codes․ Regular maintenance and parameter checks are crucial for preventing recurring issues․
6․2 Maintenance Best Practices
Regular maintenance is essential to ensure the SVX9000 operates efficiently․ Update firmware periodically to access new features and fixes․ Inspect wiring and connections for wear or damage․ Clean dust from cooling vents to prevent overheating․ Check parameter settings against motor specifications to avoid mismatches․ Refer to Chapter 4 for configuration guidelines․ Ensure power supplies meet operating conditions outlined in Chapter 2․ Perform routine backups of configurations to prevent data loss․ Schedule professional inspections annually for optimal performance․ Adhere to these practices to extend system lifespan and maintain reliability․ Consult the manual for detailed maintenance schedules and procedures․
This concludes the SVX9000 User Manual․ Refer to Chapter 4 for configuration details and Chapter 7 for application instructions․ Visit the manufacturer’s website for additional resources and support․
7․1 Summary of Key Points
The SVX9000 User Manual provides detailed guidance for installation, configuration, and operation․ Key topics include system requirements, parameter settings, and troubleshooting․ Proper installation ensures optimal performance, while understanding parameter configurations enhances functionality․ Digital outputs like DO1 simplify control․ Referencing chapters 4 and 7 is crucial for advanced applications․ Regular maintenance and adherence to operating limits prolong system lifespan․ For further assistance, consult additional resources and manufacturer support․ This manual is essential for users seeking to maximize the SVX9000’s capabilities while ensuring safe and efficient operation․
7․2 Additional Resources and Manuals
For further assistance, refer to the 9000X AF Drives User Manual, which provides detailed technical specifications and troubleshooting guides; Additional resources include application-specific manuals for parameters and wiring․ The SVX9000 Application Manual offers insights into advanced configurations․ Visit the manufacturer’s website for updated documentation and EDS file downloads․ Supplementary guides like the SVX/SPX Add-On Instructions are also available․ These resources ensure comprehensive understanding and optimal use of the SVX9000 system, addressing both basic and complex applications․