Product Overview
Bob Evans single‑serve mashed potatoes offer a quick, creamy side․ The package contains pre‑mashed potatoes that need only a few minutes in the microwave; After heating, stir in butter, milk, and seasonings for a smooth, flavorful result․ Ideal for busy dinners․ Simply heat, fluff, and serve․ Enjoy! and share․ Now
What Is Bob Evans Single Serve Mashed Potatoes?
Bob Evans single‑serve mashed potatoes are a convenient, ready‑to‑eat side dish that delivers the comforting taste of freshly mashed potatoes in a compact, pre‑portion package․ Each 4‑ounce pouch contains a blend of Yukon‑Gold and Russet potatoes that have been cooked, mashed, and seasoned with a proprietary mix of butter, milk, salt, pepper, and a hint of garlic․ The result is a creamy, smooth texture that can be quickly reheated in a microwave or on the stovetop, making it an ideal choice for busy weeknights, road trips, or small family meals․ The product is designed to preserve the classic flavor profile of homemade mashed potatoes while eliminating the need for chopping, peeling, or cooking from scratch․ The packaging includes a simple “heat and serve” instruction sheet, and the potatoes can be enhanced with additional toppings such as shredded cheese, chives, or a drizzle of gravy․ Because the mash is pre‑seasoned, it offers a consistent flavor that can be enjoyed straight out of the bag or customized to suit individual taste preferences․ The single‑serve format also helps reduce waste and portion control, making it a practical option for single diners or those who want to avoid over‑serving․ Overall, Bob Evans single‑serve mashed potatoes provide a quick, reliable, and tasty solution for anyone looking to add a comforting side dish to their meal without the hassle of traditional preparation․
Key Features and Benefits
Bob Evans single‑serve mashed potatoes combine convenience with classic comfort․ Each 4‑ounce pouch is pre‑mashed, pre‑seasoned, and ready to heat in just minutes, eliminating peeling, boiling, and mashing․ The blend of Yukon‑Gold and Russet potatoes delivers a naturally creamy texture that stays smooth after microwaving․ Seasoning includes butter, milk, salt, pepper, and a subtle garlic note, giving a savory depth that rivals homemade mash․ Portion control is built‑in: one serving per pouch means no excess, perfect for single diners or families that want to avoid waste․ The product is shelf‑stable until opened, so you can keep a few on hand for spontaneous meals․ It pairs easily with gravy, cheese, or fresh herbs, allowing you to customize flavor on the fly․ For busy weeknights, the “heat‑and‑serve” design saves prep time and reduces cleanup․ Even on road trips or camping, the compact packaging fits in a cooler and can be reheated with a portable microwave or hot water bath․ Overall, Bob Evans single‑serve mashed potatoes offer a reliable, tasty, and time‑saving solution for anyone craving a comforting side without the fuss
Nutrition-wise, each pouch contains roughly 200 calories, 10 grams of protein, 30 grams of carbohydrates, and 5 grams of fat, making it a balanced side that fits into most diet plans․ The potatoes are sourced from farms that practice sustainable agriculture, ensuring a high‑quality product with minimal environmental impact․ Because the mash is pre‑seasoned, you can skip the extra step of adding butter or milk, but if you prefer a richer texture, a splash of cream or a pat of butter will elevate the flavor․ The packaging is recyclable, and the product is free of artificial preservatives, mind about what goes into your meal․ Whether you’re hosting a dinner party, preparing a quick lunch, or simply need a comforting side for a family dinner, Bob Evans single‑serve mashed potatoes provide a dependable, hassle‑free option that delivers consistent taste and texture every time․ Add fresh herbs now․
Serve immediately for best texture․ and warm․!!
Ingredients and Flavor Profile
Bob Evans single‑serve mashed potatoes blend Yukon‑Gold and Russet potatoes, seasoned with butter, milk, salt, pepper, and a hint of garlic․ The result is creamy, smooth, savory, comforting, and ready to pair with gravy, cheese, or fresh herbs․ Its buttery base invites toppings like cheese or herbs for rich taste
Potato Type and Seasonings
Bob Evans single‑serve mashed potatoes are crafted from a blend of premium Yukon‑Gold and Russet potatoes, chosen for their creamy texture and natural sweetness․ The potatoes are pre‑mashed to a fine consistency, ensuring a smooth base that requires minimal effort during reheating․ Seasoning is thoughtfully balanced: a generous knob of butter melts into the warm mash, while a splash of whole‑milk adds moisture and richness․ A pinch of sea salt and freshly ground black pepper provide the essential savory backbone, and a subtle hint of garlic powder offers depth without overpowering the natural potato flavor․ Some batches may include a touch of smoked paprika or a dash of dried thyme for a warm, earthy undertone․
The selection process begins with sourcing high‑quality, non‑GMO potatoes that are free from wax coatings and excessive moisture․ After washing, the potatoes are diced into uniform cubes to promote even cooking․ They are then boiled until just tender, drained, and mashed using a hand‑held or electric mixer until silky smooth․ During this stage, a small amount of butter is folded in to enhance flavor and create a glossy sheen․ The mixture is then cooled to room temperature before being portioned into single‑serve containers, each sealed to preserve freshness․
Seasoning is applied just before reheating to maintain the integrity of the flavors․ The butter and milk are added in measured amounts, allowing the mash to absorb moisture without becoming soupy․ A light sprinkle of sea salt and a few grinds of black pepper elevate the natural taste, while garlic powder or roasted garlic paste adds a savory nuance․
A sprinkle of sea salt and black pepper lifts rich flavor, while garlic powder adds savory nuance!
Equipment Needed
A microwave, a small bowl, a fork or spoon, a measuring cup, butter, milk, and a pinch of salt․ Keep everything ready for a quick, smooth mash․ No extra gadgets needed—just simple kitchen tools for a hassle‑free prep․ Add a small saucepan, whisk, and a pinch of paprika for flavor!
Microwave and Basic Tools
To prepare Bob Evans single‑serve mashed potatoes, you’ll need a microwave oven with a 700‑watt setting, a small microwave‑safe bowl, a fork or whisk for mixing, and a measuring cup for milk․ A small saucepan if you prefer to warm the milk separately․ Keep a butter knife or spoon ready to fold in the butter․ If you like a smoother texture, a hand mixer or a potato masher can be used after microwaving․ For a quick heat‑and‑mix routine, place the potato packet in the bowl, cover with a microwave‑safe lid or plastic wrap, and microwave on high for 2–3 minutes, stirring halfway through․ Once the potatoes are hot, add a splash of milk, a pat of butter, then fluff with the fork until creamy․ If the mixture is too thick, add more milk a tablespoon at a time․ For extra flavor, sprinkle a dash of black pepper or a pinch of garlic powder․ Keep the bowl covered while mixing to prevent splatter․ When finished, transfer the mash to a serving dish, garnish with chopped chives or parsley, and serve immediately․ Leftovers can be reheated in the microwave for 30–45 seconds, stirring halfway, or warmed in a small saucepan over low heat, adding a splash of milk to restore creaminess․ This simple setup ensures a quick, flavorful side that pairs well with any main course․ If you prefer a richer texture, melt a tablespoon of unsalted butter in a small saucepan until foamy, then stir it into the mash for a silky finish․ For a dairy‑free alternative, replace the milk with a splash of oat milk or a light coconut cream to keep the mash silky without dairy․ Enjoy the mash warm for best flavor today!!
Place the Bob Evans packet in a microwave‑safe bowl․ Cover and microwave on high for 2–3 minutes, stirring halfway․ Remove, add a splash of milk and a pat of butter, then fluff with a fork until creamy․ Serve hot, garnish with chives, and enjoy! Let it rest 30 seconds, then stir․ If too thick, add a splash of milk
Microwave Cooking
Step 1: Take the Bob Evans single‑serve mashed potato packet out of its foil wrapper and pour the contents into a microwave‑safe bowl․ The bowl should be at least 8 oz in capacity to allow the mixture to expand as it heats․ If you prefer a firmer texture, you can use a smaller bowl, but a larger one helps keep the potatoes fluffy․
Step 2: Cover the bowl with a microwave‑safe lid or a damp paper towel․ The cover traps steam, preventing the potatoes from drying out and ensuring a creamy finish․ Make sure the cover has a vent to let steam escape․ This method keeps the potatoes moist, making the side dish more enjoyable․
Step 3: Set the microwave to high power (usually 1000 W)․ If your microwave is lower wattage, add 30 seconds for every 200 W drop in power․ Cook for 90 seconds․ If you notice any dry spots, pause the microwave, stir, and then resume․ If the mixture seems too thick, add a splash of milk․
Step 4: After the initial cook, stir the potatoes with a fork or a whisk․ Return the bowl to the microwave and cook for an additional 30–45 seconds․ If it’s still cold in the center, add another 15 seconds․ A stir heats OK now․
Step 5: Remove the bowl carefully with oven mitts․ The potatoes will be hot, so handle with caution․ At this point, the potatoes are ready for butter, milk, or seasonings․ Use a spoon to fold in the additions, then stir until the mixture is silky and uniform․ Serve immediately․ The result is a side․
Mixing and Finishing Touches
After the microwave step, the mashed potatoes should be fluffy and slightly warm․ Use a wooden spoon or a silicone spatula to fold in the butter—about one tablespoon per serving—until it melts into a glossy coating․ Then drizzle a splash of milk or cream, roughly 1–2 tablespoons, to achieve the desired consistency․ Stir gently; the goal is a silky, smooth texture that clings to the sides of the bowl․
Season the mixture with salt and freshly ground black pepper to taste․ A pinch of garlic powder or a dash of paprika can add depth without overpowering the natural potato flavor․ A teaspoon of sour cream or a dollop of Greek yogurt will give the dish a subtle zing․ For a richer profile, sprinkle grated cheddar or parmesan cheese and let it melt into the warm mash․
Optional garnishes include chopped chives, parsley, or a drizzle of olive oil․ These not only enhance the visual appeal but also introduce fresh, herbal notes that brighten the dish․ If you prefer a crunchy contrast, top the finished mash with a handful of toasted breadcrumbs or crispy bacon bits․
Serve immediately, as the potatoes begin to cool and thicken quickly․ If you need to hold them for a short time, cover the bowl with a clean kitchen towel and keep it in a warm place․ For leftovers, refrigerate promptly and reheat gently in the microwave with a splash of milk, stirring until smooth again․ Enjoy your quick, comforting side dish with minimal fuss․
Tip: Add a pinch of smoked paprika or a few drops of liquid smoke before stirring․ For creaminess, blend in a tablespoon of sour cream or a dollop of cream cheese․ Adjust seasoning to taste, then serve hot․
Serving Suggestions
Serve hot mashed potatoes with butter, herbs, or cream․ Pair with roasted chicken, steak, or stew․ Spoon onto a plate, top with bacon, and garnish with chives․ Add a splash of milk and a pinch of pepper for creaminess, then serve immediately for the experience! yum! Cheese!!!!!
Pairings and Presentation Tips
Bob Evans single‑serve mashed potatoes are a versatile base that pairs well with a variety of proteins and sauces․ Serve the potatoes roasted or pan‑seared chicken, turkey, or pork chops․ A rich brown gravy or a velvety mushroom sauce adds depth and moisture, while a light tomato‑based sauce offers a fresh contrast․ If you prefer a vegetarian option, pair the mash with sautéed spinach, roasted vegetables, or a hearty lentil stew․
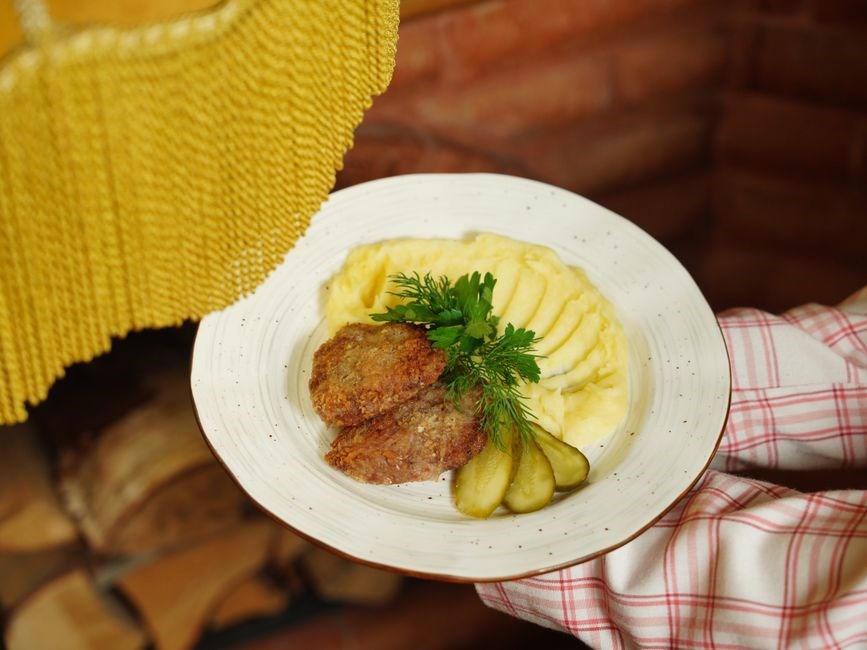
Presentation can elevate the dish․ Spoon the mashed potatoes into a shallow bowl or a small ramekin, then drizzle a thin stream of warm butter over the top․ Sprinkle freshly chopped herbs—such as parsley, chives, or dill—for color and aroma․ A dusting of grated Parmesan or a crumble of crispy bacon adds texture․ For a festive touch, arrange the potatoes in a circular pattern and place a small mound of roasted garlic or caramelized onions in the center․ Serve with a drizzle of melted butter and a sprinkle of paprika then top with carrots or green salad to add crunch and color․
maintain single‑serve concept․ Use a clean, white plate to highlight the creamy white mash, and add a contrasting green garnish or a pop of color from a bright sauce․ decorative can be placed beside the serving to add extra butter or seasoning․ This simple yet thoughtful approach ensures that the mashed potatoes look as good as they taste, making them an appealing side for any meal․
Drizzle olive oil or lemon juice serving Sprinkle toasted breadcrumbs or fresh herbs for crunch and visual appeal Keep the plate simple and let creamy texture shine․ of sea salt or dash of hot sauce enhances the flavor profile!!!
Serving Temperature and Leftovers
Bob Evans single‑serve mashed potatoes are best enjoyed at a comforting 140°F to 160°F (60°C to 71°C)․ After microwaving, let the dish sit for 2–3 minutes to allow steam to settle, which ensures a smooth, airy texture․ If you prefer a slightly cooler bite, aim for 120°F (49°C) and serve immediately․ When reheating leftovers, use the microwave on medium power for 30–45 seconds, stirring halfway through to distribute heat evenly․ Alternatively, reheat in a small saucepan over low heat, whisking constantly to prevent sticking․ For a crispier exterior, finish the mash in a preheated oven at 350°F (177°C) for 5–7 minutes, adding a drizzle of butter or a sprinkle of cheese before serving․ Store any unused portions in an airtight container in the refrigerator for up to 3 days․ When reheating, add a splash of milk or cream to restore moisture․ Avoid reheating more than twice to maintain optimal texture․ If you plan to serve the mash as part of a buffet, keep it in a warming drawer set to 140°F (60°C) and cover with foil to retain heat․ For an elegant presentation, place the potatoes in a shallow bowl, top with a small dollop of sour cream or a swirl of pesto, and garnish with fresh herbs․ This keeps the dish visually appealing while maintaining the desired temperature․ Remember to check the internal temperature with a food thermometer before serving to ensure food safety and quality․ Enjoy your creamy, perfectly warmed mashed potatoes! Keep the mashed potatoes covered while reheating to lock in moisture and flavor, serve today for results․