The Kiss Acrylic Nail Kit is a comprehensive DIY solution for creating salon-quality nails at home. It includes everything needed for a professional finish, including acrylic powder, liquid monomer, glue, and essential tools, making it perfect for beginners and experienced users alike.
Overview of the Kit and Its Contents
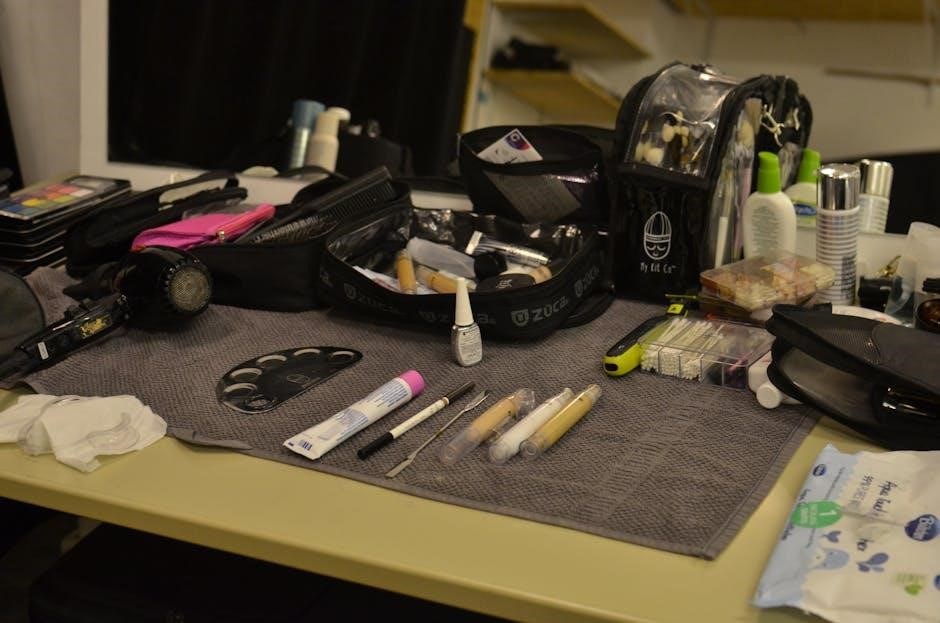
The Kiss Acrylic Nail Kit is a complete, all-in-one solution for at-home nail enhancements. It includes acrylic powder, liquid monomer, nail glue, and a variety of tools like brushes, nail tips, and forms. The kit also comes with detailed instructions to guide users through the application process. Designed for both beginners and experienced users, it provides everything needed to achieve professional-looking results. The kit is user-friendly, with components carefully selected to ensure durability and a natural finish. Whether you’re aiming for a subtle look or bold nail art, the Kiss Acrylic Nail Kit offers the essentials to create stunning, long-lasting nails from the comfort of your home.
Benefits of Using the Kiss Acrylic Nail Kit
Using the Kiss Acrylic Nail Kit offers numerous benefits, making it a popular choice for at-home nail enhancements. One of the primary advantages is its user-friendly design, which simplifies the application process even for those new to acrylic nails. The kit provides professional-quality results without the need for salon visits, saving both time and money. Additionally, the comprehensive contents ensure that all necessary tools and materials are readily available, eliminating the hassle of purchasing separate items. The kit’s long-lasting durability is another significant benefit, with proper application leading to nails that remain intact and flawless for weeks. Furthermore, the ease of customization allows users to create a variety of styles, from natural to bold designs, catering to different preferences and occasions. Overall, the Kiss Acrylic Nail Kit is a cost-effective, convenient, and versatile solution for achieving beautiful nails at home.
Preparation Steps
Preparation involves cleaning nails with acetone, shaping, and buffing to create a rough surface for acrylic adhesion, ensuring a strong and long-lasting hold.
Cleaning and Preparing Your Natural Nails
Cleaning and preparing your natural nails is the first step in ensuring a successful acrylic application. Start by using an acetone-based nail polish remover to wipe away any existing polish or residue. Next, wash your hands thoroughly with soap to remove dirt and oils. Once clean, gently wipe each nail with a cotton ball soaked in alcohol to eliminate any remaining residue, creating a clean surface for the acrylic to adhere to. This step is crucial for ensuring proper adhesion and preventing lifting or separation of the acrylic from your natural nail. Avoid using harsh chemicals that could damage your nails or surrounding skin. Proper preparation sets the foundation for a long-lasting, professional-looking finish.
Shaping and Buffing Your Nails
Shaping and buffing your natural nails are essential steps before applying acrylics. Use a nail file to gently shape your nails into your desired form, whether it’s oval, square, or round. Be cautious not to file too aggressively, as this can weaken the nail. Next, buff the surface of your nails using a fine-grit buffer to create a rough texture. This helps the acrylic adhere more securely to the natural nail. Lightly buffing also ensures a seamless blend between your natural nail and the acrylic enhancement. Avoid over-buffing, as it can cause damage or thinning of the nail plate. Once shaped and buffed, your nails are ready for the application of primer and acrylic mixture, ensuring a strong and durable bond.
Application Process
The application process involves mixing acrylic powder and liquid monomer to create a smooth, workable mixture. Apply this evenly to your nails, shaping as desired, and finish with a professional touch.
Mixing the Acrylic Powder and Liquid Monomer
Begin by preparing a clean, flat surface and gathering a small bowl and mixing tool from the Kiss Acrylic Nail Kit. Open both the acrylic powder and liquid monomer, ensuring they are at room temperature for optimal mixing. Carefully pour a small amount of powder into the bowl, followed by a few drops of monomer. Use the mixing tool to blend the components in a circular motion until a smooth, creamy paste forms. Be cautious not to add too much monomer, as this can make the mixture too runny. If the mixture becomes too thick, add a tiny amount of monomer at a time until the desired consistency is achieved. Work in a well-ventilated area to avoid inhaling fumes, and ensure all tools are cleaned immediately to prevent the mixture from hardening on them. Properly mixed acrylic is essential for a strong, durable application. Avoid over-mixing, as it can cause the mixture to set too quickly. Once mixed, apply the acrylic immediately for the best results.
Applying the Acrylic Mixture
Once the acrylic mixture is properly mixed, dip the brush from the Kiss Acrylic Nail Kit into the mixture, wiping off any excess on the side of the bowl. Starting at the center of your natural nail, gently press the brush flat and spread the mixture outward in a smooth, even motion, covering the entire nail surface. Ensure the mixture extends to the tip but avoid getting it on the cuticles or skin. Use light pressure to feather the edges for a seamless blend with your natural nail. If necessary, apply additional thin layers, allowing each to set slightly before adding more. Work in a well-ventilated area to minimize fumes. Use the nail forms provided in the kit to help shape the acrylic as you go, ensuring a professional finish. Clean the brush immediately with monomer to prevent the mixture from hardening on it.
Using Nail Forms for a Professional Finish
Nail forms are essential for achieving a professional-looking finish with the Kiss Acrylic Nail Kit. Start by selecting the right size of nail form for each finger, ensuring a snug fit under your natural nail. Gently place the form under your natural nail, aligning it with the center and pressing firmly to secure it. Apply a small amount of adhesive or nail glue to hold the form in place. Once the form is properly positioned, begin applying the acrylic mixture, using the form as a guide to shape the nail. This ensures a smooth, even surface and prevents the acrylic from lifting or unevenness. The forms help create a uniform thickness and a seamless blend with your natural nail, resulting in a polished, professional finish. Remove the forms after the acrylic has set completely for a flawless look.
Finishing Touches
Finalize your look by filing and buffing the nails for a smooth finish. Apply a top coat to seal and add shine, ensuring long-lasting durability and a polished appearance.
Filing and Buffing the Acrylic Nails
Filing and buffing are essential steps to achieve a smooth, professional finish. Start by gently filing the edges of the acrylic nails to shape them according to your preference. Use a coarse-grit nail file to remove any excess material or uneven areas. Once shaped, switch to a finer-grit file to smooth out the surface, ensuring no ridges or bumps remain. For an extra polished look, use a nail buffer with progressively finer pads. Begin with a rough buffer to smooth imperfections, then switch to a softer one for a high-gloss finish. Be careful not to over-file, as this can weaken the acrylic. Finally, wipe away any dust with a lint-free wipe and apply a top coat to seal and protect the nails.
Applying a Top Coat for Longevity
Applying a top coat is the final step to ensure your acrylic nails last longer and maintain their glossy appearance. Use a high-quality top coat specifically designed for acrylic nails. Start by shaking the bottle well to mix the formula. Dip the brush into the bottle, allowing any excess to drip off, and wipe it against the rim to prevent air bubbles. Gently stroke the brush from the center of your nail to the tip, covering the entire surface evenly. Avoid overloading the brush, as this can lead to streaks or unevenness. Allow the first coat to dry completely before applying a second if desired. This step not only seals the acrylic but also adds a protective barrier against chipping and fading, ensuring your nails stay vibrant and pristine for weeks.

Tips for a Successful Application
For a successful application, use thin layers, ensure proper ventilation, and avoid air bubbles. Press firmly for a secure fit and follow instructions carefully for lasting results.
Avoiding Common Mistakes
When using the Kiss Acrylic Nail Kit, it’s crucial to avoid common mistakes that can ruin your nail application. One of the most frequent errors is applying too much glue, which can lead to a bulky finish and weak adhesion. Always use a small amount of glue and press firmly for about 10 seconds to ensure proper bonding. Another mistake is not properly preparing the natural nail surface. Failing to clean and buff the nails can result in the acrylic nails lifting or not adhering correctly. Additionally, mixing too much acrylic powder and liquid monomer at once can lead to a thick, uneven consistency that’s difficult to work with. To avoid this, mix small amounts and work gradually. Lastly, avoid applying the acrylic too close to the cuticles, as this can cause irritation and lead to an uneven appearance. By being mindful of these potential pitfalls, you can achieve a smooth, professional-looking finish with your Kiss Acrylic Nail Kit. Proper technique and patience are key to a successful application, ensuring your nails look stunning and last longer.
Maintaining Your Acrylic Nails
To ensure your acrylic nails remain durable and visually appealing, proper maintenance is essential. Regularly clean under and around the nails to prevent dirt buildup, which can lead to lifting or infections. Avoid using your nails as tools, as this can cause chipping or cracking. Moisturize your cuticles and hands frequently to maintain healthy nail growth and prevent dryness. If you notice any lifting or damage, address it promptly by gently filing the area and applying a small amount of glue or acrylic to seal it. For long-lasting results, avoid exposing your nails to harsh chemicals or excessive water without wearing gloves. Touch-ups every two to three weeks can help maintain the appearance and prevent major repairs. By following these care tips, you can enjoy your acrylic nails for an extended period while keeping them looking fresh and polished.
The Kiss Acrylic Nail Kit offers a user-friendly solution for achieving salon-quality nails at home. With proper preparation and care, it delivers long-lasting, professional results, empowering you to embrace your creativity and confidence effortlessly.

Final Thoughts and Next Steps
Mastering the Kiss Acrylic Nail Kit opens the door to endless creativity and professional-looking results at home. Regular maintenance, such as filing and touch-ups, ensures longevity. For optimal durability, apply a top coat periodically. Exploring additional nail art tools or tutorials can further enhance your skills. Remember, practice makes perfect, so don’t hesitate to experiment with new designs. If you’re satisfied with your results, consider sharing your experience or teaching others. The kit’s cost-effectiveness and ease of use make it a great investment for nail enthusiasts. Finally, always follow proper removal techniques to maintain healthy natural nails. With the Kiss Acrylic Nail Kit, you’re equipped to achieve salon-quality nails whenever inspiration strikes!