instructions for maxi cosi car seat

Maxi-Cosi car seats are renowned for their safety, comfort, and durability, offering solutions for infants to older children. They provide detailed manuals and videos for proper installation and usage, ensuring a secure and comfortable experience for your child.

1.1 Importance of Proper Installation

Proper installation of your Maxi-Cosi car seat is critical to ensure your child’s safety during travel. Incorrect installation can lead to reduced protection in the event of an accident, putting your child at risk. Always follow the step-by-step instructions provided in the user manual to secure the seat correctly. Use ISOFIX points or the vehicle’s seat belt as recommended, and ensure the seat is tightly fastened to prevent any movement. Regularly check the installation to maintain safety standards. Improperly installed seats can fail to provide adequate protection, so taking the time to install correctly is essential. Utilize resources like installation videos or guides to avoid common mistakes and ensure your child’s seat is safely and correctly fitted in your vehicle.

1.2 Overview of Maxi Cosi Brand

Maxi-Cosi is a globally recognized brand specializing in child car seats, offering a wide range of products from infant to booster seats. Known for their commitment to safety, comfort, and innovation, Maxi-Cosi seats are designed with high-quality materials and adhere to rigorous safety standards. The brand caters to diverse needs, providing solutions for different ages and vehicle types. Their seats often feature adjustable designs, ensuring a secure fit as children grow. With a focus on ease of use and durability, Maxi-Cosi has earned a reputation as a trusted choice for parents worldwide, prioritizing child protection and comfort during car journeys.

Understanding Your Maxi Cosi Car Seat Model

Maxi-Cosi car seats cater to different needs, offering infant, convertible, and booster options. Each model provides tailored features for safety, comfort, and ease of use, growing with your child.

2.1 Types of Maxi Cosi Car Seats (Infant, Convertible, Booster)

Maxi-Cosi offers three primary car seat types: infant, convertible, and booster. Infant seats, like the Pebble, are designed for newborns up to 12 months, providing a secure and snug fit. Convertible seats, such as the Pria, adapt from rear-facing to forward-facing and later to booster mode, accommodating children from infancy to toddler years; Booster seats, like the RodiFix, ensure proper seat belt positioning for older children, typically from 3.5 to 12 years. Each type is crafted with safety and comfort in mind, ensuring your child is protected throughout their growth.

2.2 Key Features and Safety Standards

Maxi-Cosi car seats are equipped with advanced safety features, including Side Impact Protection and a five-point harness with magnetic buckles for easy operation; Many models meet rigorous i-Size standards, ensuring enhanced protection for your child’s head and neck. Seats like the Titan Pro feature high-quality materials and innovative designs, such as 360-degree rotation for effortless access. They also offer adjustable recline positions for optimal comfort. ISOFIX compatibility ensures secure installation, while energy-absorbing materials provide superior crash protection. These features, combined with thorough testing, make Maxi-Cosi seats a trusted choice for parents seeking safety, durability, and comfort for their children.

Preparing for Installation

Start by reading the user manual to understand your Maxi-Cosi model. Gather tools like ISOFIX points or seat belts; Ensure your vehicle is compatible with the seat.

3.1 Reading the User Manual

Reading the user manual is essential for proper installation and use of your Maxi-Cosi car seat. It provides detailed step-by-step instructions, safety guidelines, and model-specific features. The manual outlines how to correctly secure the seat using ISOFIX or seat belts, ensuring your child’s safety. It also covers adjusting harnesses, positioning your child, and maintaining the seat. Take time to review all sections, as proper installation is critical for functionality and compliance with safety standards. Many manuals are available online if you’ve misplaced the physical copy. Additionally, quick start guides are often included to help you get started quickly while emphasizing the importance of thorough understanding.

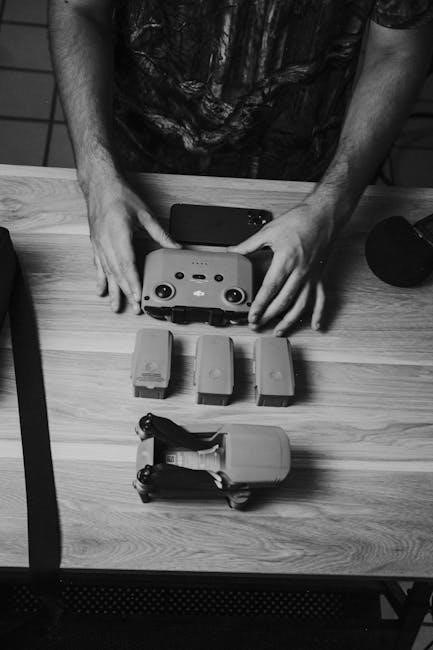
3.2 Gathering Necessary Tools and Accessories

Gathering the right tools and accessories is crucial for a successful installation. Ensure you have the Maxi-Cosi car seat, its base (if applicable), and the user manual. Check for ISOFIX fixing points in your vehicle or a seat belt for alternative installation methods. A level indicator, often built into the base, helps achieve the correct angle. Additionally, keep a tether strap handy for securing the seat in certain models. Some accessories, like seat belt clamps or padding, may be required for specific installations. Always verify compatibility with your vehicle and car seat model. Having these tools ready ensures a smooth and safe installation process, adhering to safety standards and guidelines.

Installation Methods

Maxi-Cosi car seats offer two primary installation methods: ISOFIX fixing points for a secure and stable fit, and seat belt installation for versatility. Both methods ensure proper positioning and safety when followed correctly.

4.1 Using ISOFIX Fixing Points

Using ISOFIX fixing points ensures a secure installation of your Maxi-Cosi car seat. Start by extending the ISOFIX arms located on the base of the seat. Align these arms with the ISOFIX anchors in your vehicle, typically found in the rear seats. Push the base firmly until the arms click into place, ensuring a snug fit. Check for the indicator, such as a green light or audible click, to confirm proper installation. Tighten the ISOFIX arms if necessary for added stability. Always consult your Maxi-Cosi manual for specific instructions, as models may vary. For additional guidance, refer to the installation videos or contact customer support.

4.2 Seat Belt Installation

Seat belt installation for your Maxi-Cosi car seat is a reliable alternative to ISOFIX. Begin by locating the vehicle’s seat belt and threading it through the designated guides on the car seat base. Ensure the belt is flat and not twisted. Pull the seat belt to tighten it, then secure it by pressing the buckle into place. Check the seat for stability by gently rocking it; it should feel firm with minimal movement. For added security, some models allow the use of a locking clip to prevent the belt from loosening. Always refer to your Maxi-Cosi manual for specific instructions, as installation steps may vary by model. If unsure, consult the user guide or contact customer support for assistance.

Adjusting the Car Seat

Adjust the car seat to ensure a proper fit for your child. Follow the manual to modify the harness, shoulder straps, and recline position for optimal comfort and safety.

5.1 Harness and Shoulder Strap Adjustment

Adjusting the harness and shoulder straps on your Maxi-Cosi car seat is crucial for your child’s safety and comfort. Ensure the harness is snug and even, with straps resting at or below your child’s shoulders when rear-facing and at or above when forward-facing. The chest clip should be positioned at armpit level. Tighten the straps until there’s no slack, using the built-in adjusters. Regularly check the fit as your child grows, ensuring the straps remain secure and properly aligned. Refer to your user manual for specific guidance tailored to your car seat model to ensure accurate adjustments.

Securing Your Child

Ensure your child is properly positioned, with the harness snug and chest clip at armpit level. Tighten straps to remove slack, securing your child safely and comfortably.

6.1 Correct Positioning of the Child

Proper positioning is critical for your child’s safety. Place your child in the car seat with their back against the seat and knees bent slightly forward. Ensure the harness is snug, with the chest clip at armpit level. The child’s head should remain within the seat’s headrest area. Avoid bulky clothing that could interfere with the harness fit. Regularly check that your child is seated correctly, with no slack in the straps. Ensure the seat belt or ISOFIX system is securely fastened. These steps ensure optimal protection and comfort for your child during travel.

6.2 Tightening the Harness

Tightening the harness correctly is essential for your child’s safety. Start by ensuring the harness straps are free from twists and properly positioned on your child’s shoulders. Pull the straps snugly, making sure there’s no slack. The chest clip should be at armpit level, ensuring the harness is secure. After tightening, perform the “pinch test” by trying to pinch the harness material at your child’s shoulder; if you can’t pinch any excess, it’s properly tightened. Avoid overtightening, as this could cause discomfort. Regularly check the harness tightness, especially as your child grows or wears different clothing. Proper harness adjustment ensures maximum protection in the event of sudden stops or collisions.

Maintenance and Troubleshooting

Regularly clean the car seat with mild detergent and water, avoiding harsh chemicals. Check for wear and tear, and ensure all buckles and straps function properly. Avoid using damaged seats and refer to the manual for troubleshooting tips or seek professional assistance if issues arise.

7.1 Cleaning and Caring for the Car Seat

Regular maintenance ensures your Maxi-Cosi car seat remains safe and hygienic for your child. Clean the seat using mild detergent and water, avoiding harsh chemicals or abrasive cleaners. For fabric covers, machine wash on a gentle cycle, while harness straps should be hand-washed to prevent damage. Allow all parts to air-dry completely to avoid mold or mildew. Avoid direct sunlight, as it may cause fading or weakening of materials. Never bleach or iron the fabric, as this can compromise its safety features. Inspect the seat regularly for wear and tear, and replace any damaged parts immediately. Proper care extends the lifespan of your car seat and ensures optimal protection for your child.

true controller manual pdf

The True Controller Manual PDF is a comprehensive guide designed to help users understand and operate their True Controller effectively. It covers installation, safety, and maintenance tips to ensure optimal performance and longevity of the device. This manual is essential for both new and experienced users, providing detailed instructions and troubleshooting solutions. By following the guidelines outlined in this document, users can maximize the functionality and efficiency of their True Controller.

1;1 Overview of the True Controller

The True Controller is a sophisticated electronic device designed to regulate and monitor various functions in commercial refrigeration systems. It ensures precise temperature control, defrost cycle management, and advanced customization options. The controller is compatible with a wide range of refrigeration units, making it a versatile solution for maintaining optimal operating conditions. Its user-friendly interface and robust features enable seamless monitoring and adjustments, ensuring energy efficiency and consistent performance. Proper installation and maintenance, as outlined in the manual, are crucial for maximizing its functionality and lifespan.

1.2 Importance of the Manual for Users

The True Controller Manual PDF is an essential resource for users, offering clear instructions and guidelines for safe and effective operation. It provides detailed insights into installation, configuration, and maintenance, ensuring users can troubleshoot common issues and optimize performance. The manual also highlights safety precautions, reducing the risk of accidents or equipment damage. By adhering to the manual’s recommendations, users can extend the lifespan of their True Controller and maintain peak efficiency, making it indispensable for both initial setup and ongoing use.

1.3 How to Navigate the Manual

Navigating the True Controller Manual PDF is straightforward, with a clear structure designed for easy access to information. The manual begins with an index and table of contents, allowing users to quickly locate specific sections. Each chapter is organized logically, covering topics from installation to troubleshooting. Users can also use the search function in PDF viewers to find keywords or topics instantly. Visual aids, such as diagrams and illustrations, complement the text, ensuring clarity and ease of understanding. This layout ensures users can efficiently find and apply the information they need.

Safety Precautions and Guidelines

Always follow safety precautions to ensure proper usage of the True Controller. Disconnect power before maintenance and avoid improper modifications. Adhere to guidelines for safe operation.

2.1 General Safety Instructions

Always read the manual thoroughly before operating the True Controller. Ensure proper installation by a qualified technician to avoid hazards. Disconnect power before maintenance. Never modify the device without authorization, as this can void the warranty and pose safety risks. Use the controller only for its intended purpose and follow all guidelines to prevent accidents. Regularly inspect components and replace worn parts promptly. Keep the area clean and dry to ensure safe operation. Adhere to all safety protocols for optimal performance and longevity of the device.

2.2 Electrical Safety Considerations

Ensure the True Controller is installed and operated by a qualified technician. Always disconnect power before performing maintenance or repairs. Use only authorized replacement parts to avoid electrical hazards. Keep the device away from water and moisture to prevent short circuits. Never overload circuits or modify wiring without proper authorization. Follow all local electrical codes and regulations. Regularly inspect power cords and connections for damage. Proper grounding is essential to prevent electrical shocks. Adhere to these guidelines to ensure safe and reliable operation of the True Controller.

2.3 Handling and Storage Recommendations

Handle the True Controller with care to avoid physical damage. Store it in a cool, dry place away from direct sunlight and moisture. Avoid exposing the device to extreme temperatures or humidity. Ensure the controller is placed on a stable, level surface during storage. Keep it away from flammable materials and avoid stacking heavy objects on top of it. Use the original packaging if available to protect it during transportation. Store the device in an upright position to prevent internal component shifting. Follow these guidelines to maintain the controller’s integrity and functionality.

Installation and Setup

Ensure proper installation by following the manual’s step-by-step guide. Verify compatibility with your system and environment. Check electrical requirements and connections before powering up. Proceed methodically.

3.1 Pre-Installation Requirements

Before installing the True Controller, ensure compatibility with your system and environment. Verify electrical specifications and connections. Check for any software or hardware dependencies. Review environmental operating conditions to ensure optimal performance. Prepare all necessary tools and materials as outlined in the manual. Ensure proper grounding and safety measures are in place. Familiarize yourself with the installation process to avoid errors. Confirm that all components are included in the package. Plan the installation location carefully for easy access and maintenance.

3.2 Step-by-Step Installation Process

Start by powering down the system and ensuring all components are safe to handle. Mount the True Controller in a secure location, following the manual’s guidelines. Insert the controller through the designated hole (71×29 mm) and connect the probes to their respective ports. Ensure all electrical connections are secure and properly insulated. Restore power and check the display for initialization. Test the controller’s basic functions to confirm proper operation. Refer to the manual for specific calibration steps and any additional setup requirements. Follow all safety precautions during the process.

3.3 Initial Configuration and Calibration

Access the controller’s interface using the Info/Setpoint button to navigate through settings. Set the desired temperature and defrost cycle based on your specific requirements. Ensure the probes are correctly positioned to provide accurate readings. Refer to the manual for default parameter settings and adjust as needed. Test the system by initiating a manual defrost cycle and monitoring the temperature response. Once configured, save your settings and verify proper operation. Consult the troubleshooting section if any issues arise during calibration. Proper initialization ensures precise control and optimal performance of your True Controller.

Operational Features of the True Controller

The True Controller offers advanced temperature control, automatic defrost cycling, and customizable settings to optimize performance. It ensures precise monitoring and efficient operation for various applications.

4.1 Temperature Control and Monitoring

The True Controller features a robust temperature control system, allowing precise monitoring and adjustment of settings. With a digital display, users can easily set and track temperatures. The controller includes probes that accurately measure ambient and product temperatures, ensuring optimal performance. Manual defrost options and automatic defrost cycles are integrated to maintain efficiency. The system also provides real-time feedback, enabling adjustments to meet specific requirements. This advanced monitoring ensures consistent operation, reducing the need for manual intervention and enhancing overall reliability.

4.2 Defrost Cycle Management

The True Controller includes advanced defrost cycle management to maintain optimal performance. Automatic defrost cycles are initiated during refrigeration, preventing ice buildup. Users can also manually activate defrost for specific situations. The controller adjusts defrost frequency based on usage and environmental conditions. This feature ensures efficient operation without unnecessary downtime. Regular defrost cycles help maintain temperature accuracy and prevent damage to internal components. Proper management of defrost cycles is crucial for longevity and reliability, as outlined in the manual for customized settings and troubleshooting.

4.3 Advanced Settings and Customization

The True Controller offers advanced settings and customization options to tailor its operation to specific needs. Users can adjust temperature setpoints, defrost cycles, and alarm thresholds through the digital interface. Customizable profiles allow for optimized performance in various environments; The manual provides detailed instructions for accessing and modifying these settings, ensuring precise control over the controller’s functions. Proper customization enhances efficiency and prevents operational errors, making it a crucial feature for advanced users seeking tailored solutions.

Maintenance and Troubleshooting

This section provides guidance on routine maintenance tasks and troubleshooting common issues with the True Controller. It includes diagnostic tools and error code interpretations for quick resolution.

5.1 Routine Maintenance Tasks

Regular maintenance ensures the True Controller operates efficiently. Check temperature sensors, clean condenser coils, and inspect wiring for damage. Schedule defrost cycles based on usage and environment. Replace faulty components promptly, using genuine parts from authorized dealers. Ensure proper ventilation and avoid extreme temperatures. Calibrate controls periodically for accuracy. Refer to the manual for specific intervals and procedures to maintain performance and extend lifespan. Address minor issues early to prevent major repairs. Keep the controller firmware updated for optimal functionality. Always follow safety guidelines during maintenance.

5.2 Common Issues and Solutions

Common issues with the True Controller include temperature inaccuracies, error codes, and power malfunctions. Check sensor connections for temperature issues and ensure proper calibration. For error codes, refer to the manual or diagnostic tools for specific solutions. Power problems may stem from electrical connections or faulty components, requiring professional inspection. Regularly update firmware to resolve software-related issues. Consult the manual for troubleshooting guides or contact True support for assistance. Addressing these issues promptly ensures optimal performance and extends the controller’s lifespan. Always follow safety guidelines during repairs.

5.3 Diagnostic Tools and Error Codes

The True Controller Manual PDF includes a detailed section on diagnostic tools and error codes. Users can identify issues using error codes displayed on the controller’s interface, which correspond to specific problems. The manual provides a comprehensive list of codes and their meanings, along with troubleshooting steps. Diagnostic software tools are also available to analyze system performance and detect faults. Regularly checking error logs and updating firmware can prevent recurring issues. Refer to the manual for step-by-step guidance on using these tools effectively to resolve problems and maintain optimal functionality.

Technical Specifications and Compatibility

The True Controller Manual PDF outlines technical specifications, including hardware and software requirements, environmental operating conditions, and compatibility with other systems to ensure seamless integration and performance.

6.1 Hardware and Software Requirements

The True Controller Manual PDF provides detailed hardware and software requirements to ensure compatibility and optimal performance. It specifies compatible operating systems, necessary software versions, and recommended hardware components. The manual also outlines minimum processor speeds, RAM requirements, and storage recommendations. Additionally, it covers compatibility with various sensors and peripherals. By adhering to these specifications, users can ensure seamless integration and proper functioning of the True Controller in their setup, avoiding potential issues related to insufficient hardware or outdated software.

6.2 Compatibility with Other Systems

The True Controller is designed to integrate seamlessly with various systems, ensuring versatility in different setups. It supports communication protocols like RS-232 and Ethernet, enabling compatibility with modern control systems. The manual highlights its ability to work with third-party software and hardware, making it adaptable to diverse operational needs. Users are encouraged to verify compatibility with specific systems before installation to ensure smooth operation. This flexibility allows the True Controller to be a reliable choice for integrated solutions across multiple applications and environments.

6.3 Environmental Operating Conditions

The True Controller is designed to operate within specific environmental conditions to ensure optimal performance and longevity. It functions effectively in temperatures ranging from 32°F to 122°F (0°C to 50°C) and humidity levels up to 80% non-condensing. Proper ventilation and protection from direct moisture are essential. The device should be installed in a clean, dry environment, away from extreme temperatures and corrosive substances. Adhering to these conditions ensures reliable operation and prevents damage. Users are advised to consult the manual for detailed specifications to maintain warranty validity and performance integrity.

Accessing and Downloading the Manual

The True Controller Manual PDF is available for download on the official True Fitness website. Visit www.truefitness.com and navigate to the support section. For assistance, contact True’s customer service at 800-883-8783. Ensure to use keywords like “True Controller Manual” or “True Lae Controller Manual” when searching online for the most accurate results.

7.1 Official Sources for the True Controller Manual

The official True Controller Manual PDF can be downloaded directly from the True Fitness website at www.truefitness.com. This is the most reliable source, ensuring you receive the latest version. Additionally, True Manufacturing provides access to the manual through their official portal. For further assistance, users can contact True’s customer service at 800-883-8783. Always verify the authenticity of the source to avoid outdated or incorrect information.

7.2 Tips for Searching and Downloading the PDF

When searching for the True Controller Manual PDF, use specific keywords like “True Controller Manual PDF” or “True Lae Controller Manual” for accurate results. Visit the official True Fitness website at www.truefitness.com for the most reliable download. Ensure your search includes the correct model and version to avoid outdated documents. For assistance, contact True’s customer service at 800-883-8783. Always verify the source to ensure authenticity and access the latest updates for optimal performance.

The True Controller Manual PDF offers comprehensive guidance for setup, operation, and maintenance, ensuring optimal performance. Utilize it to maximize efficiency and longevity of your True Controller.

8.1 Final Thoughts on the True Controller Manual

The True Controller Manual PDF is an indispensable resource for users, offering detailed insights and practical guidance. It ensures safe and efficient operation, covering installation, maintenance, and troubleshooting. By adhering to the manual’s instructions, users can optimize their True Controller’s performance, extend its lifespan, and resolve common issues effectively. This comprehensive guide is a testament to True’s commitment to user satisfaction and product reliability.

8.2 Encouragement for Proper Usage and Maintenance

Proper usage and regular maintenance are crucial for maximizing the lifespan and efficiency of your True Controller. By following the manual’s guidelines, users can ensure optimal performance, prevent unexpected issues, and maintain safety standards. Routine checks and adherence to the recommended practices will not only enhance functionality but also contribute to energy efficiency. Encourage yourself to stay proactive in monitoring and servicing your device, as consistent care will lead to long-term reliability and satisfaction with your True Controller.

fighter pathfinder guide

Fighter Overview

The Fighter is Pathfinder’s most versatile class, excelling in combat with mastery over weapons and armor. They are highly customizable, serving as both defenders and powerful front-line warriors.

1.1 Class Features and Abilities

The Fighter class in Pathfinder offers exceptional versatility through its class features. Proficiency in all simple and martial weapons, along with armor and shields, makes them highly adaptable. Fighters gain access to Weapon Mastery, enhancing their combat effectiveness. They also benefit from abilities like Bravery, granting immunity to fear effects, and Tactics, aiding allies in combat. The class features allow for deep customization, enabling players to craft unique builds tailored to specific playstyles. Fighters excel in both offense and defense, making them a cornerstone of any party. Their abilities ensure they remain effective in various combat scenarios, whether focusing on dealing damage or protecting allies.

1.2 Importance of Strength and Dexterity

Strength and Dexterity are cornerstone abilities for Fighters in Pathfinder, directly impacting their combat effectiveness. Strength determines melee attack power and damage, making it essential for dealing devastating blows. Dexterity enhances Armor Class (AC) and initiative, improving survivability and ensuring the Fighter acts quickly in combat. Prioritizing these abilities allows Fighters to excel in their roles as front-line warriors. A high Strength score is vital for offensive builds, while Dexterity supports defensive and agile playstyles. Balancing both ensures versatility, enabling Fighters to adapt to various combat scenarios. Proper allocation of these attributes is key to crafting an effective and durable Fighter character.

Combat Styles and Specializations

Fighters excel in various combat styles, mastering weapons and tactics for versatile engagement. Their adaptability allows them to dominate both offensive and defensive roles effectively in battle.

2.1 Weapon Mastery and Proficiencies

Fighters are proficient with all simple and martial weapons, granting them unmatched versatility in combat. This mastery allows them to wield swords, axes, bows, and more with precision and deadly accuracy. Their weapon proficiencies are a step above other classes, making them highly effective in both melee and ranged engagements. Fighters can specialize in two-handed weapons for devastating strikes or opt for finesse weapons to emphasize agility and precision. As they gain levels, their mastery grows, enabling them to inflict greater damage and adapt to various combat scenarios seamlessly. This adaptability makes Fighters indispensable on the battlefield, capable of excelling in any role their party requires.

2.2 Defensive Tactics and Shield Usage

Fighters excel in defensive tactics, utilizing shields to enhance their survivability in combat. Proficient with all types of shields, including tower shields, Fighters can block attacks with ease, protecting themselves and allies. Shields provide a significant boost to Armor Class, making Fighters formidable defenders. They can also use shields offensively, employing techniques like Shield Bash to deal damage or create openings. Defensive Tactics allow Fighters to control the battlefield, positioning themselves to disrupt enemy movements and protect vulnerable party members. Mastery of shield usage and defensive strategies makes the Fighter a cornerstone of any party’s defense, ensuring they can withstand even the most intense battles.

Character Build Guide

The Fighter is a versatile class, allowing players to craft builds tailored to their playstyle. Whether focusing on brute Strength for offense or Dexterity for defensive precision, Fighters can adapt to any role, making them a cornerstone of any party composition.

3.1 Offensive Builds (Two-Handed Weapon Fighter)

For players seeking raw power, the Two-Handed Weapon Fighter is a devastating offensive build. Prioritizing Strength and feats like Power Attack and Cleave enables massive damage output. Vital Strike enhances critical hits, making this build excel in dealing consistent, high-damage strikes. Weapon choices like the Glaive or Greatsword emphasize reach and intimidation. Pairing high Strength with Dexterity for accuracy ensures effectiveness. Equipment-wise, focus on weapons with high critical ranges. Feats like Weapon Focus and Critical Strike further amplify effectiveness. This build thrives in close combat but may lack survivability, requiring strategic positioning. Perfect for players who enjoy dominating the battlefield with sheer force and precision.

3.2 Defensive Builds (Shield Fighter)

The Shield Fighter is a formidable tank-like character, emphasizing survivability and protection. By focusing on Strength and Constitution, this build ensures high health and robust defenses. Key feats include Shield Mastery, which removes penalties for shield use, and Combat Reflexes, enabling better enemy control. Proficiency with tower shields allows for maximum AC and defensive stance. Equipment choices prioritize heavy armor and high-quality shields. Players should also invest in feats like Toughness for extra hit points. This build excels at holding the front line, protecting allies, and withstanding heavy enemy pressure. Ideal for those who enjoy a more strategic, defensive playstyle while still contributing to combat effectiveness.

Feats and Their Significance

Feats are pivotal in shaping a Fighter’s identity and effectiveness in Pathfinder. Key feats like Power Attack enhance melee damage, while Cleave allows for devastating follow-up strikes against multiple foes. Toughness boosts survivability by increasing hit points, making it a staple for defensive builds. Weapon Focus and Specialization improve proficiency with specific weapons, amplifying damage output. Feats like Improved Initiative and Great Fortitude enhance battlefield control and resistance to debilitating effects. Additionally, metamagic feats like Quicken Spell can synergize with multiclass spellcasters. Fighters’ versatility is further expanded by critical feats, such as Critical Focus and Devastating Strike, which enhance critical hit effectiveness. Selecting the right feats ensures a Fighter excels in their chosen role, balancing offense, defense, and utility.

Equipment and Armor Choices

Fighters in Pathfinder are proficient with all simple and martial weapons, as well as all types of armor and shields, including tower shields. This versatility allows them to adapt to any combat situation. Choosing the right weapon is crucial; for offense, a longsword or greataxe is ideal, while shields like the tower shield excel for defense. Armor selection depends on the build—light armor for mobility, medium for balance, or heavy for maximum protection; Accessories such as belts of strength, rings of protection, or potions of healing further enhance their capabilities. Fighters can also wield ranged weapons like bows or crossbows for versatility. Their equipment choices are pivotal in defining their role in battle, whether as a front-line warrior or a ranged specialist.

Archetypes and Multiclassing Options

Fighters can choose from various archetypes like Two-Handed Weapon or Shield Specialist, each offering unique combat styles. Multiclassing with Barbarian or Rogue adds versatility and depth to builds, enhancing their adaptability in different roles.

6.1 Archetype Overview

Pathfinder Fighters gain access to diverse archetypes, each tailoring the class to specific combat styles. The Two-Handed Weapon Fighter excels with massive weapons, delivering devastating blows, while the Shield Specialist masters defensive tactics, using shields as both protection and a weapon. The Unarmed Fighter forgoes weapons, focusing on lethal martial techniques. Other archetypes like the Cavalier or Weapon Specialist offer unique abilities, blending mobility, precision, or enhanced weapon mastery. These archetypes allow players to craft unique characters, whether as unstoppable bruisers, agile defenders, or specialized combatants, ensuring the Fighter remains adaptable to any campaign or playstyle.

6.2 Multiclassing Strategies

Pathfinder Fighters can benefit greatly from multiclassing, blending martial prowess with other classes’ abilities. A popular choice is combining Fighter with Sorcerer for a mix of magic and weaponry, creating a versatile “Sorcerercher” build. Pairing Fighter with Monk enhances survivability and melee effectiveness, leveraging the Monk’s high AC and agility. Rogue multiclassing adds sneak attack damage, ideal for stealthy fighters, while Ranger combinations boost ranged combat capabilities. Each multiclass option opens unique playstyles, allowing Fighters to adapt to any party role, whether as a spell-enhanced warrior, a stealthy striker, or a durable defender. Strategic multiclassing enhances versatility, making the Fighter even more formidable in diverse campaign scenarios.

Tips and Tricks for Higher Difficulties

At higher difficulties, Fighters must prioritize survivability and strategic positioning. Focus on maintaining a high AC by optimizing armor, shields, and Dexterity. Use mobility actions like Step or Withdraw to avoid enemy clusters and flanking. Leverage feats like Combat Reflexes or Weapon Mastery to enhance defensive and offensive capabilities. Always target enemy spellcasters first to disrupt their ability to buff or heal. For melee Fighters, consider using reach weapons to attack safely from a distance, while ranged Fighters should focus on high-damage, precise attacks. Multiclassing with a defensive class like Monk can also boost survivability. Adapt your build to the campaign’s challenges, ensuring a balance between offense and defense to thrive in tough encounters.

Advanced Tactics and Combat Strategies

Fighters excel in advanced combat tactics by mastering battlefield control and synergy with allies. Use feats like Trip or Combat Reflexes to disrupt enemy movements and create openings. Position yourself to flank enemies, boosting your attack bonus, while avoiding flanking by foes. Employ reach weapons to control chokepoints and protect allies. Optimize your attack sequences by combining powerful strikes with precision for maximum critical hit potential. Use Weapon Mastery to enhance your primary combat style, ensuring consistent damage output. Coordinate with spellcasters to eliminate threats or debuff enemies, making your attacks more effective. Always maintain high AC through armor and positioning to survive prolonged fights. Adapt your tactics to enemy weaknesses for optimal success.

bestway pool filter pump manual

Safety Precautions and Warnings

Always read all safety warnings before setup. Connect only to a grounding-type receptacle. Suitable for storable pools; do not use with permanent installations. Avoid improper use to prevent hazards.

1.1 Essential Safety Information

Read the manual thoroughly before installation and operation. Ensure all safety warnings are understood to prevent accidents. Connect the pump only to a grounding-type receptacle to avoid electrical hazards. Use the pump exclusively with storable pools, as specified. Never operate the pump near open flames or sparks, and keep it away from children. Proper installation and adherence to guidelines are crucial for safe operation.

Always ensure the pump is correctly grounded and installed on a level surface. Avoid exposing the pump to extreme temperatures or weather conditions. Follow all safety precautions to prevent electrical shock, injury, or damage. Misuse can result in serious harm or equipment malfunction. Regularly inspect the pump and connections for wear or damage.

1.2 Electrical Safety Guidelines

Connect the pump to a grounding-type receptacle to prevent electrical shock. Never use extension cords or damaged cables. Ensure the pump is installed by a qualified technician if unsure. Avoid exposure to water while handling electrical components. Keep the pump dry and away from flammable materials. Regularly inspect the power cord and connections for damage or wear. Do not modify the electrical system or bypass safety features. Always follow the manufacturer’s wiring instructions to ensure safe operation.

Never operate the pump near water without proper grounding. Ensure all electrical connections are secure and protected from moisture. Avoid overloading circuits, as this can cause malfunctions. Keep children away from electrical components. If in doubt, consult a licensed electrician. Proper electrical installation and maintenance are critical for safe and efficient pump operation. Always adhere to local electrical safety standards and regulations.

Installation and Setup

Place the pump on a level surface near the pool. Ensure all connections are secure and aligned properly. Follow the manual for precise setup instructions.

2.1 Unpacking and Initial Inspection

Unpack the pump and accessories carefully. Inspect for damage or missing parts. Ensure all components, including hoses and connections, are included. Check for any shipping-related damage before proceeding. Consult the manual for a detailed list of items and proper inspection steps.

2.2 Connecting the Filter Pump

Align the pump with the pool and connect the hoses securely. Ensure all connections are tight to prevent leaks. Attach the control valve and configure it according to the manual. Plug in the pump and verify proper alignment with the pool setup. Double-check all connections before powering on the system.

2.3 Priming the Pump

After installation, press the control valve to the backwash position. Plug in the pump and run it for 3-5 minutes until water flows clear. This ensures proper priming. Once done, switch the valve back to the filter position. Regularly check for airlocks and leaks to ensure smooth operation and optimal performance of the pump system.

Operating the Bestway Pool Filter Pump

Turn on the pump and monitor its operation. Ensure the control valve is set correctly for filtration or backwashing. Regular checks maintain optimal pool water clarity and pump efficiency.

3.1 Starting the Pump for the First Time

Before first use, ensure the pump is properly primed. Set the control valve to the “Filter” position, plug in the power cord, and turn it on. Allow the pump to run for a few minutes to ensure proper water flow. Check for any leaks and monitor operation. Refer to the manual for detailed startup procedures.

3.2 Understanding the Control Valve Functions

The control valve directs water flow for filtration, backwashing, or recirculation. Press down and rotate to select “Filter” for normal operation, “Backwash” to clean the filter, or “Recirculate” to bypass filtration. Ensure the valve is securely positioned to avoid leaks. Always monitor the valve’s setting to maintain proper pool maintenance and water circulation. Refer to the manual for detailed guidance.

3.4 Daily Operation and Monitoring

Operate the pump daily to maintain clean water. Monitor water flow and pressure to ensure optimal performance. Regularly inspect the filter and skimmer for debris. Adjust settings as needed to maintain proper circulation and filtration. Ensure all connections are tight to prevent leaks; Refer to the manual for specific guidance on daily monitoring and adjustments.

Maintenance and Cleaning

Regularly clean the filter cartridge to ensure optimal performance. Lubricate moving parts to prevent wear. Store the pump properly during off-season to maintain functionality and longevity.

4.1 Regular Cleaning of the Filter

Turn off the pump and disconnect it before cleaning. Use the backwash function to remove debris from the filter. Regularly inspect and clean the filter cartridge to ensure optimal water flow and efficiency. Replace worn-out parts promptly to maintain performance. Clean the filter every 1-2 weeks or as needed based on usage and water clarity.

4.2 Lubricating Moving Parts

Lubricate moving parts such as O-rings and gaskets with silicone-based grease to prevent wear and ensure smooth operation. Apply a small amount to the valve seals and connections during regular maintenance. This prevents leaks and maintains efficiency. Refer to the manual for specific lubrication points and follow the recommended maintenance schedule to keep the pump running effectively.

4.3 Storing the Pump During Off-Season

Drain all water from the pump and filter system. Clean thoroughly and allow to dry completely. Store in a cool, dry place protected from humidity and freezing temperatures. Protect moving parts with a breathable cover. Inspect for damage before storage and lubricate if necessary. This ensures the pump remains in good condition for the next season.

Troubleshooting Common Issues

Identify common problems like noise, low flow, or leaks. Check for blockages, proper connections, and error codes. Refer to the manual for detailed solutions.

5.1 Diagnosing a Noisy Pump

A noisy pump may indicate blockages, improper connections, or worn parts. Check for debris in the filter or pipes. Ensure the control valve is aligned correctly. If noise persists, inspect internal components or consult the manual for specific troubleshooting steps to resolve the issue effectively.

5.2 Resolving Low Water Flow

Low water flow may result from a clogged filter or obstructed hoses. Backwash the filter and ensure all connections are secure; Check for kinks in hoses and clear any blockages. If issues persist, reset the pump or consult the manual for advanced troubleshooting steps to restore proper water circulation.

5.3 Fixing Leaks in the System

Turn off the pump immediately and drain the system to inspect for leaks. Check all connections, O-rings, and gaskets for damage or wear. Tighten loose fittings and replace any damaged seals. Apply a pool-safe sealant if necessary. Refer to the manual for specific instructions on replacing parts to ensure a watertight system and prevent further issues.

Understanding Error Codes

Identify error codes by referring to the manual. Codes indicate specific issues like low flow or system blockages. Reset the pump as instructed to resolve errors;

6.1 Identifying Error Code Causes

Error codes like E01 or E02 indicate specific issues, such as low water flow or overheating. Refer to the manual for a detailed list of codes and their meanings. Common causes include clogged filters, improper installation, or malfunctioning sensors; Always check the control valve and filter condition when troubleshooting error codes.

6.2 Resetting the Pump After an Error

To reset the pump after an error, turn it off and allow it to cool for 5 minutes. Press and hold the reset button located on the control panel for 3 seconds. Release and restart the pump. If the error persists, refer to the manual for specific error code solutions or contact customer support.

Winterization and Storage

Drain all water from the pump and filter. Allow the system to dry completely. Store the pump in a clean, dry place to prevent damage during off-season.

7.1 Preparing the Pump for Winter

Drain all water from the pump, hoses, and filter to prevent freezing. Clean and dry the system thoroughly. Apply a rust-inhibiting spray to metal parts. Store in a cool, dry place, away from direct sunlight. Follow manufacturer guidelines for winterizing to ensure longevity and proper function when restarting in the spring.

7.2 Proper Storage Techniques

Store the pump in a clean, dry, and cool environment. Protect it from direct sunlight and moisture. Use a rust-inhibiting spray on metal components. Ensure all parts are securely fastened to prevent movement during storage. Keep the pump upright to avoid damage to internal components. Follow manufacturer guidelines for optimal storage conditions to maintain functionality and longevity.

Choosing the Right Pool Filter Pump

Select a pump based on pool size, flow rate, and horsepower. Ensure compatibility with your pool type and consider energy efficiency. Check warranty and support options.

8.1 Factors to Consider

When selecting a pool filter pump, consider pool size, flow rate, and horsepower. Ensure compatibility with your pool type and filter system. Check energy efficiency ratings and noise levels. Evaluate maintenance requirements and durability. Look for features like timer functionality and multiple speed settings. Compare warranties and customer support offered by manufacturers. Budget considerations are also crucial for long-term satisfaction.

8.2 Comparing Different Models

Compare models based on pump power, filter type, and energy efficiency. Consider flow rate, horsepower, and compatibility with pool size. Check noise levels, timer functionality, and multi-speed settings. Evaluate additional features like automatic shut-off or remote control. Review warranty lengths and customer support; Compare energy consumption and operating costs to find the best fit for your needs and budget.

Accessories and Replacement Parts

Accessories like hoses, connectors, and adapters are available. Replacement parts include filters, O-rings, and gaskets. Always check the manual for compatibility before purchasing.

9.1 Recommended Accessories

Recommended accessories include compatible hoses, adapters, and connectors for secure connections. Maintenance kits with O-rings and gaskets are essential for repairs. A pool skimmer and vacuum kit enhances cleaning efficiency. Winterizing kits are ideal for off-season storage. Always purchase from Bestway or authorized retailers to ensure compatibility and performance. Check the manual for a full list of compatible items.

9.2 Ordering Replacement Parts

To order replacement parts, refer to the manual for specific part numbers and descriptions. Visit the official Bestway website or contact customer service for assistance. Ensure all parts are genuine and compatible with your pump model. Avoid third-party sellers to maintain warranty validity and performance. Always verify authenticity to ensure safety and optimal functionality.

Resources and Support

Visit the official Bestway website for comprehensive resources and support. Contact customer service for inquiries, troubleshooting, or assistance with your pool filter pump.

10.1 Official Bestway Manuals

Official Bestway manuals are essential resources for your pool filter pump. They provide detailed instructions, safety guidelines, and troubleshooting tips. Visit the Bestway website or contact customer support to access these manuals. Reading them before installation ensures proper setup and maintenance, covering warranty details, optimal performance, and extending the pump’s lifespan for reliable operation.

10.2 Customer Service Contact

For assistance with your Bestway Pool Filter Pump, contact customer service through their official website or support hotline. They provide guidance on troubleshooting, maintenance, and warranty inquiries. Reaching out ensures you receive accurate information and support tailored to your product, helping you resolve issues efficiently and maintain optimal performance.

Best Practices for Pool Maintenance

Regularly skim and vacuum the pool to keep it clean. Balance pool chemistry by testing pH levels and adjusting chemicals as needed to ensure safe swimming conditions.

11.1 Regular Skimming and Vacuuming

Regular skimming removes floating debris, preventing it from sinking and causing contamination. Use the pool vacuum weekly to clean the floor and walls, ensuring a pristine environment. Check the pump basket for debris and clean it regularly to maintain proper water flow. Keep the filter clean to optimize performance and water clarity. Daily skimming and weekly vacuuming are essential for a well-maintained pool.

11.2 Balancing Pool Chemistry

Regularly test and adjust pool water chemistry to maintain safe and healthy conditions. Ideal pH levels are 7.2–7.8, alkalinity at 80–120 ppm, and chlorine at 1–3 ppm. Adjust chemicals as needed to prevent eye irritation or equipment damage. Test water after adjustments and ensure proper calcium hardness (175–275 ppm) to avoid scaling or corrosion issues. Consistent monitoring ensures optimal water quality and longevity of your pool system.

Comparing Sand Filter Pumps

Bestway sand filter pumps offer efficient filtration, cost-effectiveness, and ease of use. They are ideal for storable pools, ensuring clean water and durable performance, satisfying user needs.

12.1 Pros and Cons

The Bestway Pool Filter Pump offers efficient filtration, cost-effectiveness, and ease of use, making it ideal for storable pools. However, it’s not suitable for permanent installations and may produce noise during operation. Regular maintenance is necessary to ensure optimal performance and longevity. Proper setup and grounding are essential for safe and effective use. Troubleshooting guides are available for common issues, ensuring durability and user satisfaction.

12.2 Alternative Options

Consider alternative pool filter systems like cartridge or sand filters for different needs. Cartridge systems offer easier cleaning, while sand filters provide superior filtration over time. Other brands, such as Intex, offer similar products with varying features. Evaluate your pool size, budget, and maintenance preferences to choose the most suitable option for your specific requirements and ensure optimal performance.

Warranty and Repair Options

Your Bestway Pool Filter Pump is backed by a limited warranty covering manufacturing defects. Contact customer service for repair or replacement options during the warranty period.

13.1 Understanding Your Warranty

Your Bestway Pool Filter Pump is covered by a limited warranty for manufacturing defects. The warranty period varies by product, typically covering parts and labor for 1-2 years. Registration may be required. Review the warranty terms for specific conditions and exclusions. Damage from misuse or tampering voids coverage. For details, refer to the official Bestway manual or contact customer support.

13.2 Professional Repair Services

For repairs beyond DIY, contact Bestway-authorized service centers. Ensure only genuine parts are used to maintain warranty validity. Professional technicians can diagnose and fix complex issues efficiently. Contact Bestway customer support for a list of approved repair providers. Always follow their guidance to ensure repairs are done safely and effectively, preventing further damage to your pool filter pump system.

black & decker user manuals

Importance of Black & Decker User Manuals

Black & Decker user manuals are crucial for ensuring safe and effective use of their products․ They provide detailed instructions‚ troubleshooting tips‚ and maintenance advice‚ helping users optimize performance and longevity of their tools and appliances․ These manuals also include essential safety guidelines and warranty information‚ making them indispensable for both DIY enthusiasts and professionals․ Accessing digital copies online offers convenience and ease of reference‚ ensuring users can always find the guidance they need․

1․1 Why User Manuals Are Essential for Black & Decker Products

Black & Decker user manuals are vital for ensuring the safe and efficient operation of their tools and appliances․ They provide clear instructions for assembly‚ usage‚ and maintenance‚ helping users avoid potential hazards․ These manuals also include troubleshooting tips to address common issues‚ reducing downtime and the need for professional assistance․ Additionally‚ they outline warranty details and maintenance schedules‚ ensuring products last longer․ For professionals and DIY enthusiasts alike‚ the manuals offer insights into optimizing performance․ With detailed diagrams and step-by-step guides‚ they empower users to get the most out of their Black & Decker products while minimizing risks․

1․2 Key Features of Black & Decker User Manuals

Black & Decker user manuals are designed to be comprehensive and user-friendly․ They include detailed step-by-step instructions‚ safety guidelines‚ and troubleshooting tips to help users resolve common issues․ The manuals often feature diagrams and illustrations to clarify complex procedures‚ ensuring ease of understanding․ Additionally‚ they provide model-specific information‚ making them highly relevant to the product in use․ Many manuals are now available digitally‚ offering convenient access and search functionality․ These features make Black & Decker manuals an invaluable resource for optimizing product performance‚ ensuring safety‚ and extending the lifespan of their tools and appliances․

Popular Categories and Models Covered in Black & Decker Manuals

Black & Decker manuals cover a wide range of categories‚ including power tools‚ kitchen appliances‚ trimmers‚ and vacuum cleaners․ Popular models like drills‚ sanders‚ and coffee makers are well-represented․

2․1 Power Tools (Drills‚ Saws‚ Sandresses)

Black & Decker power tool manuals are essential for drills‚ saws‚ and sanders‚ providing detailed setup‚ operation‚ and maintenance instructions․ These guides ensure safe and efficient use‚ covering topics like blade installation and speed adjustment․ Troubleshooting sections address common issues such as motor overheating or uneven cutting․ Manuals for popular models‚ like the KS55 saw‚ are readily available online‚ offering step-by-step solutions for optimal performance․ By following the guidelines‚ users can extend tool lifespan and achieve professional results․ Whether for DIY projects or professional tasks‚ these manuals are indispensable for mastering Black & Decker power tools effectively․

2․2 Kitchen Appliances (Blenders‚ Coffee Makers‚ Toasters)

Black & Decker kitchen appliance manuals provide essential guidance for blenders‚ coffee makers‚ and toasters‚ ensuring safe and efficient operation․ These manuals include detailed instructions for assembly‚ usage‚ and cleaning‚ as well as troubleshooting tips for common issues like jammed toasters or uneven blending․ For example‚ the Select-A-Size Coffeemaker manual offers programmable brewing options‚ while toaster manuals highlight safety features to prevent overheating․ Digital access to these manuals allows users to quickly resolve problems and optimize their appliances’ performance; By following the guidelines‚ users can extend the lifespan of their kitchen devices and enjoy consistent results in food preparation․

2․3 Trimmers and Lawn Care Equipment

Black & Decker manuals for trimmers and lawn care equipment provide comprehensive guidance for optimal use and maintenance․ These manuals cover cordless and corded trimmers‚ edgers‚ and lawn mowers‚ offering step-by-step instructions for assembly‚ operation‚ and troubleshooting․ They highlight safety precautions‚ such as proper handling of cutting strings and blade maintenance․ Additionally‚ manuals often include tips for adjusting handles for ergonomic use and advice on maintaining battery health for cordless models․ By following these guides‚ users can ensure efficient lawn care while prolonging equipment lifespan․ Digital access to these manuals makes it easy to resolve issues and keep your outdoor spaces well-groomed year-round․

2․4 Vacuum Cleaners and Home Cleaning Devices

Black & Decker user manuals for vacuum cleaners and home cleaning devices offer detailed guidance for effective and safe operation․ These manuals cover a wide range of models‚ from handheld vacuums to upright and canister cleaners․ They provide instructions for assembly‚ filter maintenance‚ and troubleshooting common issues like suction loss or blockages․ Additionally‚ the manuals include tips for optimizing cleaning performance on different surfaces and advice on extending the lifespan of the device․ With clear diagrams and step-by-step instructions‚ users can easily perform routine maintenance‚ such as replacing belts or cleaning filters․ Digital access to these manuals ensures users can quickly resolve issues and keep their homes clean with ease․

How to Find the Right Black & Decker Manual

To find the right Black & Decker manual‚ search by model number or product name on platforms like ManualsDir․com or ManualsLib․ Use specific keywords like “user manual” for accurate results․

3․1 Tips for Searching Online

When searching for Black & Decker manuals online‚ use specific keywords like the product model number and terms like “user manual” or “instruction guide․” Visit trusted platforms such as ManualsDir․com or ManualsLib‚ which host extensive libraries of Black & Decker manuals․ Ensure you search by the exact model name or number for precise results․ Additionally‚ check the official Black & Decker website for dedicated support sections․ Use advanced search filters to narrow down results by product category or release year․ Always verify the manual’s relevance by cross-referencing the model number and product description before downloading․ This ensures you access the correct guide for your specific device․

3․2 Troubleshooting Common Issues

Black & Decker manuals often include troubleshooting sections to address common issues․ For power tools‚ check power sources‚ batteries‚ or cords for connectivity․ For appliances‚ ensure proper installation and settings․ If a device overheats‚ refer to the manual for cooling procedures․ Malfunctioning parts may require cleaning or replacement‚ as outlined in the guide․ Error messages or unusual noises should be investigated using the manual’s diagnostic tips․ Regular maintenance‚ such as cleaning filters or lubricating moving parts‚ can prevent many issues․ If problems persist‚ contact Black & Decker support for further assistance or repair options․

Benefits of Digital Access to Black & Decker Manuals

Digital access to Black & Decker manuals offers convenience‚ easy searchability‚ and instant availability․ Users can download or view guides anytime‚ reducing storage needs and ensuring quick troubleshooting․

4․1 Online Platforms for Downloading Manuals

Several online platforms offer easy access to Black & Decker manuals‚ including ManualsDir․com‚ ManualsLib‚ and Manua․ls․ These websites provide extensive libraries of downloadable PDF manuals‚ covering a wide range of products such as power tools‚ kitchen appliances‚ and lawn care equipment․ Users can search by product category or model number‚ ensuring quick and precise access to the desired manual․ Additionally‚ platforms like ManualsDir feature a user-friendly interface with search and share options‚ while ManualsLib organizes manuals by categories for easier navigation․ These platforms eliminate the need for physical storage and allow users to access instructions anytime‚ anywhere‚ enhancing convenience and efficiency․

4․2 Advantages of Digital Manuals Over Printed Copies

Digital Black & Decker manuals offer significant advantages over printed versions․ They are easily accessible online‚ eliminating the risk of loss or damage․ Digital manuals can be searched quickly using keywords‚ making it faster to find specific information․ They also save physical storage space and are environmentally friendly․ Regular updates ensure users have the latest instructions‚ while hyperlinks and interactive features enhance navigation․ Additionally‚ digital manuals are cost-effective and can be viewed on various devices‚ providing unparalleled convenience for users seeking instant guidance․ This modern approach aligns with the needs of today’s tech-savvy consumers‚ ensuring optimal usability and efficiency․

Safety and Best Practices When Using Black & Decker Products

Black & Decker user manuals emphasize safety and best practices‚ ensuring optimal product use․ Always follow guidelines‚ wear protective gear‚ and maintain equipment for longevity and efficiency․

5․1 General Safety Guidelines

Black & Decker user manuals outline essential safety precautions to prevent accidents and ensure safe operation of their tools and appliances․ Always wear protective gear like safety glasses and gloves when using power tools․ Keep loose clothing and long hair tied back to avoid entanglement․ Ensure work areas are well-lit and free from clutter․ Avoid using damaged cords or accessories‚ as they can pose fire or electric shock risks․ Follow recommended load capacities for appliances and tools to prevent overheating or mechanical failure․ Regularly inspect equipment for wear and tear‚ and store products in dry‚ secure locations out of children’s reach․ Adhering to these guidelines minimizes hazards and prolongs product lifespan․

5․2 Product-Specific Safety Tips

Black & Decker manuals provide tailored safety advice for specific products․ For power tools‚ always use safety glasses and keep hands away from moving parts․ When using kitchen appliances‚ avoid overheating by not leaving them unattended and keep them away from water․ Lawn care equipment requires proper handling to prevent accidental cuts or injuries․ Vacuum cleaners should be operated on dry surfaces to avoid electrical hazards․ Additionally‚ ensure all products are used for their intended purposes and follow load capacity guidelines․ Regular maintenance‚ as outlined in the manuals‚ is crucial for safe and efficient operation․ These tips help users avoid common risks and ensure optimal performance․

interaction of color pdf

Color interaction in PDFs is crucial for ensuring accuracy and consistency across digital and print outputs. It involves understanding how colors appear on different devices.

Importance of Color Accuracy in PDFs

Color accuracy is fundamental for maintaining the integrity of PDF content, ensuring designs display as intended across devices. It enhances readability, especially for those with color vision deficiency, and is critical in professional settings where precise color representation is essential. Proper color management supports accessibility and prevents unwanted shifts, ensuring digital and print outputs remain consistent and visually appealing.

Overview of Color Spaces in PDFs

Color spaces in PDFs define how colors are represented and interpreted. Common spaces include sRGB, Adobe RGB, and CMYK. sRGB is ideal for web and mobile, while Adobe RGB offers a wider range for professional printing. Device-independent spaces ensure consistency across devices, while device-dependent spaces are tailored to specific outputs. Understanding these spaces is essential for maintaining color integrity and achieving accurate visual representation in both digital and print formats.

Fundamentals of Color in PDFs

Color in PDFs is defined using models like RGB and CMYK, ensuring accurate representation across devices. Proper color management enhances visual consistency and professional output quality.

RGB and CMYK Color Models

The RGB (Red, Green, Blue) model is ideal for digital displays, while CMYK (Cyan, Magenta, Yellow, Key/Black) is suited for printing. RGB offers vibrant colors but lacks in print accuracy, whereas CMYK ensures precise reproduction on paper. Understanding these models is essential for maintaining color consistency across different mediums, preventing unwanted shifts and ensuring the final output aligns with the intended design.

Device-Independent and Device-Dependent Color Spaces

Device-independent color spaces, like sRGB and Adobe RGB, offer standardized color representation, ensuring consistency across different devices. Device-dependent spaces, such as monitor or printer profiles, are tailored to specific hardware, leading to variations in color appearance. In PDFs, device-independent spaces are often preferred for their universality, while device-dependent profiles are used for precise output on particular devices, requiring careful management to maintain color integrity and avoid unintended shifts. Proper use of these spaces is vital for professional results.

Color Management in PDFs

Color management in PDFs ensures consistent and accurate color representation by utilizing standardized profiles and spaces, maintaining the creator’s intent across various devices and outputs.

Understanding sRGB and Adobe RGB

sRGB and Adobe RGB are popular color spaces used in PDFs. sRGB is ideal for web and mobile devices, offering a standard monitor-based color profile. Adobe RGB, with its wider color range, is better for professional printing. Choosing the right space ensures accurate color representation, maintaining the creator’s intent. This distinction is vital for both digital and print outputs, ensuring visual consistency and professional results across all mediums.

Handling Device-Specific Color Profiles

Device-specific color profiles ensure accurate color reproduction across different devices. Each device, like monitors or printers, has unique color responses. Embedding these profiles in PDFs maintains color consistency. For prints, using CMYK and ICC profiles is recommended. sRGB is best for digital displays. Proper profile handling prevents color shifts, ensuring the intended visual experience is preserved. This is essential for professional output and brand consistency in both digital and printed formats.

Color Accuracy and Consistency

Color accuracy ensures the final output aligns with the creator’s vision, enhancing visual appeal and trust. Consistency across devices is key to professional and visually satisfying PDFs.

Ensuring Color Fidelity Across Devices

Color fidelity across devices requires careful management of color spaces and profiles. Using sRGB or Adobe RGB ensures consistency, as these spaces are designed for standard devices. Embedding ICC profiles in PDFs helps maintain accurate color representation. Best practices include using PDF/X standards for commercial printing and ensuring colors are defined independently of specific devices. This approach guarantees that digital and printed outputs remain faithful to the original design, enhancing professionalism and visual appeal.

Impact of Color Consistency on Professional Output

Color consistency is vital for professional output, as it directly impacts trust and credibility. Inaccurate colors can misrepresent a brand’s identity, leading to a loss of professionalism. Ensuring color fidelity across devices and mediums enhances visual appeal and emotional engagement; Using standardized color spaces like Adobe RGB or sRGB guarantees vibrant and accurate colors. Consistent color representation aligns with brand identity, fostering recognition and satisfaction among recipients, making it essential for professional-grade PDFs.

Interactive Elements and Color

Interactive elements in PDFs use color to enhance user experience through gradients, transparency, and dynamic color changes, making checkboxes and forms visually responsive and engaging in PDFs.

Using Gradients and Transparency in PDFs

Gradients and transparency in PDFs enable smooth color transitions and overlays, enhancing visual appeal. These effects are achieved by setting gradient directions and colors via pickers or HEX codes. Transparency adjusts layer opacity, allowing background elements to show through. Proper use ensures design consistency and professional output, whether for digital displays or print, while maintaining file stability and visual integrity across devices and platforms.

Customizing Interactive Checkboxes and Form Fields

Interactive checkboxes and form fields in PDFs can be customized to enhance user interaction. Colors of checkboxes can change when clicked, providing visual feedback. Users can select colors for each checkbox individually, improving accessibility. This customization ensures forms are user-friendly and visually appealing, while maintaining functionality across devices. Proper design practices ensure consistency and professionalism, making PDF forms more engaging and effective for users.

PDF/X Standards for Color

PDF/X standards ensure color consistency and accuracy for commercial printing. They define how color information is represented, ensuring reliable color reproduction across different print workflows and devices.

Overview of PDF/X Compliance

PDF/X compliance ensures that PDFs meet specific standards for color accuracy and consistency in commercial printing. By adhering to PDF/X, files are optimized for print production, reducing errors. This standard defines how color information is embedded and interpreted, ensuring that the final output matches the creator’s intent. PDF/X compliance is particularly important for high-quality print materials, such as brochures, catalogs, and packaging, where precise color reproduction is critical.

Best Practices for Commercial Printing

For commercial printing, ensure PDFs are PDF/X-compliant to maintain color accuracy. Use sRGB or Adobe RGB for consistent results. Embed color profiles and avoid device-specific settings. Optimize gradients and transparency carefully, as they may affect print output. Proof colors on multiple devices to ensure consistency. Use high-resolution images and vector graphics for sharp details. Avoid color shifts by converting files properly. These practices ensure professional-quality outputs, meeting industry standards for clarity and precision in printed materials.

Color Preservation in PDF Export

Color preservation ensures PDFs retain their intended hues during conversion. Using PDF/X standards and embedding color profiles helps maintain accuracy. Avoid color shifts by converting files properly.

Maintaining Color Integrity During Conversion

Maintaining color integrity during PDF conversion is essential for preserving the original design intent. Using PDF/X standards ensures colors remain consistent across devices. Embedding color profiles and converting files properly prevents shifts. Avoiding unmanaged color workflows is crucial. Tools like Adobe Acrobat offer features to lock colors, ensuring fidelity. Proper settings in design software also help retain accuracy. The goal is to achieve consistent visuals in both digital and print formats, avoiding unwanted changes during export.

Avoiding Color Shifts in Digital and Print Outputs

Color shifts in PDFs can occur due to device differences and incorrect profiles. Using sRGB for digital and CMYK for print minimizes discrepancies. Soft proofing helps preview colors accurately before printing. Embedding profiles ensures consistent display across devices. Avoiding over-saturation and using PDF/X standards further prevents shifts. Calibrating monitors and verifying print settings are key steps. By taking these measures, color fidelity is maintained, ensuring outputs match the intended design across all platforms and mediums.

Accessibility and Color in PDFs

Accessible PDFs ensure readability for all users, including those with color vision deficiency. Using high contrast colors and proper formatting enhances readability and inclusivity.

Ensuring Readability for Color Vision Deficiency

Color vision deficiency affects millions, making certain hues indistinguishable. To ensure readability in PDFs, use high-contrast colors and avoid relying solely on color for information conveyance. Tools like color contrast analyzers can help verify accessibility. Additionally, providing alt text for images and using clear typography enhances comprehension for all users, including those with visual impairments. This approach promotes inclusivity and ensures content is accessible to everyone, regardless of visual abilities.

Best Practices for Accessible Color Design

For accessible color design in PDFs, use high-contrast colors to ensure readability. Avoid relying solely on color to convey information; instead, use patterns or labels as alternatives. Utilize tools like color contrast analyzers to verify accessibility standards. Provide text alternatives for images with color-based information. These practices ensure that content is accessible to users with visual impairments, promoting inclusivity and enhancing overall user experience.

Color Search Functionality in PDFs

Color search in PDFs enables users to locate specific hues efficiently, enhancing productivity and supporting detailed color-based analysis across multiple documents.

Searching for Specific Colors in Multiple PDFs

Searching for Specific Colors in Multiple PDFs

Advanced PDF tools allow users to search for specific colors across multiple documents, enhancing efficiency in design and analysis. This functionality is particularly useful for professionals who need to maintain consistent branding or identify specific elements in large collections of PDFs. By leveraging color search, users can quickly locate and verify color accuracy, ensuring alignment with brand guidelines or project requirements. This feature streamlines workflows, saving time and reducing errors in color-sensitive tasks.

Using OCR for Color-Based Document Analysis

Using OCR for Color-Based Document Analysis

OCR (Optical Character Recognition) technology enables color-based document analysis by extracting text and recognizing color patterns within PDFs. This feature is invaluable for tasks like color search, brand consistency checks, and accessibility reviews. By identifying specific colors, OCR helps automate tasks such as verifying color accuracy or detecting color-coded information. This capability enhances productivity in design, printing, and compliance workflows, making it easier to manage and analyze color-related data across multiple PDF documents efficiently.

Future Trends in Color Interaction

Future trends in color interaction include AI-driven enhancements for precise color matching and dynamic adaptation across devices, ensuring vibrant and consistent visual experiences in PDFs.

AI-Driven Color Enhancement in PDFs

AI-driven color enhancement in PDFs is revolutionizing how colors are managed and displayed. Advanced algorithms can automatically adjust and optimize colors for consistency across devices, ensuring vibrant visuals. AI tools enable real-time color correction, conversion between color spaces like sRGB and Adobe RGB, and enhancement of gradients and transparency effects. These technologies also improve color fidelity during printing, reducing manual effort and enhancing professional output. AI’s role in color interaction is expected to expand, offering smarter solutions for accessibility and dynamic color adaptation in PDFs.

Emerging Standards for Color Management

Emerging standards for color management in PDFs aim to enhance consistency and accuracy. New profiles and specifications are being developed to support wider color gamuts and improved device interoperability. These standards focus on seamless integration across digital and print workflows, ensuring colors remain faithful to the original design. Advances in PDF/X compliance and extended color spaces are expected to drive innovation, offering better tools for designers and ensuring optimal color reproduction in both digital and printed formats.

Color interaction in PDFs ensures accuracy and consistency, enhancing both digital and print outputs. Proper color management and accessibility are key to achieving the creator’s vision effectively.

Color interaction in PDFs involves understanding and managing color spaces, ensuring accuracy and consistency across devices. Proper use of RGB, CMYK, and device-independent color spaces is essential; Color management standards like PDF/X ensure reliability in commercial printing. Accessibility considerations, such as readability for color vision deficiency, are crucial for inclusive design. By leveraging tools like gradients, transparency, and accessible color palettes, creators can enhance both visual appeal and functionality in PDF documents effectively.

Final Thoughts on Effective Color Interaction in PDFs

Effective color interaction in PDFs hinges on precision, consistency, and accessibility. By leveraging color management tools and standards, creators ensure visuals resonate across devices. Accessibility practices like readable contrasts enhance inclusivity. Future advancements, such as AI-driven enhancements, promise better color fidelity. Balancing aesthetics with functionality ensures PDFs deliver their intended impact reliably, making color interaction a cornerstone of professional and engaging digital content creation.

hungry hungry caterpillar pdf

Overview of “The Very Hungry Caterpillar”

Written by Eric Carle in 1969‚ The Very Hungry Caterpillar is a beloved children’s classic․ It follows a tiny caterpillar’s journey from hatching to transforming into a butterfly‚ emphasizing counting‚ days of the week‚ and the consequences of overeating․ The story’s colorful‚ hand-painted tissue paper collages and educational themes have made it a global phenomenon‚ cherished by both children and parents․

Author and Publication Details

The Very Hungry Caterpillar was written and illustrated by the renowned American author and artist Eric Carle․ First published in 1969‚ the book has since become a cornerstone of children’s literature․ Carle’s unique collage illustrations‚ created from hand-painted tissue paper‚ have captivated readers worldwide․ The book was originally published by Penguin Putnam and has been reprinted numerous times due to its enduring popularity․ Its simple yet engaging narrative‚ combined with educational elements like counting and the days of the week‚ has made it a favorite among parents and educators․ The story’s universal themes and vibrant visuals have led to translations into over 62 languages‚ cementing its global appeal․ This beloved tale continues to inspire new generations‚ solidifying Eric Carle’s legacy as a master of children’s storytelling․

Plot Summary: The Journey of the Hungry Caterpillar

The Very Hungry Caterpillar begins with a tiny egg hatching on a leaf‚ introducing the protagonist‚ a small‚ insatiably hungry caterpillar․ The story follows his week-long journey as he eats through various foods each day‚ from fruits like apples and pears to treats like ice cream and cake․ By Saturday‚ the caterpillar overeats and develops a stomachache‚ teaching a lesson about moderation․ The following week‚ he transforms into a pupa and emerges as a beautiful butterfly․ The narrative is simple yet engaging‚ making it accessible to young readers while incorporating educational elements like counting and the days of the week․ The caterpillar’s transformation from egg to butterfly serves as a metaphor for growth and change‚ resonating with children and adults alike․ The story’s vivid illustrations and repetitive text structure have made it a timeless classic in children’s literature․

Why It’s a Classic: Key Features and Themes

The Very Hungry Caterpillar is a timeless classic due to its universal themes and engaging design․ The story introduces young readers to fundamental concepts like counting‚ the days of the week‚ and the life cycle of a butterfly․ Its colorful‚ hand-painted tissue paper collages by Eric Carle captivate children’s imagination‚ while the simple‚ repetitive text aids in early language development․ The caterpillar’s journey from egg to butterfly symbolizes growth and transformation‚ resonating with readers of all ages․ Additionally‚ the book subtly teaches lessons about moderation and the consequences of overindulgence․ Its enduring popularity‚ translations into over 62 languages‚ and numerous adaptations further solidify its status as a beloved and educational children’s classic․ These elements make it a cherished read for generations‚ blending learning with entertainment seamlessly․

Target Audience and Educational Value

The Very Hungry Caterpillar is designed for young children‚ teaching counting‚ days of the week‚ and the butterfly life cycle․ Its simple text and vibrant visuals make it an excellent educational tool for early learners‚ fostering language skills and curiosity about nature․ The PDF format enhances accessibility‚ allowing parents and educators to easily share this beloved story with children worldwide‚ promoting both entertainment and learning․ The book’s engaging narrative and interactive elements cater to preschoolers‚ making it a cornerstone of early childhood education․ Its universal themes and educational value ensure it remains a favorite among both children and educators․ The story’s repetitive structure and colorful illustrations aid in memory retention and language development‚ making it a valuable resource for teaching young minds․ Additionally‚ the story introduces basic math concepts through counting and sequencing‚ further enriching its educational appeal․ The PDF version preserves the original’s charm while offering convenience for modern readers‚ ensuring its timeless lessons reach new generations․ The book’s ability to blend learning with entertainment solidifies its place as a vital educational tool for children everywhere․ Eric Carle’s masterpiece continues to inspire young readers‚ fostering a lifelong love for learning and exploration․ The Very Hungry Caterpillar remains a cherished resource in both homes and classrooms‚ providing endless opportunities for growth and development․ Its impact on early childhood education is immeasurable‚ making it a true classic in every sense․

Age Range and Appropriateness

The Very Hungry Caterpillar is primarily designed for children aged 1 to 4 years‚ making it an ideal choice for toddlers and preschoolers․ Its sturdy board book format‚ colorful illustrations‚ and simple‚ repetitive text are perfect for young learners; The story’s engaging narrative and educational elements‚ such as counting and days of the week‚ cater to early childhood development․ The PDF version of the book retains these features‚ ensuring accessibility for parents and educators to share the story digitally․ The themes of growth‚ transformation‚ and moderation are timeless and universally appealing‚ making the book suitable for children up to 8 years old․ The absence of complex language or mature themes ensures its appropriateness for all young readers‚ fostering a love for reading and learning from an early age․ The book’s enduring popularity lies in its ability to entertain and educate children across various age groups․

Learning Opportunities: Days of the Week‚ Counting‚ and More

The Very Hungry Caterpillar is more than just a story; it’s a tool for early childhood education․ The book introduces young readers to essential concepts like the days of the week‚ as the caterpillar eats through each day‚ providing a clear sequence of time․ It also teaches counting through the caterpillar’s consumption of fruits and foods‚ with numbers increasing progressively․ This repetition helps children memorize and understand basic numeracy․ Additionally‚ the story subtly introduces themes like cause-and-effect‚ as the caterpillar’s overeating leads to a stomachache‚ teaching moderation․ The caterpillar’s transformation into a butterfly introduces basic science concepts‚ sparking curiosity about nature and life cycles․ These elements make the PDF version of the book a valuable resource for parents and educators‚ offering both entertainment and learning opportunities for young minds․ Its universal appeal ensures it remains a timeless educational tool․

How It Sparks Creativity and Curiosity in Children

The Very Hungry Caterpillar ignites children’s imagination through its vibrant visuals and engaging narrative․ The caterpillar’s journey from a tiny egg to a beautiful butterfly encourages kids to explore the wonders of nature․ The story’s repetitive structure and colorful illustrations inspire creativity‚ as children can imagine the caterpillar’s adventures and the transformation process․ The PDF version’s interactive elements‚ such as counting and tracking the caterpillar’s growth‚ foster curiosity and active participation․ The story’s themes of growth and change spark questions about the natural world‚ prompting children to observe and learn about insects and life cycles․ This blend of art‚ storytelling‚ and education makes the book a powerful tool for nurturing creativity and curiosity in young minds‚ helping them develop a deeper connection with the world around them․

Pdf Version and Digital Availability

The Very Hungry Caterpillar is widely available in PDF format‚ offering convenience and accessibility․ Digital versions can be downloaded from platforms like Amazon‚ Google Books‚ and educational websites‚ ensuring easy access for readers worldwide․ Interactive elements in the PDF‚ such as animations and clickable features‚ enhance the storytelling experience‚ making it engaging for children and parents alike․ This digital format preserves the vibrant collages and educational content‚ allowing the story to reach a new generation of readers while maintaining its timeless appeal and charm․ The PDF version is a popular choice for schools and homeschooling‚ providing a durable and shareable resource for learning and entertainment․ Its availability across multiple platforms ensures that the story remains accessible to a global audience‚ fostering a love for reading and learning in diverse settings․ The digital version also supports offline reading‚ making it ideal for travel or areas with limited internet connectivity‚ ensuring that the caterpillar’s journey can be enjoyed anywhere‚ anytime․ By embracing digital technology‚ the PDF version of The Very Hungry Caterpillar continues to inspire creativity and curiosity in children‚ while its educational value remains intact‚ making it a cherished resource for families and educators․

Benefits of the PDF Format for Readers

The PDF version of The Very Hungry Caterpillar offers numerous benefits for readers․ It provides easy access to the story‚ allowing readers to enjoy it on various devices such as tablets‚ smartphones‚ and computers․ The digital format ensures that the vibrant illustrations and educational content are preserved‚ maintaining the book’s visual appeal․ Additionally‚ the PDF is lightweight and portable‚ making it convenient for travel or classroom use․ Interactive elements‚ such as clickable animations‚ enhance the storytelling experience‚ engaging young readers and fostering a deeper connection with the narrative․ The PDF also supports offline reading‚ which is ideal for areas with limited internet access․ This format is particularly beneficial for schools and homeschooling‚ as it offers a durable and shareable resource for teaching counting‚ days of the week‚ and other essential concepts․ Overall‚ the PDF version of The Very Hungry Caterpillar combines accessibility‚ interactivity‚ and educational value‚ making it a versatile and cherished resource for families and educators worldwide․

Popular Platforms to Download the PDF

The PDF version of The Very Hungry Caterpillar is widely available on various platforms‚ making it easily accessible to readers worldwide․ Amazon‚ OZON‚ and iTunes are among the most popular choices‚ offering convenient downloads and competitive pricing․ Additionally‚ platforms like Google Books and educational websites provide direct links to purchase or download the PDF․ Many online marketplaces‚ such as eBay and Avito‚ also list the book in digital formats․ Some platforms offer free samples or previews‚ allowing users to experience the story before purchasing․ Furthermore‚ educational resources and libraries often include the PDF in their collections‚ ensuring accessibility for schools and homeschooling families․ With its widespread availability across these platforms‚ readers can effortlessly acquire and enjoy the timeless story of The Very Hungry Caterpillar in digital form․

Interactive Elements in the Digital Version

The digital version of The Very Hungry Caterpillar offers engaging interactive elements that enhance the reading experience․ Animated illustrations bring the caterpillar’s journey to life‚ allowing children to witness the transformation from egg to butterfly in a dynamic way․ Interactive features such as puzzles‚ counting games‚ and sound effects encourage participation and learning․ For instance‚ children can tap on fruits to watch the caterpillar eat them‚ fostering a sense of immersion․ Additionally‚ the app My Very Hungry Caterpillar provides a 3D game where kids can feed and care for the caterpillar‚ teaching important values like growth and responsibility․ These interactive elements make the digital version not only entertaining but also educational‚ helping children develop motor skills and problem-solving abilities while enjoying the classic story․

Cultural Impact and Legacy

The Very Hungry Caterpillar has become a global icon‚ translated into numerous languages․ Its adaptations into movies‚ games‚ and other media have solidified its enduring cultural legacy․

The Caterpillar as a Cultural Icon

Since its debut in 1969‚ The Very Hungry Caterpillar has transcended literature to become a cultural phenomenon․ The caterpillar’s universal appeal lies in its relatable journey of growth and transformation‚ resonating with audiences worldwide․ Its distinctive design‚ created by Eric Carle using hand-painted tissue paper collages‚ has made the character instantly recognizable․ The caterpillar has inspired countless adaptations‚ including films‚ games‚ and educational tools‚ cementing its place in popular culture․ Merchandise featuring the caterpillar‚ such as toys and apparel‚ is widely popular‚ further amplifying its iconic status․ The character’s enduring legacy is evident in its global reach‚ with translations in multiple languages and a presence in schools‚ libraries‚ and homes across generations․ Its influence extends beyond entertainment‚ often used in educational settings to teach concepts like counting and the life cycle of butterflies․ The caterpillar’s cultural impact is undeniable‚ making it a timeless symbol of childhood and learning․

Adaptations: Movies‚ Games‚ and Other Media

The Very Hungry Caterpillar has been adapted into various forms of media‚ expanding its reach beyond the original book․ A popular video animation brings the story to life‚ while interactive games like My Very Hungry Caterpillar for Android engage children in educational play․ The character has also inspired short films and educational content‚ such as Eric Carle reading the story aloud․ Additionally‚ a collection of stories‚ including The Very Hungry Caterpillar‚ is available on iTunes‚ offering a digital platform for enjoyment․ These adaptations not only entertain but also enhance learning‚ teaching concepts like counting and the life cycle of butterflies․ The character’s versatility has made it a staple in children’s media‚ ensuring its timeless appeal across generations․ These adaptations continue to captivate audiences‚ blending education with entertainment seamlessly․

Translations and Global Reach

The Very Hungry Caterpillar has been translated into numerous languages‚ making it a global phenomenon․ Its universal themes and simple narrative have allowed it to resonate with children and parents worldwide․ The book’s availability in multiple languages ensures its accessibility across different cultures‚ fostering a shared love for the story․ Additionally‚ the PDF version of the book has further expanded its reach‚ enabling readers in various countries to access it digitally․ This widespread availability has solidified its place as a beloved tale globally․

The character of the very hungry caterpillar has also become a cultural icon‚ appearing in merchandise‚ educational tools‚ and even apps․ Its global popularity is evident in its millions of copies sold worldwide‚ making it one of the most recognizable children’s book characters․ The story’s timeless appeal continues to connect with audiences across borders‚ ensuring its enduring legacy․

300 recettes pour la machine à pain pdf

Welcome to the world of bread machine recipes! Discover 300 diverse recipes, from classic white bread to whole grain and specialty breads, all made easy with your machine.

1.1 Benefits of Using a Bread Machine

A bread machine offers convenience, time-saving, and consistent results. It simplifies the baking process, reducing manual labor and ensuring precise ingredient measurements. With preset programs, you can customize recipes and explore various bread types, from classic white to whole grain and gluten-free options, enhancing your culinary creativity effortlessly.

1.2 Overview of 300 Recipes

This comprehensive guide offers 300 diverse bread machine recipes, ranging from classic white bread to artisan sourdough and gluten-free options. Explore multigrain blends, ancient grains, and specialty breads, with detailed instructions for customization. Perfect for both beginners and experienced bakers, the guide ensures endless creativity and delicious homemade bread tailored to every taste and dietary need.

Understanding Your Bread Machine

Familiarize yourself with your bread machine’s basic components and essential settings. Learn how to use the pan, paddles, and programmable features to achieve perfect results every time.

2.1 Basic Components and Functions

Your bread machine includes a baking pan, paddles, control panel, and lid. The pan holds ingredients, paddles mix and knead dough, while the control panel sets timings and modes. The lid ensures even heating, and some models feature additional compartments for yeast or nuts, enhancing functionality for various recipes.

2.2 Essential Settings for Various Bread Types

Adjust settings based on bread type: basic, whole grain, French, or gluten-free. Select crust color and loaf size. Use specific programs like rapid bake or dough mode for pizza or pasta. Timing and temperature vary, ensuring optimal results for each recipe, from crispy baguettes to hearty whole-grain loaves.

Choosing the Right Ingredients

Selecting quality ingredients is key to perfect bread. Use fresh yeast, precise measurements of flour, and the right liquids for optimal texture and flavor in every recipe.

3.1 Role of Different Flours

Different flours like multigrain, fine wheat semolina, and white flour type 55 or 65 are essential for varying textures and flavors. Multigrain adds nutrition, fine semolina enhances texture, and white flour ensures lightness. Each flour type plays a crucial role in achieving desired bread qualities, from crust to crumb, in your machine recipes.

3.2 Importance of Yeast and Salt

Yeast is vital for fermentation, providing bread its rise and texture. Use machine-specific yeast for best results. Salt enhances flavor and controls yeast activity, ensuring a balanced taste. Both ingredients are critical for achieving the perfect loaf, whether you’re making classic white bread or multigrain varieties in your machine.

3.4 Enhancing Flavor with Additives

Additives like nuts, seeds, herbs, and cheese can elevate your bread’s flavor and texture. Experiment with combinations to create unique recipes, such as rosemary and olive oil or cranberries and orange zest. These additions allow for endless customization, ensuring each loaf is tailored to your taste preferences.

Basic Preparation Steps

Mastering basic preparation steps ensures perfectly baked bread. From measuring ingredients to loading the machine, these foundational techniques transform simple elements into a delicious, homemade loaf.

4.1 Measuring Ingredients Accurately

Accurate measurement is crucial for bread machine success. Use digital scales for precise weights and standard cups for dry ingredients. Liquid measurements require clear visibility to avoid overfilling. Proper ratios ensure the dough develops correctly, leading to a perfectly textured loaf every time;

4.2 Loading the Bread Machine Correctly

Properly loading your bread machine ensures even mixing and baking. Place liquids first, followed by dry ingredients, with yeast on top. Avoid overfilling and use the correct pan size. Secure the paddle and close the lid gently. This setup guarantees consistent results and prevents mechanical issues during operation. Always follow the manufacturer’s guidelines for optimal performance and safety.

4.3 Initial Dough Preparation Tips

Ensure ingredients are at room temperature for optimal yeast activation. Measure flour accurately, as excess can lead to dense bread. Gently mix dry ingredients before adding liquids to prevent lumps. Avoid overmixing, as it can toughen the dough. Place the dough in the machine’s pan smoothly, ensuring even distribution for consistent rising and baking results.

Popular Bread Machine Programs

Explore essential programs like the 600g loaf setting, perfect for everyday bread. Customize with multigrain or gluten-free options, ensuring precise temperature and timing for perfect results every time.

5.1 Program 1 for a 600g Loaf

Program 1 is ideal for a classic 600g loaf. It combines precise temperature control and automatic mixing, ensuring a light texture and golden crust. Perfect for everyday bread, this program is a great starting point for beginners and experienced bakers alike, offering consistent results with minimal effort required.

5.2 Exploring Other Programs and Cycles

Beyond Program 1, explore other cycles like rapid bake, whole grain, and dough settings. These programs offer versatility for crusty baguettes, dense whole grain loaves, or even pizza dough. Customize further with delay timers and crust color options, ensuring every recipe meets your preferences and expands your baking creativity effortlessly.

Classic Bread Recipes

Discover timeless recipes like simple white bread, French baguette, and whole wheat bread. These classics are easy to make and offer authentic flavors perfect for everyday meals.

6.1 Simple White Bread Recipe

Start with a classic! This simple white bread recipe requires only flour, water, yeast, salt, and sugar. Perfect for beginners, it yields a soft, fluffy loaf with a golden crust. Ideal for sandwiches or toast, this versatile bread is a timeless favorite among machine users.

6.2 French Baguette Adaptation

Create an authentic French baguette with your machine! Using wheat flour, water, yeast, and salt, this recipe captures the crispy crust and soft interior of traditional baguettes. Simply program your machine to the dough setting, shape the loaf, and bake for a fresh, aromatic result perfect for any meal or snack.

6.3 Whole Wheat Bread

Enjoy the hearty flavor and nutritional benefits of whole wheat bread, made effortlessly with your machine. Combine whole wheat flour, water, yeast, salt, and a touch of sugar or oil. Program your machine for a basic or whole wheat setting. Perfect for sandwiches or toast, this bread offers a nuttier taste and denser texture than white bread.

Whole Grain and Multigrain Recipes

Explore the richness of whole grains and multigrain blends, offering more fiber and nutrients. Perfect for health-conscious bakers, these recipes add variety and texture to homemade bread.

7.1 Benefits of Whole Grain Breads

Whole grain breads provide essential nutrients like fiber, vitamins, and minerals. They support digestion, lower cholesterol, and reduce chronic disease risks. Perfect for health-conscious bakers, these recipes blend ancient grains and multigrain flours for a nutritious and flavorful loaf, enhancing your dietary well-being with every slice.

7.2 Multigrain Blend Recipe

Perfect for health-conscious bakers, this multigrain blend combines whole wheat, rye, oats, and seeds for a nutritious loaf. With 380ml water, 500g multigrain flour, yeast, and a hint of salt, it’s simple yet flavorful. Customize with nuts or herbs for added texture and taste, ensuring a wholesome bread for every meal.

7.3 Ancient Grain Varieties

Explore ancient grains like Kamut, spelt, and quinoa for a nutty, wholesome flavor. These grains are rich in fiber and nutrients, offering a healthier alternative. Combine them with modern flours for a balanced texture. Adjust water content for denser grains, and enjoy the robust taste of these timeless ingredients in your homemade bread.

Artisan and Specialty Breads

Elevate your baking with crusty baguettes, hearty sourdough, and robust rye. These artisan recipes bring traditional flavors to life with ease using your bread machine.

8.1 Sourdough Starter Method

Create authentic sourdough bread using a natural starter. This traditional method requires patience but delivers a tangy, crusty loaf. The machine simplifies proofing and baking, ensuring perfect results while maintaining the artisanal flavor of sourdough. Perfect for those who enjoy a classic, slow-fermented bread experience.

8.2 Rye and Caraway Bread

Rye and caraway bread offers a distinctive flavor profile, perfect for those seeking a robust, earthy taste; The combination of rye flour and caraway seeds creates a dense, aromatic loaf with a slightly bitter finish. This recipe is ideal for experimenting with traditional Eastern European bread variations using your machine.

8.3 Gluten-Free Options

For those with dietary restrictions, gluten-free bread recipes offer a delicious solution. Using specialized flours like rice, almond, or coconut, you can create light and flavorful loaves. Many machines feature gluten-free settings, ensuring perfect results. Experiment with unique combinations to find your favorite gluten-free bread tailored to your preferences and needs.

Customizing Your Bread Recipes

Elevate your bread-making skills by customizing recipes to suit your taste. Add herbs, spices, nuts, or seeds for unique flavors. Adjust ingredients to cater to dietary needs, creating personalized bread that’s both delicious and tailored to your preferences.

9.1 Adding Herbs and Spices

Elevate your bread recipes by incorporating fresh or dried herbs like rosemary, thyme, or oregano, and spices such as garlic, cumin, or coriander. These additions create aromatic and flavorful loaves that enhance any meal. For best results, use high-quality ingredients and adjust quantities to balance taste preferences, ensuring each bite is a culinary delight.

9.2 Incorporating Nuts and Seeds

Add texture and nutrition to your bread by including nuts like walnuts or almonds, and seeds such as sunflower or chia. These ingredients enhance flavor and provide a crunchy texture. Toasting them lightly before adding can intensify their aroma and taste, creating a delicious and wholesome bread experience for all to enjoy.

9.3 Adjusting for Dietary Needs

Easily adapt recipes to suit various dietary preferences. Replace wheat flour with gluten-free alternatives for those with intolerances. Use sugar substitutes for low-sugar diets or incorporate ancient grains like quinoa for added nutrition. These modifications allow everyone to enjoy fresh, homemade bread tailored to their specific needs and preferences with minimal effort.

Troubleshooting Common Issues

Common issues include dense bread, often due to overmixing. Ensure accurate measurements and avoid overworking dough. Maintain the right temperature and humidity for optimal results;

10.1 Dealing with Dense Bread

Dense bread often results from overmixing or using the wrong flour type. Ensure accurate measurements, avoid overworking dough, and use bread flour for better structure. Proper hydration and temperature control are crucial for a lighter texture. Adjust settings if necessary to achieve the perfect loaf every time.

10.2 Avoiding Overmixing

Overmixing can lead to tough, dense bread by developing too much gluten. Use the machine’s dough setting to mix ingredients just until combined. Avoid excessive scraping or restarting the machine, as this can overwork the dough. Proper ingredient order and precise measurements help ensure a smooth, even mix for better texture and rise.

10.3 Maintaining the Right Environment

Maintain consistent temperature and humidity for optimal bread machine performance. Place the machine away from drafts and direct sunlight. Ensure the room temperature is around 75°F to 78°F for yeast activation. Keep the machine on a stable, even surface and avoid extreme environmental changes to promote even rising and baking.

Health Benefits of Homemade Bread

Homemade bread offers numerous health benefits, including control over ingredients, reduced additives, and customization for allergies. Freshly baked bread retains more nutrients and can be tailored to dietary needs.

11.1 Nutritional Advantages

Homemade bread made with whole grains offers higher fiber, vitamins, and minerals compared to store-bought options. Control over ingredients ensures fewer preservatives and additives, making it a healthier choice for daily consumption.

11.2 Customizing for Allergies

Bread machine recipes allow easy customization for allergies. Substitute gluten-free flours for traditional options or omit nuts and dairy. This flexibility ensures delicious, allergen-friendly bread tailored to specific dietary needs, making homemade bread accessible for everyone, including those with gluten intolerance or other sensitivities.

Popular Recipes from the Guide

Explore the guide’s top recipes, including Multigrain Bread, Milk Bread, and Herb and Cheese Varieties. These crowd-pleasers offer variety and customization for every taste and dietary preference.

12.1 Multigrain Bread

Multigrain bread is a favorite for its hearty texture and nutritional benefits. Combine whole wheat, rye, oats, and seeds for a wholesome loaf. A simple recipe includes 380ml water, 500g multigrain flour, 1 tsp yeast, and 1 tbsp seeds. Perfect for sandwiches or toast, it offers a delicious and healthy option for any meal.

12.2 Milk Bread

Milk bread is a delightful treat, combining 210ml water, 230g semolina, 120g white flour, and 2 tsp yeast. Its soft texture makes it perfect for sandwiches. This simple recipe highlights the bread machine’s ease, offering a fresh, homemade loaf with minimal effort. Ideal for breakfast or snacks, milk bread is a family favorite.

12.3 Herb and Cheese Varieties

Elevate your bread game with herb and cheese varieties! Combine rosemary, garlic, and parmesan for a savory twist or cheddar and herbs for a rich flavor. Perfect for sandwiches or snacks, these recipes offer a delicious blend of textures and tastes, all easily achievable with your bread machine. Customize to your liking for a unique experience!

Your journey to perfect bread making ends here! Discover the 300 recettes pour la machine à pain PDF for endless inspiration. Happy baking!

13.1 Where to Find the PDF Guide

The 300 recettes pour la machine à pain PDF is readily available on online marketplaces, baking communities, and retailer websites. Check platforms like Scribd or visit stores like Costco for access. Download the guide to explore endless bread-making possibilities and elevate your culinary skills with ease.

13.2 Encouragement to Experiment

Embrace creativity with your bread machine! Experiment with diverse flavors, ingredients, and settings to craft unique breads. From herbs to nuts, explore endless possibilities. Adjust recipes to suit dietary needs or preferences. With the 300 recettes pour la machine à pain PDF, discover inspiration and confidence to innovate, ensuring every loaf is a delightful creation tailored to your taste.

pandaria hunter pets guide

Mists of Pandaria introduced a wide variety of new and exotic hunter pets, each with unique abilities and traits. Hunters could tame never-before-seen creatures like water striders, shale spiders, and pandaren-specific beasts. This expansion also brought significant changes to pet customization and combat roles, making pets more integral to a hunter’s strategy and gameplay experience.

1.1 Importance of Pets for Hunters in Mists of Pandaria

In Mists of Pandaria, pets became more integral to a hunter’s strategy and gameplay. Their unique abilities and buffs provided critical support in combat, enhancing the hunter’s effectiveness. Pets also played a key role in the new pet battle system, offering diverse options for customization and specialization. This expansion emphasized the bond between hunters and their pets, making them indispensable companions in both PvE and PvP scenarios.

New Pet Families in Mists of Pandaria

Mists of Pandaria introduced several new pet families, including water striders, shale spiders, and other exotic creatures. These unique families offered hunters diverse abilities and strategic options.

2.1 Water Striders as a New Tamable Family

Water striders became a unique tamable family in Mists of Pandaria, offering hunters a refreshing mix of mobility and utility. Native to Pandaria’s waterways, these insects provided abilities like increased movement speed and water-walking, making them invaluable for traversing aquatic areas. Their distinctive appearance and versatile skills made them a popular choice among hunters seeking both practicality and style in their pets.

2.2 Shale Spiders and Their Unique Abilities

Shale spiders were introduced in Pandaria as a unique tamable family, offering hunters a blend of resilience and strategic utility. These spiders could generate and store energy to unleash powerful attacks, making them formidable in combat. Their ability to adapt to various roles, combined with their distinctive appearance, made them a standout choice for hunters seeking both functionality and visual appeal in their pet collection.

2.3 Other Exotic Families Introduced in Pandaria

Pandaria introduced several new exotic pet families, including Aqiri, Clefthooves, and Pterrordaxes. These unique creatures offered hunters diverse abilities, such as increased critical strike chances or enhanced defensive capabilities. The Aqiri, for example, provided powerful melee attacks, while Clefthooves excelled at ranged damage. These additions expanded the strategic options for hunters, allowing for tailored pet choices based on combat situations and playstyles, while also adding visual diversity to their arsenals.

Tracking and Locating Rare Hunter Pets

Rare hunter pets in Pandaria required meticulous tracking, often following specific patrol routes. Hunters used skills and patience to locate these elusive creatures for taming.

3.1 Rare Pet Tracking Mechanics in Pandaria

Rare pets in Pandaria required hunters to use tracking skills and follow specific patrol routes. These elusive creatures left behind tracks that players could follow to locate them. The process involved patience and dedication, as pets often appeared unpredictably. Hunters needed to be prepared to act quickly when encountering these rare beasts, ensuring they were tamed before others could interfere. Each rare pet had a unique path, making the hunt both challenging and rewarding.

3.2 Best Zones for Finding Rare Pets

The best zones for finding rare pets in Pandaria include Jade Forest, Valley of the Four Winds, Krasarang Wilds, and Kun-Lai Summit. Each zone offers unique environments where rare pets patrol. Jade Forest is ideal for water striders, while Valley of the Four Winds is home to swift clefthooves. Kun-Lai Summit hosts snow leopards, and Krasarang Wilds features elusive stags. Hunters should explore these areas thoroughly to maximize their chances of taming rare companions.

Exotic Pets and Their Specializations

Exotic pets in Pandaria offer unique specializations, enhancing a hunter’s combat effectiveness. Their distinct abilities make them invaluable for specific roles, adding depth to hunter strategies and gameplay.

4.1 Benefits of Exotic Pets for Hunters

Exotic pets in Pandaria offer unique abilities and enhanced stats, making them highly versatile for both PvE and PvP. Their specialized skills, such as Harden Carapace or Monstrous Bite, provide utility and damage boosts. Exotic pets also benefit from increased health and attack power, making them ideal for challenging encounters. Hunters can further customize their exotic pets with talents, ensuring they fit seamlessly into any combat strategy or role.

4.2 Best Exotic Pets to Tame in Pandaria

Shale spiders, water striders, and pterrordaxes are among the best exotic pets to tame in Pandaria. Shale spiders offer robust defensive abilities, while water striders provide exceptional movement speed in aquatic areas. Pterrordaxes are prized for their raw power and versatility. These exotic pets are highly sought after due to their unique abilities and strengths, making them must-have additions for any serious hunter in Pandaria.

Tamable Bosses and Elite Pets

Pandaria introduced elite pets like Glimmer, a rare water strider, and challenging boss-like creatures. These unique pets require skill and strategy to tame, offering hunters exclusive rewards and bragging rights for their collections.

5.1 Notable Tamable Bosses in Pandaria

Pandaria introduced several elite pets that function like boss encounters, offering unique challenges for hunters. One notable example is Glimmer, a rare water strider found in the Jade Forest, known for its elusive patrol routes. These tamable bosses often possess exclusive abilities, making them highly sought after by hunters. Taming such creatures requires precision, patience, and a deep understanding of their behaviors and patterns.

5.2 Strategies for Taming Elite Pets

Taming elite pets in Pandaria requires careful planning and execution. Hunters must track these rare creatures, studying their patrol routes and habits. Using abilities like Track Beasts or Scare Beast can help isolate targets. Environmental advantages, such as line-of-sight tactics, can prevent unwanted adds. Equipping gear like a Freeze Trap ensures control during taming. Patience and practice are key, as these challenging encounters test a hunter’s skill and dedication.

Pet Abilities and Buffs

Pandarian pets offer unique abilities that enhance a hunter’s gameplay. From crowd control to damage boosts, these pets provide various buffs tailored to different combat scenarios and strategies.

6.1 Unique Abilities of Pandarian Pets

Pandarian pets possess unique abilities that enhance gameplay. Water Striders provide passive swim speed, while Shale Spiders offer healing. Other exotic pets like Basilisks and Chimaeras bring powerful crowd control and damage. These abilities make each pet valuable in specific situations, allowing hunters to adapt strategies for optimal performance. The variety of skills ensures diverse gameplay and tailored approaches to different combat scenarios.

6.2 Synergizing Pet Buffs for Optimal Performance

Synergizing pet buffs enhances a hunter’s effectiveness in both PvE and PvP. By combining abilities like increased swim speed from Water Striders with healing from Shale Spiders, hunters can optimize performance. Crowd control from Basilisks pairs well with damage-boosting buffs, creating powerful synergies. This strategic use of pet abilities ensures versatility and improved gameplay, making pet selection and buff coordination crucial for success in various combat scenarios and challenges;

Resources for Hunters in Pandaria

Hunters in Pandaria require specific resources like meat, fish, and special items to feed and maintain their pets, ensuring they stay healthy and perform optimally in combat.

7.1 Food and Feeding Requirements for Pets

Hunters must feed their pets specific foods like meat, fish, and fungi to maintain their health and performance. Each pet family has unique dietary needs, such as raw meat for carnivores or bread for certain exotic pets. Regular feeding ensures pets stay loyal and effective in combat, while neglecting their diet can lead to reduced efficiency. Proper feeding habits are essential for maximizing a pet’s abilities and longevity.

7.2 Best Practices for Pet Care and Maintenance

Regularly heal and feed your pets to maintain their health and loyalty. Use the Mend Pet ability to restore health after battles. Dismiss injured pets to allow them to recover. Rotate pets strategically to optimize their abilities in different situations. Keep your pet’s skills updated as you level up; A well-maintained pet enhances your hunter’s effectiveness and ensures longevity in both PvE and PvP scenarios.

New Challenges and Opportunities

Mists of Pandaria introduced new challenges like tracking rare pets and mastering the pet battle system, offering hunters opportunities to enhance their strategies and pet collections.

8.1 Leveling and Pet Training in Pandaria

Leveling and training pets in Pandaria required strategic planning, as new pet families like water striders and shale spiders offered unique abilities. Hunters had to explore diverse zones to find rare pets and train them effectively. The introduction of the pet battle system added depth, allowing hunters to test their pets’ strengths. Proper food and care were essential to maintain pet health and performance during leveling.

8.2 The Impact of Pet Battles on Hunter Strategy

Pet battles in Pandaria revolutionized hunter strategy by introducing a new layer of depth to pet management. Hunters could now engage in turn-based combat with their pets, testing their abilities and strengths. This system encouraged hunters to diversify their pet collections and strategically choose pets with complementary skills. The ability to showcase pet prowess in battles added a fresh dynamic to both PvE and PvP gameplay, enhancing overall hunter effectiveness.

Mastery of Pandaria’s diverse pets enhances a hunter’s effectiveness. Explore thoroughly, experiment with abilities, and adapt strategies to maximize your hunter’s potential in this expansive world.

9.1 Maximizing Your Hunter’s Potential with Pandarian Pets

To maximize your hunter’s potential in Pandaria, explore thoroughly to discover rare and exotic pets. Track unique abilities and synergize buffs for optimal performance. Maintain well-fed pets and experiment with different specializations. Adapt strategies based on pet traits and utilize their strengths in various combat scenarios. Stay updated with the latest guides and continuously refine your approach to excel in both PvE and PvP environments.

jack lalanne power juicer user manual

Welcome to the Jack LaLanne Power Juicer, a high-quality appliance designed to make juicing easy and efficient. This user manual will guide you through its features, safety tips, and maintenance to ensure optimal performance and longevity. By following the instructions, you can unlock the full potential of your juicer and enjoy healthy, delicious juices at home.

Overview of the Product and Its Benefits

The Jack LaLanne Power Juicer is a powerful and efficient appliance designed to extract fresh juice from fruits and vegetables. With its stainless steel blade and robust motor, it ensures maximum juice yield while preserving nutrients. Its compact design and easy-to-use interface make it a convenient addition to any kitchen, promoting a healthier lifestyle through delicious homemade juices.

Importance of Reading the User Manual

Reading the user manual is crucial for safe and effective operation of the Jack LaLanne Power Juicer. It provides essential safety precautions, assembly guidelines, and maintenance tips to ensure optimal performance. Following the manual helps prevent accidents, extends the appliance’s lifespan, and guarantees the best juicing experience, making it a vital step before first use.

Key Features of the Jack LaLanne Power Juicer

The Jack LaLanne Power Juicer features automatic shut-off, a built-in thermal cut-off switch, stainless steel blades, and easy assembly for safe, efficient juicing and durability.

Automatic Shut Off and Locking Bar Safety Features

The Jack LaLanne Power Juicer includes an automatic shut-off feature that stops the motor if the unit becomes jammed, preventing damage. The locking bar ensures the lid is securely fastened, enhancing safety during operation. These features protect both the user and the appliance, ensuring safe and efficient juicing experiences.

Built-In Thermal Cut Off Switch for Motor Protection

The Jack LaLanne Power Juicer features a built-in thermal cut-off switch, designed to protect the motor from overheating. This safety mechanism automatically shuts off the motor if it becomes too hot, preventing damage. This feature ensures the appliance operates safely and efficiently, while also extending the lifespan of the motor and overall juicer performance.

Safety Precautions and Guidelines

Always follow safety tips to avoid injury and ensure proper function. Keep the juicer out of children’s reach, avoid hot surfaces, and never use a damaged cord or malfunctioning unit. Consult a physician before giving fresh juice to children.

Basic Safety Tips for Operating the Juicer

Always keep the juicer out of children’s reach and ensure the locking bar is securely in place before use. Avoid placing the juicer near hot surfaces or using a damaged cord. Never modify the plug or force it into an outlet. Use the pusher tool to guide food, keeping hands and utensils away from the blade. Regularly inspect and maintain the appliance to ensure safe operation.

Precautions to Avoid Injury and Damage

Avoid overripe fruits and vegetables, as they can clog the filter. Never use bananas or avocados, as they lack sufficient juice. Do not submerge the base in water or clean it with harsh chemicals. Regularly clean the filter and blade to prevent pulp buildup. Ensure the juicer is unplugged before disassembling or cleaning to avoid electrical shock or injury.

Assembly and Disassembly Instructions

Place the base on a flat surface, insert the filter, and secure the blade with the crescent tool. Ensure all parts are properly aligned and locked. For disassembly, unplug the juicer, lower the locking bar, and remove components in the reverse order of assembly. Clean each part thoroughly before reassembling.

Step-by-Step Guide to Assembling the Juicer

Begin by positioning the base on a stable surface. Align the receptacle with the base, ensuring the juice spout faces the locking bar. Insert the filter into the receptacle, matching the screw peg. Place the blade inside the filter and secure it using the crescent tool by turning clockwise until tight. Attach the lid with the pulp guard, ensuring it locks securely with the locking bar. Insert the pusher into the chute, ready for use. Ensure all components are properly assembled before operation for safety and efficiency.

Proper Disassembly for Cleaning and Maintenance

Before disassembling, ensure the juicer is turned off and unplugged. Lower the locking bar and remove the lid and pulp collector. Use the crescent tool to remove the blade by turning it counter-clockwise. Wash all parts with mild detergent, rinse thoroughly, and dry. Reassemble only when all components are completely dry to maintain efficiency and safety.

Operating the Jack LaLanne Power Juicer

To operate, ensure the juicer is properly assembled and plugged in. Turn it on and let it run for 10 seconds before adding fruits or vegetables. Use the pusher to feed items gently, avoiding force. Allow the blade to process contents without overloading. After use, let the juicer spin briefly before turning it off.

Preparing the Juicer for Use

Place the base on a dry, flat surface. Attach the receptacle, aligning it with the locking bar. Insert the filter, matching the opening to the screw peg. Secure the blade using the crescent tool without over-tightening. Ensure the locking bar is fully upright and locked before use to guarantee safe and efficient operation.

Feeding Fruits and Vegetables Safely and Effectively

Use the pusher to gently feed fruits and vegetables into the juicer, avoiding force. Feed whole or large-cut pieces, removing pits and seeds to prevent damage. Avoid bananas and avocados, as they may clog the filter. Let the juicer run briefly after feeding to ensure maximum extraction before adding more ingredients.

Cleaning and Maintenance Tips

Regular cleaning ensures optimal performance. Rinse filter and blade under warm water, using a soft brush for pulp removal. Dry all parts thoroughly after cleaning. Avoid submerging the base in water or using harsh chemicals. Place a plastic bag in the pulp collector for easy disposal. This maintains hygiene and prolongs the juicer’s lifespan.

Recommended Cleaning Procedures

For optimal maintenance, rinse the filter and blade under warm water immediately after use. Use a soft-bristled brush to remove pulp and debris. Dry all components thoroughly to prevent rust. Avoid submerging the base in water; instead, wipe it with a damp cloth. Regular cleaning ensures longevity and prevents clogging, keeping your juicer in top condition for consistent performance;

Maintaining the Juicer for Long-Term Use

Regularly clean and dry all parts to prevent rust and bacterial growth. Lubricate moving components periodically to ensure smooth operation. Store the juicer in a cool, dry place to protect it from moisture and dust. Check for worn-out parts like blades and filters, replacing them as needed to maintain efficiency and prevent damage over time.

Troubleshooting Common Issues

Address common problems like motor issues or clogging by checking assembly, cleaning filters, and ensuring proper operation. Refer to the manual for detailed solutions to ensure smooth juicing experiences.

Identifying and Resolving Motor Problems

Common motor issues include overheating, loud noise, or failure to start. Check if the unit is properly assembled and plugged in. Ensure the locking bar is securely locked, as the motor won’t run otherwise. Clean the filter if clogged, especially from overripe fruit pulp; Allow the motor to cool if it overheats. If problems persist, contact customer support for assistance.

Addressing Juice Splashing and Filter Clogging

Juice splashing can be minimized by ensuring the lid is securely locked and the pulp guard is properly aligned. For filter clogging, turn off the juicer, unplug it, and clean the filter under running water with a soft brush. Avoid overripe fruits, as they can cause excessive pulp buildup. Regularly cleaning the filter and blade helps maintain smooth operation and prevents clogs.

Accessories and Replacement Parts

The Jack LaLanne Power Juicer offers various accessories, including replacement blades, pulp collectors, and recipe cookbooks, to enhance your juicing experience. Visit www.powerjuicer.com or call 1-800-526-2518 to order parts and learn about warranty details for maintaining your juicer’s performance;

Available Accessories for Enhanced Juicing Experience

Enhance your juicing experience with the Jack LaLanne Power Juicer’s accessory kit, featuring a recipe cookbook, measuring cup, overflow platform, filter brush, and replacement blade and pulp kits. These accessories ensure optimal performance and convenience. Order online at www.powerjuicer.com or call 1-800-526-2518 to upgrade your juicing routine today.

Replacing Blades and Pulp Collectors

To replace the blade or pulp collector, first unplug the juicer and disassemble it. Use the orange crescent tool to remove the blade by turning it counterclockwise. Handle sharp parts with care. Ensure all components are properly aligned and securely locked during reassembly. Replacement parts are available at www.powerjuicer.com or by calling 1-800-526-2518.

Recipes and Healthy Living Tips

Discover delicious recipes in the Recipes for Healthy Living Cookbook. Try the Green Goddess or Citrus Burst for refreshing juices. Incorporate juicing into your daily routine for a balanced diet and improved well-being.

Recommended Recipes for Optimal Juicing

Explore the Recipes for Healthy Living Cookbook for delicious and nutritious options. Try the Green Goddess, combining kale, apple, and lemon, or the Citrus Burst with oranges, grapefruits, and pineapples. Avoid using bananas and avocados, as they clog the juicer. These recipes enhance flavor and nutrition, ensuring a perfect blend every time for a healthier lifestyle.

Incorporating Juicing into a Healthy Lifestyle

Juicing with the Jack LaLanne Power Juicer can enhance your wellness journey. Start by consulting a physician, especially for children or infants. Create a daily routine, beginning with simple recipes like the Green Goddess or Citrus Burst. Use fresh, organic ingredients and gradually introduce new flavors. Balance juicing with a varied diet and lifestyle changes for long-term health benefits.

Warranty and Customer Support

The Jack LaLanne Power Juicer offers a lifetime motor warranty and 60-day coverage for other parts. Contact customer support at 1-800-526-2518, available from 9:00 AM to 7:00 PM EST, Monday through Friday, for assistance with any issues.

Understanding the Warranty Coverage

The Jack LaLanne Power Juicer is backed by a lifetime warranty for the motor and 60-day coverage for all other parts. The warranty ensures defect-free materials and workmanship, with options for repair or replacement. Proper assembly and usage are required to maintain coverage. For assistance, contact customer support at 1-800-526-2518, available Monday to Friday, 9:00 AM to 7:00 PM EST.

Reaching Out to Customer Service

For assistance with your Jack LaLanne Power Juicer, contact customer service at 1-800-526-2518, available Monday to Friday from 9:00 AM to 7:00 PM EST. Friendly staff are ready to address questions, repairs, or concerns. Ensure your appliance is properly assembled and operated to maintain warranty coverage and optimal performance.

Purchasing and Shipping Information

The Jack LaLanne Power Juicer is available for purchase online or by phone. Orders are processed securely, with shipping details and payment options provided upon checkout.

Please allow 4-6 weeks for delivery. For more information, visit www.powerjuicer.com or call 1-800-526-2518. Prices are subject to change; U.S. currency only accepted.

How to Order Accessories and Replacement Kits

To order accessories or replacement kits for your Jack LaLanne Power Juicer, visit www.powerjuicer.com or call 1-800-526-2518. Available items include blade replacement kits, pulp collectors, and recipe cookbooks. Payments can be made via credit card, check, or money order (U.S. currency only). Shipping typically takes 4-6 weeks, and prices are subject to change.

For CT, NY, and NV residents, applicable sales tax applies. Orders can be mailed to the provided address with payment details enclosed. Customer service is available Monday-Friday, 9:00 AM to 7:00 PM EST, to assist with any inquiries.

Shipping Details and Payment Options

Orders are shipped within 4-6 weeks. Payment options include credit cards (VISA, MasterCard, Discover), checks, or money orders (U.S. currency only). Send payments to POWER JUICER, 26 Barnes Industrial Rd. North, P.O. Box 3125, Dept. PJ999, Wallingford, CT 06494. CT, NY, and NV residents must add applicable sales tax. Prices are subject to change.