Bosch Washing Machine User Guide: A Comprehensive Overview (Updated 03/26/2026)
Today’s date is 03/26/2026 14:22:11; This manual initiates your experience with the Bosch Exxcel‚ ensuring successful operation and enjoyment of your upgraded Serie 4 machine.
Welcome! This user manual serves as your comprehensive guide to operating and maintaining your new Bosch washing machine. We are thrilled you’ve chosen Bosch‚ a brand synonymous with quality‚ innovation‚ and reliability in home appliances. This guide is specifically designed for the upgraded Bosch Serie 4 Washing Machine‚ and also applies to many Exxcel models‚ offering detailed instructions to maximize performance and longevity.
Before you begin‚ it’s crucial to correctly identify your specific model. Locate the model number and serial number‚ typically found on a sticker located on the inside of the door‚ or on the rear of the appliance. Record these numbers for future reference‚ particularly when contacting customer support or ordering replacement parts. Knowing your model number ensures you receive the most accurate and relevant assistance. This manual marks the beginning of your journey‚ guiding you towards successful operation and enjoyment.
Safety Precautions
Important Safety Instructions: Your safety is paramount. Before operating your Bosch washing machine‚ carefully read and understand all safety precautions outlined in this manual. Failure to adhere to these guidelines could result in personal injury or damage to the appliance.
Key Precautions: Never operate the machine if the power cord or plug is damaged. Ensure the appliance is properly grounded. Do not attempt to repair the machine yourself; contact qualified service personnel for any repairs. Keep children and pets away from the washing machine during operation. Never open the door during a wash cycle. Avoid contact with water inside the drum during or immediately after a cycle. Disconnect the appliance from the power supply before cleaning or performing maintenance. Always follow detergent manufacturer’s instructions and use only recommended detergents.
Initial Setup & Installation
Preparing for Installation: Before commencing installation‚ ensure you have all necessary components – the washing machine‚ water inlet hoses‚ drain hose‚ and this user guide. Verify the electrical outlet meets the machine’s power requirements. A dedicated‚ grounded outlet is crucial for safe operation.
Step-by-Step Guide: Begin by removing all shipping bolts and packaging materials. Carefully inspect the machine for any transit damage. Position the washing machine on a firm‚ level surface. Adjust the leveling feet to eliminate any wobble. Connect the water inlet hoses to both the machine and the water supply‚ ensuring tight connections to prevent leaks. Attach the drain hose securely to a suitable drain point. Finally‚ confirm all connections are secure before powering on the appliance.

Unpacking and Inspection

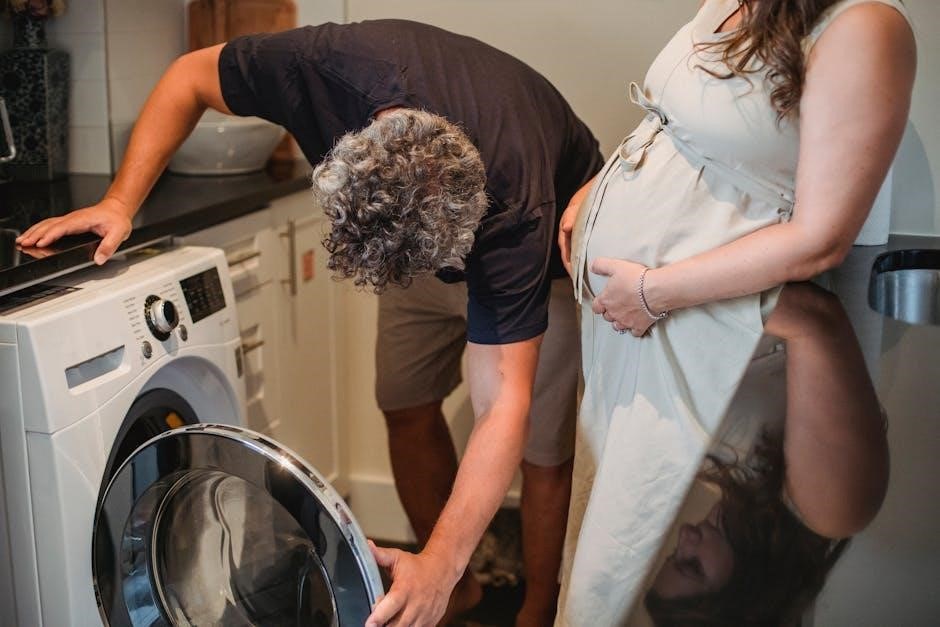
Careful Unboxing: Upon delivery‚ carefully unpack your new Bosch washing machine. Retain the original packaging materials for potential future transport or warranty claims. Inspect the exterior of the machine for any visible signs of damage incurred during shipping‚ such as dents‚ scratches‚ or broken parts.
Component Verification: Cross-reference the included components with the packing list. Ensure all items – the washing machine itself‚ water inlet hoses‚ drain hose‚ user manual‚ and any accessories – are present. Critically‚ locate and remove all shipping bolts and protective packaging inside the drum. Failure to remove these can cause significant damage during operation. Document any discrepancies or damage immediately and contact your retailer or Bosch customer support.
Positioning and Leveling
Optimal Placement: Position your Bosch washing machine on a firm‚ level floor capable of supporting its weight‚ especially when fully loaded with laundry. Avoid placing it in areas with excessive moisture or direct sunlight. Ensure sufficient space around the machine for proper ventilation and to facilitate easy access for maintenance and loading/unloading.
Achieving Stability: Utilize a spirit level to verify the machine’s levelness. Adjust the adjustable feet at the base of the machine until it is perfectly level‚ both front-to-back and side-to-side. Proper leveling minimizes vibration and noise during operation‚ extending the machine’s lifespan. Secure the locking nuts on the feet after leveling to prevent accidental movement. An unstable machine can ‘walk’ during cycles‚ causing damage.
Connecting Water Supply & Drain Hose
Water Inlet Connection: Carefully connect the supplied water inlet hose to both the washing machine’s inlet valve and a suitable water tap. Ensure the connections are tight to prevent leaks. Use new supply hoses if the old ones show any signs of wear. A dedicated water tap is recommended for optimal performance and to avoid interruptions.
Drain Hose Installation: Position the drain hose securely into a standpipe or laundry sink‚ ensuring it’s at the correct height as specified in the manual to prevent siphoning. Avoid kinks or sharp bends in the hose‚ as these can restrict water flow. Secure the hose to prevent it from dislodging during operation. Regularly inspect the drain hose for any damage or blockages.
Understanding Your Bosch Washing Machine Control Panel
Overview: Your Bosch washing machine features an intuitive control panel designed for ease of use. The central dial selects wash programs – Cotton‚ Delicates‚ Wool‚ Quick Wash‚ and more – each tailored for specific fabric types and soil levels. Digital displays clearly indicate the selected program‚ remaining time‚ temperature‚ and spin speed.
Key Buttons & Indicators: Familiarize yourself with buttons like ‘Start/Pause’‚ ‘Temperature’‚ ‘Spin Speed’‚ and ‘Options’. Indicator lights signal the machine’s status – running‚ paused‚ or completed. Special function buttons activate features like ‘EcoSilence Drive’ or ‘AntiStain’. The ‘Delay Start’ function allows you to schedule washes for convenience. Consult the program guide for detailed settings and optimal results.
Detergent & Fabric Softener Dispenser Guide
Compartment Breakdown: The Bosch detergent dispenser typically features three compartments. Compartment I‚ often marked with “I” or a Roman numeral‚ is for pre-wash detergent – use this only when a pre-wash cycle is selected. Compartment II‚ usually indicated by “II”‚ is for the main wash detergent; powder‚ liquid‚ or pods are suitable here. Compartment ✱ or a flower symbol is reserved for fabric softener.
Dosage & Compatibility: Always refer to the detergent manufacturer’s instructions for correct dosage‚ adjusting based on load size and soil level. Bosch machines are compatible with various detergent types‚ including powder‚ liquid‚ and pods. Avoid overfilling compartments‚ as this can lead to residue and reduced cleaning performance. Never pour detergent directly into the drum.
Types of Detergent Compatible with Bosch Machines
Powder Detergents: Bosch washing machines readily accept powder detergents‚ offering a cost-effective cleaning solution. Ensure the powder dissolves completely‚ especially in colder water temperatures‚ to prevent residue on clothes. Use the appropriate amount based on water hardness and load size.
Liquid Detergents: Liquid detergents are popular for their ease of use and quick dissolving properties. They are particularly effective at removing greasy stains and are suitable for all water temperatures. Bosch machines handle liquid detergents efficiently‚ delivering consistent results.
Detergent Pods/Capsules: Convenient and pre-measured‚ detergent pods are a hassle-free option. Place pods directly into the drum before adding clothes. Avoid using pods with certain programs like short washes‚ as they may not fully dissolve. Always check the pod packaging for compatibility guidelines.
Correct Dosage & Compartment Usage

Compartment I (Pre-wash): Use this compartment for detergent when selecting a pre-wash program‚ ideal for heavily soiled items. Add detergent only if a pre-wash is activated.
Compartment II (Main Wash): This is where you’ll add detergent for the main wash cycle. The amount depends on load size and soil level – refer to the detergent packaging for guidance. For liquid detergents‚ follow the fill lines within the compartment.
Compartment III (Fabric Softener): Reserved exclusively for fabric softener. Do not overfill; the softener will be dispensed automatically during the rinse cycle. Avoid direct contact of fabric softener with clothes‚ as it can cause staining. Always dilute concentrated fabric softener with water before adding.
Dosage Considerations: Water hardness significantly impacts detergent effectiveness. Hard water requires more detergent than soft water. Adjust dosage accordingly to achieve optimal cleaning results and prevent residue buildup.
Washing Machine Programs Explained
Your Bosch washing machine offers a variety of programs tailored to different fabric types and soil levels. Understanding these programs ensures optimal cleaning and garment care. The Cotton Program is designed for everyday cotton items‚ offering adjustable temperature and spin speed settings for customized cleaning.
For delicate fabrics‚ the Delicate/Silk Program provides a gentle wash cycle with reduced mechanical action‚ protecting sensitive materials. The Wool Program is specifically engineered for woollens‚ utilizing a delicate wash and low spin speed to prevent shrinkage and damage.
Need a quick refresh? The Quick Wash/Express Program is perfect for lightly soiled items‚ delivering a fast and efficient wash in under an hour. Explore additional programs like synthetics‚ dark wash‚ and allergy plus for specialized cleaning needs.
Cotton Program – Detailed Settings
The Bosch Cotton Program offers extensive customization for optimal results. Temperature selection ranges from cold wash (15°C) to high heat (90°C)‚ catering to varying soil levels and fabric care needs. Adjust the spin speed from No Spin to Maximum (1600 rpm) to control moisture retention – lower speeds for delicate cottons‚ higher for quicker drying.
Stain removal options‚ like pre-wash‚ enhance cleaning power for stubborn marks. Utilize the Eco mode to conserve water and energy without compromising cleanliness. The IronEasy option reduces creasing‚ simplifying ironing. For heavily soiled items‚ select the Intensive stain setting.
Consider the soil level setting – lightly soiled‚ normally soiled‚ or heavily soiled – to optimize wash duration and detergent usage. Remember to consult garment care labels before selecting settings.
Delicate/Silk Program – Gentle Care
The Bosch Delicate/Silk program is engineered for the most sensitive fabrics‚ ensuring gentle cleaning and preventing damage. This program utilizes a reduced drum action and lower water temperature (typically max 30°C) to minimize stress on delicate fibers. Spin speed is automatically limited to protect fabric integrity‚ generally not exceeding 800 rpm.
Always use a liquid detergent specifically designed for delicates; powder detergents may not dissolve completely and can leave residue. Avoid using bleach or fabric softener‚ as these can harm delicate materials. The program duration is extended to allow for thorough yet gentle cleaning.
Hand-washable items‚ silk garments‚ and lingerie are ideal candidates for this program. Always check the garment’s care label before washing‚ and consider using a laundry bag for added protection against snagging or stretching.
Wool Program – Protecting Your Woollens
The Bosch Wool Program is specifically designed to care for your wool garments‚ preventing shrinkage and maintaining their natural softness. This program employs an extremely gentle wash action and consistently low water temperature (typically around 30°C) to safeguard wool fibers. The spin speed is significantly reduced‚ often below 600 rpm‚ to minimize stretching and distortion.
Only use detergents specifically formulated for wool‚ as regular detergents can damage the delicate fibers. Avoid using bleach or fabric softener. The program duration is longer to ensure thorough cleaning without aggressive agitation.
Wool sweaters‚ scarves‚ and blankets are suitable for this program‚ provided they are labeled as machine washable. For extra protection‚ place woollens inside a mesh laundry bag. Always check the garment’s care label before washing‚ and never overload the machine.
Quick Wash/Express Program – For Lightly Soiled Items
The Bosch Quick Wash/Express Program is ideal for refreshing lightly soiled laundry when time is of the essence. This program delivers a complete wash cycle in a significantly reduced timeframe – typically between 15 and 30 minutes – without compromising cleaning performance. It utilizes increased water flow and a moderate wash action to quickly remove surface dirt and odors.
This program is best suited for items like t-shirts‚ blouses‚ and everyday clothing that haven’t accumulated heavy staining. Avoid overloading the machine‚ as this can hinder effective cleaning. Use a small amount of detergent appropriate for a quick wash cycle.
While efficient‚ the Quick Wash program doesn’t offer the same level of deep cleaning as longer‚ more intensive cycles. It’s a perfect solution for a quick refresh‚ but for heavily soiled items‚ a standard program is recommended.
Special Functions & Options
Bosch washing machines offer a range of special functions designed to enhance your laundry experience and cater to specific needs. The EcoSilence Drive technology ensures exceptionally quiet operation and superior energy efficiency‚ minimizing noise pollution and reducing your environmental impact. This innovative motor design also contributes to the machine’s long-term durability.
The AntiStain function is a powerful tool for tackling stubborn stains like red wine‚ grass‚ or chocolate. This program utilizes a specifically optimized wash process‚ adjusting temperature and drum movements to effectively lift and remove difficult blemishes. It’s recommended to treat stains as quickly as possible for optimal results.
Additional options may include delay start‚ allowing you to schedule washes for convenient times‚ and extra rinse‚ providing enhanced allergen removal. Explore your machine’s control panel to discover the full spectrum of available features.
EcoSilence Drive – Energy Efficiency
The EcoSilence Drive is a hallmark of Bosch washing machine technology‚ representing a significant advancement in motor design. Unlike conventional motors‚ the EcoSilence Drive operates with remarkably quiet efficiency‚ minimizing disruptive noise during laundry cycles. This brushless‚ direct-drive motor utilizes magnetic levitation‚ reducing friction and wear‚ ultimately extending the lifespan of your appliance.
Beyond quiet operation‚ the EcoSilence Drive contributes substantially to energy savings. By optimizing power consumption‚ it helps lower your electricity bills and reduces your environmental footprint. Bosch machines equipped with this technology consistently achieve high energy efficiency ratings‚ often exceeding industry standards.
Furthermore‚ the precise motor control allows for optimized drum movements‚ enhancing wash performance and fabric care. It’s a key component in Bosch’s commitment to sustainable and effective laundry solutions.
AntiStain – Removing Stubborn Stains
Bosch washing machines featuring the AntiStain system offer a targeted solution for tackling persistent and challenging stains. This innovative function automatically adjusts washing parameters – including temperature‚ drum movement‚ and soak times – to effectively remove a variety of common stains‚ such as blood‚ grass‚ red wine‚ and chocolate;
The AntiStain program doesn’t require pre-treating stains; simply select the appropriate stain type from the machine’s control panel‚ and the washing machine will do the rest. This intelligent system optimizes the cleaning process‚ ensuring thorough stain removal while protecting your fabrics.
It’s important to note that the AntiStain function is most effective when used on fresh stains. While it can significantly improve the removal of set-in stains‚ results may vary depending on the stain’s age and severity. Always consult the garment’s care label before using this feature.
Troubleshooting Common Issues
Encountering issues with your Bosch washing machine can be frustrating‚ but many problems have simple solutions. If your machine won’t start‚ check the power supply and ensure the door is securely closed. A common issue is a blocked drain filter‚ causing water to remain in the drum – locate and clean the filter regularly.
Error codes displayed on the control panel indicate specific problems; consult the full user manual for a detailed explanation of each code. Leaking water often points to loose hose connections or an overloaded drum. Unusual noises during operation could signify foreign objects trapped within the drum or a problem with the motor.
Before contacting customer support‚ try resetting the machine by unplugging it for a few minutes. Remember to always prioritize safety and avoid attempting repairs yourself if you are not qualified.

Cleaning & Maintenance
Regular cleaning and maintenance are crucial for prolonging the life and efficiency of your Bosch washing machine. Wipe down the exterior with a damp cloth and mild detergent to prevent grime buildup. Pay particular attention to the detergent dispenser drawer‚ removing any residue regularly to ensure optimal performance.
The rubber door seal should be inspected and cleaned frequently to prevent mold and mildew growth. Leaving the door slightly ajar after each wash cycle promotes ventilation and reduces moisture. Additionally‚ periodically clean the water inlet filters to prevent blockages and maintain water flow.
For optimal hygiene‚ consider running a drum cleaning cycle with a dedicated washing machine cleaner every few months. This helps eliminate bacteria and odors‚ keeping your machine fresh and your clothes clean.
Drum Cleaning – Keeping Your Machine Fresh
Maintaining a fresh and hygienic drum is vital for optimal washing performance and preventing unpleasant odors. Bosch recommends performing a dedicated drum cleaning cycle approximately every three months‚ or more frequently with heavy use. Utilize a commercially available washing machine cleaner specifically designed for drum cleaning.
Before initiating the cycle‚ ensure the drum is empty. Add the cleaning solution to the detergent dispenser‚ following the manufacturer’s instructions on the cleaner packaging. Select the highest temperature drum cleaning program available on your Bosch machine – typically a hot wash cycle.
This process effectively removes detergent residue‚ fabric softener buildup‚ and potential mold or mildew growth within the drum; A clean drum ensures your laundry remains fresh and free from contaminants‚ extending the lifespan of your Bosch washing machine.