GE double oven self-clean instructions guide users through effortless oven maintenance․ This feature simplifies cleaning by locking in food residue and burning it to ash, ensuring efficiency and safety․ Always follow the provided guidelines to avoid damage and ensure optimal performance․ Proper preparation and precautions are essential for a successful self-clean cycle․
1․1 Understanding the Self-Clean Feature
The self-clean feature on GE double ovens uses high heat to burn food residue into ash, simplifying cleanup․ This process locks the door for safety and efficiency, requiring no harsh chemicals․ It’s designed to handle tough stains and grime, making maintenance easier․ Understanding this mechanism helps users utilize the feature effectively and safely, ensuring their oven remains in prime condition․ Always follow manufacturer guidelines for optimal results․
1․2 Benefits of Using the Self-Clean Function
Using the self-clean function on your GE double oven offers numerous benefits, including effortless removal of stubborn food residue and grime without abrasive cleaners․ It saves time and effort, ensuring a sparkling interior․ The high-heat process sanitizes the oven, eliminating bacteria and odors․ This feature also prolongs the oven’s lifespan by maintaining its condition․ Regular use keeps your oven hygienic and efficient, enhancing cooking performance over time․ It’s a convenient and effective cleaning solution․

Safety Precautions Before Starting the Self-Clean Cycle
Ensure the oven is empty, remove racks, and ventilate the kitchen․ Avoid touching hot surfaces and keep children away during the cycle․ Follow all safety guidelines carefully to prevent accidents and damage․
2․1 Ensuring the Oven is Empty
Before starting the self-clean cycle, ensure the oven is completely empty․ Remove all racks, baking trays, and accessories, as high temperatures can damage them․ Avoid leaving utensils or food residue, as they may interfere with the cleaning process; For heavy soil, consider using oven cleaners beforehand․ Never use abrasive materials on self-cleaning panels․ Always allow the oven to cool before wiping down surfaces, ensuring safety and optimal cleaning results․
2․2 Removing Oven Racks and Accessories
Remove all oven racks, baking trays, and utensils before starting the self-clean cycle․ Only enameled racks can remain inside; shiny racks must be taken out to prevent damage․ Wash racks separately with soap and water․ Ensure no accessories block the oven door or interfere with cleaning․ For heavy soil, consider using oven cleaners beforehand․ Always follow the manufacturer’s instructions for specific rack care to maintain their condition and ensure optimal cleaning results․
2․3 Ventilating the Kitchen
Proper ventilation is crucial during the self-clean cycle to prevent harmful fumes from accumulating․ Open windows and doors to ensure good airflow․ Turn on exhaust fans to vent out smoke and odors․ Keep the kitchen well-ventilated throughout the cycle to maintain a safe environment․ This step helps prevent inhaling harsh fumes and ensures the process is safe and efficient․ Always prioritize ventilation to protect your health and the integrity of your kitchen space․
Preparing the Oven for Self-Cleaning
Preparing your GE double oven for self-cleaning involves cleaning the exterior and removing racks․ Ensure the oven door is securely locked for safe and efficient cleaning․
3․1 Cleaning the Oven Exterior
Cleaning the exterior of your GE double oven is essential before starting the self-clean cycle․ Use a damp cloth to wipe down surfaces, avoiding abrasive cleaners or harsh chemicals․ Remove any food splatters or grime to ensure the exterior remains pristine․ For tough stains, apply a gentle cleaning product specifically designed for appliances․ This step ensures the oven looks its best and maintains its performance during the self-cleaning process․
3․2 Securing the Oven Door
Securing the oven door is a critical step before initiating the self-clean cycle․ Ensure the door is fully closed and latched to prevent heat escape and exposure to toxic fumes․ For GE models, engage the door lock mechanism according to the manufacturer’s instructions․ Double-check that the door is tightly sealed to allow the high temperatures to work effectively․ Never leave the door slightly ajar, as this can hinder the cleaning process and pose safety risks․
Operating the Self-Clean Cycle
Activate the self-clean mode by pressing the designated button on your GE oven controls․ Set the timer according to the manufacturer’s instructions for optimal cleaning․ Monitor the process to ensure safety and efficiency, keeping the kitchen well-ventilated to avoid fume buildup․ Follow on-screen prompts for dual oven models to clean both simultaneously if needed․
4․1 Activating the Self-Clean Mode
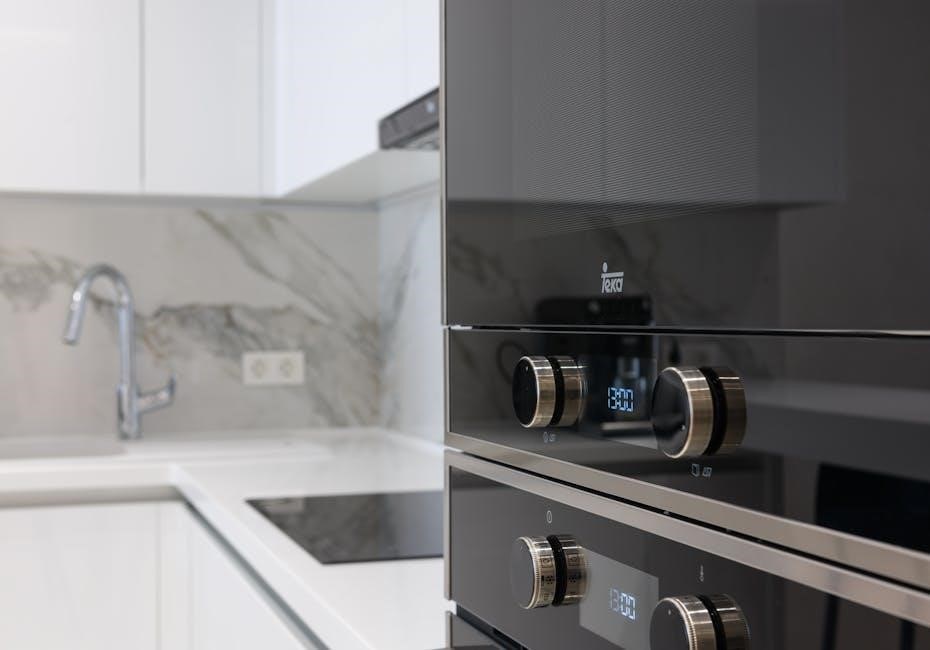
To activate the self-clean mode on your GE double oven, press and hold the Self Clean button until the display shows the activation message․ Ensure the oven door is securely locked, as indicated by the manufacturer’s instructions․ For models with a latch release button, press and hold it while sliding it into the clean position․ The oven will begin the high-heat cycle, converting food residue into ash․ Follow the on-screen prompts or manual guidelines for precise activation steps․
4․2 Setting the Timer
Setting the timer for the self-clean cycle on your GE double oven is a straightforward process․ Use the control panel to select the desired duration, typically ranging from 2 to 4 hours, depending on soil level․ Press the timer buttons to adjust the time, ensuring the display reflects your chosen duration․ Once set, press the Start button to begin the cycle․ The oven will automatically lock the door and initiate the cleaning process․ Always refer to your specific model’s manual for exact timer settings and operation guidelines to ensure optimal performance and safety․
4․3 Monitoring the Cleaning Process
While the self-clean cycle runs, ensure the oven door remains locked to maintain high temperatures․ Keep the kitchen well-ventilated to prevent fumes from accumulating․ Avoid opening the door or interrupting the cycle until it completes․ Monitor the timer and ensure no one, especially children, touches the hot surfaces․ After the cycle ends, allow the oven to cool down completely before cleaning residue․ Always follow safety guidelines to prevent accidents and ensure effective cleaning․
Post-Cycle Procedures
After the self-clean cycle, let the oven cool completely․ Wipe surfaces with a damp cloth to remove ash․ Dispose of debris safely and rinse thoroughly․ Always follow safety guidelines to prevent accidents during cleanup․
5․1 Allowing the Oven to Cool Down
After the self-clean cycle completes, turn off the oven and let it cool completely․ Avoid opening the door or touching surfaces until cooled to prevent burns․ This step ensures the oven is safe to handle and prepares it for final cleaning; Allowing the oven to cool down is crucial for safety and effective ash removal․ Always prioritize caution during this phase to avoid accidents․
5․2 Wiping Down the Oven Surfaces
Once the oven has cooled, use a damp cloth to wipe down the surfaces, removing ash and residue; Avoid abrasive materials to prevent scratching․ Focus on areas with heavy soil, ensuring a clean finish․ This step finalizes the cleaning process, leaving the oven ready for use․ Regular wiping helps maintain the oven’s condition and prevents future buildup․
Cleaning the Oven Door
Cleaning the oven door involves removing it for thorough scrubbing․ Use a gentle cleanser and water, avoiding abrasive materials․ Wipe away food residue carefully to maintain the door’s finish and ensure proper sealing․ Regular cleaning keeps the door looking new and functioning efficiently․
6․1 Removing the Door for Cleaning
Removing the oven door for cleaning involves unlocking the hinges․ Open the door slightly, then lift it off the hinges․ For some models, removing screws may be necessary․ Place the door on a protected surface to avoid scratches․ Ensure all locking mechanisms are disengaged before lifting․ This step allows for thorough cleaning without damaging the door or oven frame․ Always refer to your GE manual for specific instructions․
6․2 Cleaning the Door and Reattaching It
Clean the door with mild soap and a soft cloth, avoiding abrasive materials․ For tough stains, use a gentle scrubber or specialized oven cleaner․ Rinse thoroughly and dry to prevent water spots․ Reattach the door by aligning the hinges and securing it properly․ Ensure the door locks firmly to maintain oven efficiency․ Regular cleaning prevents grime buildup and keeps the door functioning smoothly․ Always refer to your GE manual for specific cleaning product recommendations․

Addressing Tough Stains
Tackle stubborn stains with specialized oven cleaners or steam cleaning․ Apply cleaner directly to stains for best results․ Always follow safety guidelines and product instructions․
7․1 Using Oven Cleaners for Heavy Soil
For tough stains, apply a commercial oven cleaner directly to the soiled areas․ Follow the product instructions carefully․ Wear gloves and ensure good ventilation․ Avoid abrasive materials that could damage the finish․ After cleaning, wipe down surfaces thoroughly․ Note that steam cleaning is not recommended for heavy soil․ For best results, run the self-clean cycle after using the cleaner to remove residual grime․ Always prioritize safety and manufacturer guidelines when using cleaning products․
7․2 Steam Cleaning as an Alternative
Steam cleaning offers a gentle alternative to harsh chemicals․ Pour water into the oven base, close the door, and activate the steam function․ Run a 30-minute cycle to loosen grime․ This method is ideal for lighter soil and avoids caustic cleaners․ Afterward, wipe surfaces with a damp cloth․ Steam cleaning is eco-friendly and reduces strong fumes․ Always follow the manufacturer’s guidelines for steam cleaning to ensure safety and effectiveness․

Troubleshooting Common Issues
Address common issues like the oven door not locking or the self-clean cycle failing to start․ Check error codes, ensure proper door alignment, and verify power supply․ Clean door seals and hinges regularly․ Consult the manual or contact GE support for unresolved problems․
8․1 Oven Door Not Locking Properly
If the oven door fails to lock, ensure it is properly aligned with the frame․ Clean the door seal and hinges to remove food residue․ Check for obstructions and verify the lock mechanism is functioning․ If issues persist, consult the user manual or contact GE customer support for assistance․ Proper door locking is essential for the self-clean cycle to operate safely and effectively․
8․2 Self-Clean Cycle Not Starting
If the self-clean cycle fails to start, ensure the oven is properly prepared․ Verify the door is securely locked and all racks are removed․ Check the power supply and ensure the controls are functioning correctly․ If issues persist, consult the user manual or contact GE customer support for troubleshooting guidance․ Addressing this promptly ensures safe and effective operation of the self-clean feature․

Maintenance Tips for Long-Term Efficiency
Regular light cleaning prevents grime buildup, ensuring optimal performance․ Check and replace oven seals to maintain heat efficiency and extend the appliance’s lifespan․
9․1 Regular Light Cleaning
Performing regular light cleaning helps maintain your GE double oven’s efficiency; Wipe down surfaces after each use to prevent grime buildup․ Use mild soap and water for gentle cleaning, avoiding abrasive materials․ Clean oven racks separately by soaking them in warm soapy water․ Regular maintenance ensures the self-clean feature works effectively and prolongs the appliance’s lifespan․ Consistent care prevents tough stains and keeps your oven functioning optimally․
9․2 Checking and Replacing Oven Seals
Regularly inspect oven seals for wear or damage to maintain optimal performance․ Check for cracks or gaps that may allow heat to escape, affecting efficiency and safety․ If damaged, replace the seals promptly to ensure efficient cooking and energy savings․ Obtain replacement seals from authorized dealers to guarantee compatibility․ Properly maintained seals prevent heat loss, enhancing safety and efficiency․ Inspect seals after each cleaning cycle to avoid potential issues and ensure reliable operation over time․