2015 subaru forester owners manual

The 2015 Subaru Forester Owner’s Manual provides essential information for optimal vehicle maintenance, operation, and safety. It includes detailed guides on features, troubleshooting, and emission control systems.

1.1 Purpose and Importance of the Manual

The 2015 Subaru Forester Owner’s Manual is designed to provide owners with comprehensive information for proper vehicle operation, maintenance, and safety. It ensures drivers understand features, troubleshooting, and emission control systems. This guide helps prevent damage, optimizes performance, and enhances safety, making it an indispensable resource for all Forester owners to maximize their driving experience effectively.

1.2 Vehicle Identification and Specifications

The 2015 Subaru Forester is identified as part of the fourth generation, known as the SJ series. It features a 2.0XT or 2.5-liter engine, with options for manual or CVT transmissions. The vehicle is equipped with Subaru’s Symmetrical All-Wheel Drive system, ensuring superior traction and control. Specifications include varying fuel capacities and cargo space, tailored to meet diverse driving needs and preferences for both city and off-road environments effectively.

Key Features of the 2015 Subaru Forester

The 2015 Subaru Forester offers all-wheel drive, spacious cargo area, and advanced safety features like EyeSight technology. It combines efficient fuel economy with robust engine options and a modern design for both on-road comfort and off-road versatility, ensuring a reliable and enjoyable driving experience in various conditions.

2.1 Overview of the Vehicle’s Design and Technology

The 2015 Subaru Forester features a robust exterior design with aerodynamic styling, offering a spacious interior and ample cargo space. It incorporates advanced technology, including the EyeSight Driver Assist Technology for enhanced safety and a user-friendly multimedia system. The Forester also boasts a reliable Subaru Boxer engine, ensuring efficient performance and fuel economy, making it a versatile choice for both urban and off-road adventures.

2.2 Safety Features and Advanced Driver-Assistance Systems

The 2015 Subaru Forester is equipped with a comprehensive suite of safety features, including EyeSight Driver Assist Technology, which offers adaptive cruise control, lane departure warning, and sway warning. Additional safety features include seven airbags, anti-lock braking systems, and a reinforced frame for collision protection. These advanced systems enhance driver confidence and ensure a safer driving experience for all passengers.

Safety Precautions and Guidelines

This section outlines essential safety precautions and guidelines to ensure safe operation and maintenance of your 2015 Subaru Forester, preventing potential hazards and accidents effectively.

3.1 Seatbelts and SRS Airbags

The 2015 Subaru Forester Owners Manual emphasizes the importance of proper seatbelt usage and SRS airbag functionality. It details how to correctly fasten seatbelts, explains airbag locations, and outlines warning indicators. The manual also provides guidance on airbag maintenance and precautions to avoid accidental deployment. Proper use of these systems is crucial for occupant safety and preventing serious injury in the event of a collision.

3.2 Proper Usage of Keys and Doors

The 2015 Subaru Forester Owners Manual provides detailed instructions on the proper use of keys and doors. It covers keyless entry systems, door locking mechanisms, and safety precautions to prevent accidental door opening. The manual also outlines procedures for resolving issues like jammed doors or malfunctioning key fobs, ensuring secure and convenient vehicle access for drivers and passengers.

Instruments and Controls

The 2015 Subaru Forester Owners Manual details the dashboard layout, instrument panel, and steering wheel controls. It explains how to monitor vehicle performance and adjust settings for optimal convenience.

4.1 Dashboard Overview and Instrument Panel

The dashboard of the 2015 Subaru Forester features a clear and intuitive layout, with a central speedometer, tachometer, and an LCD display for odometer, trip information, and fuel level. The instrument panel is designed to provide quick access to essential vehicle data, ensuring driver convenience and safety while operating the vehicle.

4.2 Steering Wheel and Multimedia Controls

The 2015 Subaru Forester’s steering wheel features integrated controls for audio, cruise control, and phone operations, enhancing driver convenience. The multimedia system includes Bluetooth connectivity, smartphone integration, and voice command functionality. The intuitive interface allows seamless navigation through music, calls, and settings, ensuring a safe and enjoyable driving experience while minimizing distractions.

Maintenance and Servicing

Regular maintenance is crucial for optimal performance. Follow the recommended schedule for oil changes, tire rotations, and inspections to ensure longevity and efficiency of your vehicle.

5.1 Recommended Maintenance Schedule

The 2015 Subaru Forester Owner’s Manual outlines a detailed maintenance schedule to ensure optimal performance. Regular oil changes every 7,500 to 7,500 miles are recommended. Tire rotations should occur every 7,500 miles, and brake inspections annually. Fluid checks, including coolant and transmission, are advised at specified intervals. Adhering to this schedule helps maintain the vehicle’s reliability, efficiency, and longevity while preventing potential issues. Proper maintenance also supports the emissions control system’s functionality.

5.2 DIY Maintenance Tips and Tricks

Performing routine checks and minor maintenance tasks can help extend the life of your 2015 Subaru Forester. Regularly inspect and clean the air filter, check battery terminals for corrosion, and monitor tire pressure. For DIY oil changes, use synthetic oil and genuine Subaru filters. Always refer to the manual for specific guidelines to avoid damage. These simple practices can save time and money while maintaining your vehicle’s performance and efficiency.

Performance and Handling

The 2015 Subaru Forester delivers robust performance with its Boxer engine and Symmetrical AWD, ensuring responsive handling and stability on various terrains, enhancing overall driving dynamics.

6.1 Engine Specifications and Performance

The 2015 Subaru Forester features a 2.0L or 2.5L Boxer engine, delivering up to 170 horsepower and 174 lb-ft of torque. The Boxer design enhances balance and reduces vibration, while the optional turbocharged 2.0XT model boosts performance to 250 horsepower. With excellent fuel efficiency and responsive acceleration, the Forester combines power with practicality, making it suitable for both urban and off-road driving conditions.

6.2 Transmission and All-Wheel Drive System

The 2015 Subaru Forester offers a smooth Lineartronic CVT or a 6-speed manual transmission. Its Symmetrical All-Wheel Drive system ensures even power distribution for enhanced traction. The Active Torque Split technology optimizes performance on various surfaces. With features like X-MODE for low-speed control and hill descent control, the Forester delivers confident handling and stability, making it versatile for both paved roads and rugged terrain.

Fuel Efficiency and Economy

The 2015 Subaru Forester manual provides guidance on maximizing fuel efficiency, with tips to improve MPG and reduce consumption, ensuring optimal economy for both city and highway driving.

7.1 Tips for Improving Fuel Efficiency

The 2015 Subaru Forester manual offers practical advice to enhance fuel economy. Maintain proper tire pressure, drive at moderate speeds, and avoid excessive idling. Remove unnecessary weight from the vehicle and use the recommended grade of oil. Regular maintenance, such as air filter checks, can also optimize performance and reduce fuel consumption, ensuring efficient driving in both city and highway conditions.

7.2 Understanding Fuel Consumption Ratings

The 2015 Subaru Forester manual explains fuel consumption ratings, helping owners understand efficiency. These ratings are measured under standardized conditions and provide insights into city and highway performance. Proper maintenance, as outlined in the manual, ensures accurate fuel efficiency. By understanding these ratings, drivers can make informed decisions to optimize their vehicle’s performance and reduce fuel costs effectively over time.

Interior and Comfort Features

The 2015 Subaru Forester offers a spacious interior with premium materials, ergonomic design, and ample cargo space. Features include comfortable seating, advanced climate control systems, and a high-quality audio system with AM/FM radio and MP3 compatibility.

8.1 Seating and Cargo Space

The 2015 Subaru Forester features a 5-seat configuration with supportive front seats and ample legroom. The rear seats fold flat, offering up to 74.7 cubic feet of cargo space. This versatility makes it ideal for both daily commutes and outdoor adventures, ensuring plenty of room for passengers and gear alike. The design maximizes comfort and practicality seamlessly.

8.2 Climate Control and Audio Systems

The 2015 Subaru Forester features a dual-zone automatic climate control system, ensuring comfort for both driver and passenger. The audio system includes a 6-speaker setup with HD Radio, Bluetooth connectivity, and steering wheel-mounted controls. These features enhance the driving experience, providing seamless entertainment and climate management for a comfortable and enjoyable ride.

Exterior and Accessories

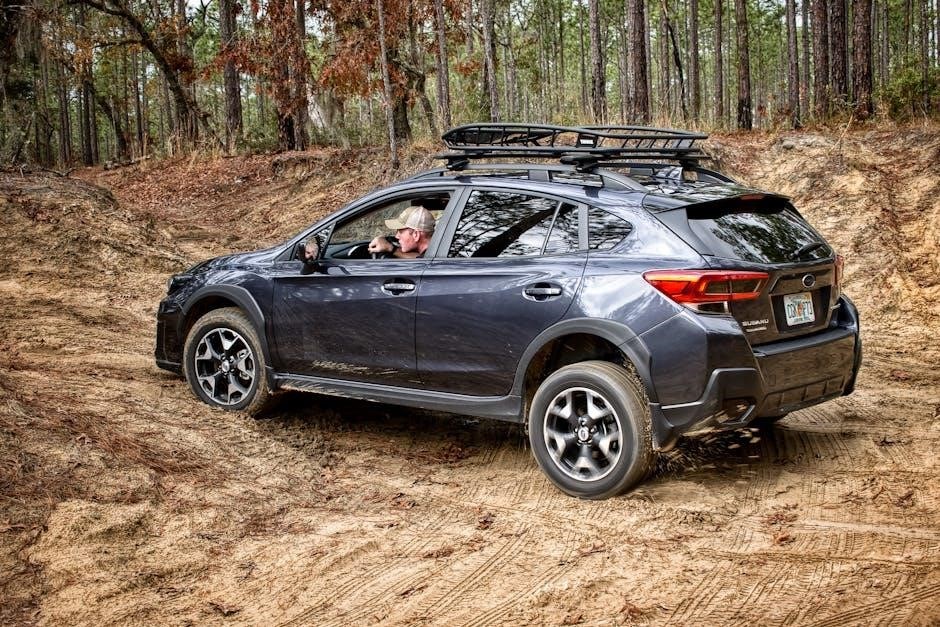
The 2015 Subaru Forester’s exterior features a durable design with available roof racks and accessories, enhancing cargo capacity and versatility for outdoor adventures and daily use.

9.1 Exterior Design and Customization Options

The 2015 Subaru Forester features a rugged yet aerodynamic exterior design, with options for roof racks, alloy wheels, and protective accessories. Owners can customize their vehicle with various color options, trim levels, and exterior add-ons to enhance both functionality and style, ensuring a balance between off-road capability and urban appeal while maintaining durability and performance.

9.2 Roof Rack and Cargo Carrying Capacity

The 2015 Subaru Forester offers a durable roof rack system, designed to securely hold luggage, bikes, or other gear. With a maximum cargo-carrying capacity of 150 lbs, it ensures versatility for both urban commutes and outdoor adventures. Proper installation and load distribution are essential to maintain safety and efficiency, as detailed in the owner’s manual for optimal performance and reliability.

Technology and Connectivity

The 2015 Subaru Forester features advanced technology and connectivity options, including a multimedia system, navigation, Bluetooth, and smartphone integration, enhancing the driving experience with seamless connectivity and entertainment.

10.1 Multimedia System and Navigation

The 2015 Subaru Forester’s multimedia system offers a user-friendly interface with navigation, voice command, and touchscreen functionality. It integrates with Bluetooth and smartphone apps, providing real-time traffic updates and entertainment options. The navigation system ensures accurate route guidance, while the multimedia system enhances connectivity and in-car entertainment for a convenient and enjoyable driving experience.

10.2 Bluetooth and Smartphone Integration

The 2015 Subaru Forester’s Bluetooth and smartphone integration allow seamless connectivity for hands-free calls and audio streaming. Compatible with iOS and Android devices, it supports voice commands and app integration. The system enables easy pairing of devices, enhancing convenience and safety. Troubleshooting tips are provided in the manual to ensure optimal performance and a connected driving experience.

Troubleshooting and Common Issues

This section provides guidance on diagnosing and resolving common issues with your 2015 Subaru Forester, including warning lights and maintenance-related problems, to ensure optimal vehicle performance.

11.1 Diagnostic Codes and Warning Lights

The 2015 Subaru Forester Owner’s Manual explains diagnostic codes and warning lights, helping drivers identify issues promptly. It details dashboard indicators, such as the check engine light, and provides steps to address them; This section ensures drivers understand their vehicle’s status and take appropriate actions to maintain performance and safety, preventing potential damage.

11.2 Solutions for Common Maintenance Problems

The manual provides solutions for common maintenance issues, such as oil change intervals, tire pressure adjustments, and filter replacements. It also addresses warning lights and unusual noises, offering step-by-step guidance. Tips for preventing major repairs and extending vehicle lifespan are included, ensuring owners can resolve issues efficiently and maintain their Forester in optimal condition.

Warranty and Service Support

This section outlines the warranty coverage for your 2015 Subaru Forester, including terms and conditions. It also provides details on how to contact Subaru customer service for assistance.

12.1 Understanding the Warranty Coverage

The 2015 Subaru Forester Owner’s Manual details the warranty coverage, including the duration and scope of the New Vehicle Limited Warranty. It explains what is covered under basic and powertrain warranties, as well as any additional protections. This section helps owners understand their entitlements and ensures they can maintain their vehicle within the warranty terms for optimal performance and longevity.

12.2 Contacting Subaru Customer Service

For inquiries or assistance, owners can contact Subaru Customer Service through the official Subaru website or dedicated support channels. The manual directs users to subaru.ca for resources, including the Owner’s Manual, EyeSight manual, and Quick Reference Guide. Support is also accessible via phone or email for maintenance, troubleshooting, or general questions about the 2015 Subaru Forester.

Regular maintenance and adherence to guidelines ensure optimal performance and longevity of your 2015 Subaru Forester. Refer to the manual for detailed care and troubleshooting tips.

13.1 Importance of Regular Maintenance

Regular maintenance is crucial for the longevity and performance of your 2015 Subaru Forester. It ensures optimal fuel efficiency, prevents mechanical issues, and maintains safety standards. By following the recommended schedule, you can identify and address potential problems early, reducing repair costs and extending the lifespan of your vehicle.

13.2 Maximizing the Lifespan of Your Vehicle

To maximize the lifespan of your 2015 Subaru Forester, adhere to the recommended maintenance schedule, avoid extreme driving conditions, and ensure proper storage. Regular oil changes, tire rotations, and inspections are vital. Addressing issues promptly prevents minor problems from becoming major repairs, ensuring your vehicle remains reliable and efficient for years to come.

ge universal remote manual pdf

The GE Universal Remote Manual PDF provides essential guidance for setting up and operating your remote, ensuring seamless control of multiple devices for an enhanced home entertainment experience.

Overview of the GE Universal Remote

The GE Universal Remote is a versatile device designed to simplify home entertainment by consolidating control of multiple devices into one convenient remote. It supports a wide range of audio/video devices, including TVs, DVD players, VCRs, satellite receivers, and more. With its intuitive design, the remote offers easy navigation and customization options to enhance user experience. Many models, such as the GE 8-Device Backlit Universal Remote, feature advanced capabilities like backlit buttons for better visibility in low-light conditions. The remote is compatible with leading brands like Samsung, LG, Sony, and Roku, ensuring broad functionality. Its programming options, including manual code entry and an auto-code search feature, make it adaptable to various devices. Whether you’re setting up a new system or upgrading your current setup, the GE Universal Remote is a practical solution for streamlined control of your entertainment system.

Importance of the Manual for Proper Usage

The GE Universal Remote Manual is indispensable for unlocking the full potential of your remote control. It provides detailed instructions for programming, troubleshooting, and customizing features, ensuring optimal performance. Without the manual, users may struggle to set up their devices or resolve common issues, leading to frustration and suboptimal functionality. The guide offers step-by-step instructions for code entry, auto-code search, and advanced features like sleep timers and button customization. Additionally, it includes troubleshooting tips to address problems such as code entry issues or remote-device connectivity. By referring to the manual, users can avoid guesswork and ensure their remote operates efficiently. Regular updates to the manual, available on official sources like the Jasco website, further enhance its reliability. Thus, the manual is not just a reference but a crucial tool for maximizing the remote’s capabilities and user satisfaction.

Downloading and Accessing the GE Universal Remote Manual

The GE Universal Remote Manual can be easily downloaded from official sources like the Jasco website or GE support page, ensuring quick access to essential instructions and guides.

Steps to Download the PDF Manual

To download the GE Universal Remote Manual PDF, visit the official GE support website or the Jasco Products website, as Jasco manufactures GE remotes. Navigate to the “Support” or “Downloads” section, where you can search for your specific remote model. Enter the model number, which is usually found on the back of the remote or in the packaging. Once you locate the correct manual, click the download link to save the PDF to your device. Ensure you have a PDF reader installed to view the manual. If the manual isn’t available on GE’s site, check the manufacturer’s official page or authorized retailers. Some models may also have their manuals available through third-party electronics forums or support communities. Always verify the source to ensure the manual is genuine and compatible with your remote. Once downloaded, you can print it for convenience or access it digitally for easy reference. This ensures you have all the necessary instructions for programming and troubleshooting your GE Universal Remote. The manual is a valuable resource for optimizing your remote’s performance and resolving any issues that may arise. By following these steps, you can quickly access the guide and start using your remote effectively.

Official Sources for the GE Universal Remote Manual

The GE Universal Remote Manual PDF can be downloaded from official sources such as the GE Appliances website or the Jasco Products website, as Jasco manufactures GE remotes. Visit the official GE support page, navigate to the “Downloads” or “Manuals” section, and search for your specific remote model. Additionally, the Jasco website provides a dedicated section for GE universal remotes, where you can find and download the manual. For added convenience, trusted platforms like ManualsLib or ManualsOnline also host PDF versions of GE universal remote manuals. Always ensure you download from reputable sources to avoid incorrect or malicious files. If you’re unable to find the manual on GE’s site, check the manufacturer’s official page or authorized retailers. Be sure to verify the model number for compatibility before downloading. This ensures you access the correct guide for your remote. Official sources guarantee authenticity and reliability.

Programming Your GE Universal Remote

Programming your GE Universal Remote involves using the code entry method or auto-code search feature, ensuring compatibility with various devices for seamless control;

Code Entry Method: Step-by-Step Instructions

To program your GE Universal Remote using the code entry method, follow these steps:

  1. Locate the device codes: Find the specific codes for your device, which can be found in the manual or on the GE support website.
  2. Press and hold the Setup button: Until the red indicator light stays on, indicating the remote is in programming mode.
  3. Enter the code: Use the number pad to input the code. The light will blink once if the code is accepted.
  4. Test the remote: Check if the remote controls your device. If it doesn’t work, repeat the process with a different code.
  5. Repeat for other devices: Program additional devices by repeating the steps with their respective codes.

This method ensures quick and precise setup for optimal performance.

Auto-Code Search Feature: How It Works

The GE Universal Remote’s auto-code search feature simplifies programming by automatically finding the correct codes for your device. Here’s how it operates:

  • Activate the feature: Press and hold the Setup button until the red light stays on.
  • Initiate the search: Press the button corresponding to your device type (e.g., TV, DVD).
  • Test functionality: The remote sends IR signals, and the device should turn off when the correct code is found.
  • Confirm the code: Press Enter or the device button to save the code.

This feature streamlines the setup process, saving time and effort. Ensure your device is powered on and in view for optimal results. The auto-code search is a convenient alternative to manual code entry, making it user-friendly and efficient.

Device Compatibility and Supported Brands

The GE Universal Remote is designed to control a wide range of devices, ensuring compatibility with most major brands. It supports popular brands like Samsung, Vizio, LG, Sony, Sharp, Roku, Apple TV, RCA, and Panasonic.

  • TVs: Works seamlessly with leading TV manufacturers for optimal performance.
  • Streaming Devices: Compatible with Roku, Apple TV, and other streaming platforms.
  • Home Theaters: Easily controls home theater systems and soundbars.
  • DVD/Blu-ray Players: Supports various DVD and Blu-ray players from top brands.
  • Gaming Consoles: Compatible with select gaming consoles for enhanced entertainment.

This broad compatibility makes the GE Universal Remote a versatile tool for home entertainment systems, allowing users to manage multiple devices with ease. Always refer to the manual or GE’s official website for the most updated list of supported brands and models.

Troubleshooting Common Issues

Address common issues like unresponsive buttons or incorrect codes by resetting the remote or re-entering codes. Refer to the manual for detailed solutions and guidance.

Resolving Code Entry Problems

If you encounter issues while entering codes, ensure the device is turned on and the remote is correctly aimed. Press and hold the Setup button until the red light stays on, then enter the code. If the code doesn’t work, repeat the process with an alternate code for your device’s brand. If multiple codes fail, reset the remote by holding the Setup button for 10 seconds until the light blinks twice. This clears stored codes, allowing you to start fresh. Also, verify that the codes are correct and updated, as outdated codes may not function properly. For persistent issues, consult the GE Universal Remote Manual PDF or visit the official GE support website for troubleshooting guides and updated code lists.

Resetting the Remote to Factory Settings

To reset the GE Universal Remote to its factory settings, follow these steps: Press and hold the Setup button until the red indicator light blinks twice, then release it. This process will clear all programmed codes and preferences, restoring the remote to its original state. After resetting, the remote will need to be reprogrammed for all devices. This feature is useful for resolving persistent issues or preparing the remote for a new user. Always refer to the GE Universal Remote Manual PDF for detailed instructions and ensure the remote is directed at the device during the reset process. This step is essential for troubleshooting and ensuring optimal performance. By resetting, you can start fresh and reprogram your remote according to your current device setup and preferences.

Advanced Features of the GE Universal Remote

The GE Universal Remote offers advanced features like a sleep timer and customizable button functions, enhancing user convenience and personalizing the control experience for home entertainment systems.

Setting Up the Sleep Timer

The GE Universal Remote allows you to set a sleep timer, enabling your devices to turn off automatically after a specified duration. To activate this feature, press and hold the Setup button until the red light remains on. Use the number pad to enter the desired timer duration in minutes. Confirm your selection by pressing the OK button. The remote will send the sleep command to your connected device at the set time, turning it off. This feature is ideal for preventing devices from running unnecessarily when not in use. If you wish to cancel the timer, repeat the process and select 0 to disable it. This convenient option enhances your home entertainment experience by streamlining device management.

Customizing Button Functions

Customizing button functions on your GE Universal Remote allows you to personalize your control experience. By mapping frequently used functions to specific buttons, you can streamline your interaction with connected devices. To customize, press and hold the Setup button until the red light stays on. Use the number pad to enter the code corresponding to the function you wish to assign. Navigate to the button you want to reassign and press it firmly. The remote will confirm the assignment with a blink of the red light. This feature is particularly useful for tailoring the remote to your viewing habits, ensuring easy access to your most-used commands. Always refer to the manual for a list of compatible codes and functions. Experiment with different configurations to optimize your remote’s functionality for a seamless entertainment experience.

The GE Universal Remote Manual PDF is a comprehensive guide, ensuring optimal performance and ease of use, helping you maximize your home entertainment experience effectively.

Final Tips for Optimal Remote Performance

To ensure your GE Universal Remote operates at its best, always refer to the manual for specific device codes and troubleshooting steps. Regularly update your remote’s code list from official sources to maintain compatibility with new devices. Clean the remote’s sensors and buttons to prevent signal interference. Replace batteries promptly when performance declines. Use the reset feature sparingly to avoid losing custom settings. Experiment with the sleep timer and custom button functions to tailor the remote to your preferences. For persistent issues, consult Jasco’s support website or contact their customer service. By following these tips, you can maximize your remote’s functionality and enjoy a seamless home entertainment experience. Explore advanced features and settings to get the most out of your GE Universal Remote.

rt 6 instructions

The RT-6 form, known as the Employer’s Quarterly Report, is a document used to report employee wages and calculate reemployment taxes for the Florida Department of Revenue. It ensures compliance with state tax laws and outlines taxable wages, excess wages, and gross wages paid to employees during a specific quarter. Accurate filing is essential to avoid penalties and maintain proper records.

1;1 Overview of RT-6 Form

The RT-6 form is a quarterly report used to inform the Florida Department of Revenue about employee wages, including gross, excess, and taxable amounts. It calculates reemployment taxes and ensures compliance with state tax laws. The form must be filed timely, even if no taxes are due, and includes details like employee Social Security numbers, names, and wage breakdowns. Accurate completion is vital to avoid penalties.

1.2 Purpose of the Employer’s Quarterly Report

The primary purpose of the Employer’s Quarterly Report (RT-6) is to report wages paid to employees and calculate reemployment taxes. This form ensures compliance with Florida’s tax laws by detailing gross, excess, and taxable wages. It also helps employers track their tax obligations and maintain accurate records, which is crucial for avoiding penalties and ensuring timely compliance with state regulations.

Who Needs to File RT-6?

All Florida employers subject to reemployment tax, including those paying cash wages for household employment, must file RT-6. This applies to employers with a payroll of $1,500 or more in a calendar quarter or those paying $1,000 or more in cash for household employment.

2.1 Eligibility Criteria for Employers

Employers in Florida must file RT-6 if they meet specific thresholds: paying $1,500 or more in wages during a calendar quarter or $1,000 or more in cash for household employment. This includes businesses, sole proprietors, and those with domestic workers. Employers remain eligible even if no taxes are due, ensuring compliance with state reemployment tax laws.

2.2 Special Cases (e.g., Sole Proprietors, Household Employment)

Sole proprietors and household employers must file RT-6 if they pay $1,000 or more in cash wages to household employees in a calendar quarter. This applies even if no other employees are present. Special cases require accurate reporting to ensure compliance with Florida’s reemployment tax laws, regardless of the employer’s size or type of employment arrangement.

Preparing for RT-6 Filing

Gathering employee data, wages, and understanding gross, excess, and taxable wages is crucial. Accurate records ensure compliance and prevent penalties, simplifying the filing process.

3.1 Gathering Necessary Information (Employee Data, Wages, etc.)

Collecting accurate employee data, including Social Security numbers, names, and wages, is essential. Record gross wages paid per employee, taxable wages, and excess wages. Ensure totals for the quarter are correct. Verify the first $8,000 of annual wages per employee is taxable. Accurate reporting prevents penalties and ensures compliance with reemployment tax laws.

3.2 Understanding Gross, Excess, and Taxable Wages

Gross wages represent the total compensation paid to employees during the quarter. Excess wages are amounts exceeding $8,000 per employee annually. Taxable wages are the first $8,000 of gross wages per employee, subject to reemployment tax. Accurate distinction between these categories ensures correct tax calculations and compliance with Florida’s reemployment tax requirements. Proper classification helps avoid errors and penalties in RT-6 filing.

Filing RT-6 Online

The RT-6 can be filed electronically through the Florida Department of Revenue’s e-Services system. Employers must complete and save the form in the CFS Payroll System, then create an import file for submission. This method ensures accuracy, reduces errors, and streamlines the filing process, promoting compliance with state tax requirements efficiently.

4.1 Steps to Complete and Save the Form in the CFS Payroll System

To file the RT-6 online, access the CFS Payroll System and navigate to the RT-6 form. Enter employee data, including names, Social Security numbers, and wage details. Calculate taxable wages and reemployment tax due, ensuring accuracy. Complete all required fields, review for errors, and save the form. This step prepares the data for creating an import file, streamlining the e-Services submission process and ensuring compliance.

4.2 Creating an Import File for e-Services

To create an import file for e-Services, navigate to the Utilities menu in the RT-6 form and select the “Create Import File for e-Services” option. This feature generates a properly formatted flat file containing tax and wage information. Ensure data accuracy before proceeding, as errors can lead to filing issues. The file format is typically compatible with e-Services systems, allowing seamless submission. This step simplifies the online filing process, ensuring compliance with Florida Department of Revenue requirements.

Calculating Taxes and Wages

Calculate taxable wages by applying the tax rate to the taxable portion of employee wages, up to $8,000 per employee annually. The RT-6 form simplifies this process, ensuring accurate tax calculations and compliance with Florida’s reemployment tax requirements.

5.1 Determining Taxable Wages and Reemployment Tax Due

Calculate taxable wages by reporting gross wages and applying the $8,000 annual cap per employee. Multiply taxable wages by the employer’s tax rate to determine reemployment tax due. Ensure accuracy in reporting to avoid penalties and maintain compliance with Florida’s reemployment tax requirements. The RT-6 form simplifies this process, guiding employers through the necessary calculations for each quarter.

5.2 Understanding Penalty Calculations

Penalties for late filing or underpayment are calculated as a percentage of the unpaid reemployment tax or a flat fee. Timely and accurate reporting is crucial to avoid these penalties, which can increase with repeated non-compliance. Employers may face additional fees or audits if errors persist. Always review your tax calculations to ensure correctness and prevent extra charges.

Deadlines and Penalties

The RT-6 must be filed by the last day of the month following the end of each quarter. Late filing or non-payment may result in penalties, including fees and interest on unpaid taxes. Timely submission is critical to avoid additional charges and ensure compliance with Florida’s reemployment tax requirements.

6.1 Filing Deadlines for RT-6

The RT-6 form must be filed by the last day of the month following each quarter. For example, if the quarter ends in March, the deadline is April 30. Late filing may result in penalties, including fees and interest on unpaid taxes. Employers must ensure timely submission to avoid additional charges and maintain compliance with Florida’s reemployment tax requirements.

6.2 Consequences of Late Filing or Non-Compliance

Late filing or non-compliance with RT-6 requirements may result in penalties, including interest on unpaid taxes and additional fees. Severe cases can lead to loss of benefits or escalated enforcement actions, such as audits or legal proceedings. Employers must prioritize timely and accurate submissions to avoid financial and administrative consequences, ensuring compliance with Florida’s reemployment tax regulations.

Common Mistakes to Avoid

Common errors include incorrect wage reporting, missing employee data, and miscalculations of taxable wages. Ensure accuracy by double-checking entries and consulting the official RT-6 guide.

7.1 Errors in Reporting Wages or Taxes

Accurate reporting of gross, excess, and taxable wages is crucial. Errors in these figures can lead to incorrect tax calculations and penalties. Ensure all wage data is verified and matches employee records. Mistakes in tax computations, such as miscalculating the tax rate or omitting taxable wages, can result in compliance issues. Always cross-reference data and consult the official RT-6 guide for clarity.

7.2 Missing or Incomplete Employee Information

Missing or incomplete employee details, such as Social Security numbers or names, can delay processing and lead to penalties. Ensure all employee data is accurate and complete. Verify each entry for consistency with payroll records. Omissions in reporting gross or taxable wages can trigger compliance issues. Double-check every detail before submission to avoid rejections or additional scrutiny from the Florida Department of Revenue.

Additional Resources and Support

The Florida Department of Revenue offers comprehensive resources, including the RT-6 form and detailed instructions online. Employers can access guides, FAQs, and contact support for assistance with filing and calculations.

8.1 Contacting the Florida Department of Revenue

Employers can contact the Florida Department of Revenue for assistance with RT-6 filing by visiting their official website or calling their dedicated support hotline. The department provides phone support, online resources, and detailed guides to help employers navigate the reporting process. For specific inquiries, users are encouraged to check the official website for the most accurate and up-to-date contact information and support options.

8.2 Accessing RT-6 Form and Instructions Online

The Florida Department of Revenue provides the RT-6 form and its instructions on their official website. Employers can access the form through the e-Services portal, where they can download the document or complete it online. The website also offers detailed instructions, FAQs, and resources to assist with accurate and timely filing. Regularly updated, the online materials ensure employers have the latest information for compliance.

Special Scenarios

This section addresses unique situations, such as handling out-of-state wages and managing multiple payrolls, providing employers with guidance on navigating these special circumstances effectively.

9.1 Filing for Out-of-State Wages

Employers with employees earning wages outside Florida must file RT-6NF, the Employer’s Quarterly Report for Out-of-State Taxable Wages. This form is required when reporting gross and taxable wages for out-of-state workers. Ensure accurate reporting to avoid penalties and maintain compliance with Florida’s reemployment tax laws. Proper documentation and timely filing are essential for employers with multi-state operations.

9.2 Handling Multiple Payrolls or Locations

Employers managing multiple payrolls or locations must file separate RT-6 reports for each entity. Each report should detail gross, excess, and taxable wages specific to that payroll or location. Consolidation is not permitted unless explicitly allowed. Ensure accurate reporting for each unit to comply with Florida’s reemployment tax requirements. Proper separation prevents penalties and ensures precise tax calculations for diverse business structures.

Filing the RT-6 accurately and timely ensures compliance with Florida’s reemployment tax laws, avoiding penalties. Proper reporting of wages and taxes is crucial for maintaining seamless employer records.

10.1 Importance of Accurate and Timely Filing

Accurate and timely filing of the RT-6 ensures compliance with Florida’s reemployment tax laws, avoiding penalties and interest. Employers must report correct wages and taxes to maintain proper records and prevent legal issues. Timely submissions help employers avoid late fees and ensure smooth financial operations, while accurate data ensures fair tax calculations and compliance with state regulations.

10.2 Final Tips for Employers

Employers should ensure all data is accurate and verified before submission. Double-check calculations for taxable wages and reemployment tax due. Use the Florida Department of Revenue’s resources for guidance in complex cases. Maintain organized records for future reference and audits. Timely filing prevents penalties, and understanding tax rates ensures compliance. Review all sections carefully before final submission to avoid errors.

jacob jamaican tour guide did he die

Jacob, a prominent Jamaican tour guide, gained attention after a tragic cliff-jumping accident. The incident sparked widespread speculation about his death, with conflicting reports emerging. A video showing his interaction with tourists before the jump went viral, fueling discussions on safety and adventure tourism; His case has led to an outpouring of support and reflections on the risks associated with such activities.

1.1 Who Was Jacob?

Jacob was a vibrant figure in Jamaica, celebrated for his warm personality and passion for the island’s culture. Originally a reggae artist, he collaborated with bands like Inner Circle, blending music into his tours. His storytelling and love for Jamaica created memorable experiences, making him a cherished name in tourism, leaving a lasting legacy behind.

1.2 Jacob’s Role as a Tour Guide in Jamaica

Jacob was a charismatic and knowledgeable tour guide in Jamaica, blending his deep understanding of the island’s culture with a passion for storytelling. He specialized in creating immersive experiences, often incorporating his background in music to enrich tours; His ability to connect with visitors and share Jamaica’s rich heritage made him a beloved figure in the tourism industry. Jacob’s tours were not just about sightseeing but about experiencing the heart and soul of the island.

The Incident Involving Jacob

A tragic accident occurred during a cliff-jumping activity, raising concerns about Jacob’s fate. A video showing his interaction with tourists sparked speculation about his death.

2.1 Circumstances Surrounding the Tragic Accident

The tragic accident involving Jacob occurred during a cliff-jumping activity in Jamaica. A video captured Jacob interacting with a tour guide before the incident, showing him preparing for the jump. Witnesses reported that Jacob lost his footing, leading to a fatal fall. The circumstances remain under investigation, but initial reports suggest a combination of risky behavior and potential safety lapses contributed to the tragedy. The incident has sparked debates on adventure tourism safety and regulation.

2.2 The Cliff Jump and Its Aftermath

Jacob’s tragic accident occurred during a cliff-jumping activity, a popular but risky tourist attraction in Jamaica. A video circulating online shows Jacob interacting with a tour guide moments before the jump. The footage reveals a sense of camaraderie, but the outcome was devastating. Jacob misjudged the jump, leading to a severe injury or potential fatality, as widely speculated. The incident sparked immediate medical responses and an outpouring of public concern. Authorities launched an investigation, while the video fueled discussions on safety measures and accountability in adventure tourism.

Jacob’s Background and Career

Jacob, a passionate Jamaican tour guide, had a career rooted in sharing his island’s culture. Before guiding, he worked in local hospitality, fostering deep community connections.

3.1 Jacob’s Life Before Becoming a Tour Guide

Before becoming a tour guide, Jacob lived a vibrant life deeply rooted in Jamaican culture. He was a reggae artist, collaborating with bands like Inner Circle. His early years were marked by a passion for music and community. Tragically, a near-drowning incident in 2021 left him hospitalized for 308 days, reshaping his path. This experience influenced his later career, as he sought to share Jamaica’s beauty with others, fostering meaningful connections with tourists and locals alike.

3.2 His Contributions to Jamaican Tourism

Jacob played a pivotal role in enhancing Jamaica’s tourism by blending music and culture. As a reggae artist, he collaborated with bands like Inner Circle, bringing authenticity to his tours. His music career added depth to his storytelling, making his tours memorable. Jacob’s ability to connect with visitors through shared experiences fostered trust and appreciation for Jamaica’s heritage. His legacy continues to inspire, showcasing the island’s beauty and rich cultural tapestry to the world.

The Tragic Accident and Its Impact

The tragic accident involving Jacob has sparked discussions on safety measures and emergency protocols in Jamaica’s tourism sector, emphasizing the need for improved safety standards and support for affected families.

4.1 Public Reaction to the Incident

The public reaction to Jacob’s accident was one of shock and dismay, with many expressing condolences and support for his family. Social media platforms saw a surge in discussions, with users sharing prayers and reflections on safety during tourist activities. The incident also sparked debates about adventure tourism risks and the need for better safety protocols. Jacob’s case resonated deeply, highlighting the importance of responsible tourism practices and the impact of such tragedies on local communities and global audiences alike.

4.2 Lessons Learned from the Tragedy

Jacob’s accident underscored critical lessons about safety in adventure tourism. It highlighted the importance of strict safety measures, proper training, and clear guidelines for participants. Authorities and tour operators have since emphasized the need for better risk assessments and emergency preparedness. The tragedy also raised awareness about the importance of adhering to safety protocols to prevent such incidents in the future, ensuring that tourists and guides alike can enjoy activities with minimized risks and enhanced precautionary measures in place.

Updates on Jacob’s Condition

Jacob remains in critical condition, showing signs of recovery. He is off his ventilator, with reports of head movement and eye opening, indicating gradual improvement.

5.1 Medical Updates and Recovery Process

Jacob remains in critical condition following the tragic accident. He has been hospitalized for 308 days, with recent reports indicating slight improvements. Jacob is now off his ventilator and showing signs of recovery, such as moving his head and opening his eyes. His semi-conscious state suggests progress, though full recovery remains uncertain. Medical teams continue to monitor his condition closely, emphasizing the need for patience and support during this delicate phase of his rehabilitation journey.

5.2 Jacob’s Current Status and Ongoing Support

Jacob remains in a semi-conscious state, showing gradual signs of recovery. His family, including his mother, Dawn Williams, has been by his side, providing emotional support. The community continues to rally around him, with many expressing hope for his full recovery. Jacob’s condition remains fragile, but the outpouring of support highlights his impact on those who knew him. Updates on his progress are shared periodically, keeping well-wishers informed and engaged in his journey toward healing.

The Video and Its Implications

A video showing Jacob’s interaction with a tour guide before a tragic cliff jump went viral, sparking discussions on safety and responsibility in adventure tourism activities.

6.1 Analysis of the Video Showing Jacob’s Interaction with the Tour Guide

The video captures Jacob’s final moments before the tragic cliff jump, showing his interaction with the tour guide. It sparked widespread speculation about his death, as initial reports varied widely, with some suggesting severe injury and others implying a fatality. The footage has been analyzed for clues about the circumstances leading to the accident, with many questioning the safety measures in place. Social media reactions have been mixed, ranging from shock to demands for greater accountability in adventure tourism activities.

6.2 Social Media Reactions and Speculations

The video of Jacob’s interaction with the tour guide sparked intense social media reactions. Users speculated about his fate, with many questioning the safety of such activities. Some edited the video to remove the tragic outcome, while others called for stricter safety measures in adventure tourism. The incident ignited debates about responsibility and risk, with public sentiment ranging from shock to outrage. Social media became a platform for tributes, prayers, and demands for accountability, reflecting the profound impact of the tragedy.

Jacob’s Legacy

Jacob’s tragic accident left a lasting impact on Jamaica’s tourism industry, highlighting the importance of safety in adventure activities. His story serves as a poignant reminder of the risks and responsibilities involved in such pursuits, influencing future safety protocols and awareness campaigns. Jacob’s legacy continues to be felt, ensuring his memory contributes to safer experiences for tourists and guides alike.

7.1 Remembering Jacob as a Tour Guide and Personality

Jacob was a charismatic and passionate tour guide whose love for Jamaica’s culture and landscapes inspired countless visitors. Known for his vibrant personality and deep knowledge, he connected deeply with tourists, creating unforgettable experiences. His tragic death during a cliff-jumping incident shocked the community, leaving a void in the tourism industry. Jacob’s legacy endures through the memories he crafted and the stories shared by those he touched, celebrating his life and contributions to Jamaican heritage.

7.2 The Lasting Impact of His Work in Jamaica

Jacob’s work as a tour guide left an indelible mark on Jamaica’s tourism industry. His passion for sharing the island’s culture, history, and natural beauty inspired countless visitors. Despite his tragic death, his legacy lives on through the memories he helped create. Jacob’s contributions highlighted the importance of safety in adventure tourism, prompting changes in safety protocols. His story continues to resonate, reminding many of the profound impact one person can have on a community and its visitors, ensuring his memory remains cherished and influential.

genki 1 3rd edition workbook pdf

Genki 1 3rd Edition Workbook PDF Overview

The Genki 1 3rd Edition Workbook PDF is a comprehensive companion to the textbook, offering practice sheets, grammar exercises, and kanji practice. It enhances speaking, listening, reading, and writing skills with structured lessons. The PDF version is widely available on digital platforms and official sources, making it easily accessible for students.

The Genki 1 3rd Edition Workbook is specifically designed as a companion to the textbook, providing students with a structured platform to practice and reinforce their Japanese language skills. Covering lessons 1 through 12, the workbook offers a wide range of exercises tailored to enhance speaking, listening, reading, and writing abilities. It also includes practice sheets for grammar, vocabulary, and kanji, ensuring a comprehensive learning experience. The workbook is organized to align seamlessly with the textbook, making it an essential tool for beginners. Additionally, the PDF version of the workbook is widely available, offering convenience and accessibility for students who prefer digital studying. It serves as a foundational resource for mastering elementary Japanese, complementing the textbook with practical exercises and clear structure.

Key Features of the 3rd Edition

The Genki 1 3rd Edition Workbook introduces several enhanced features that make it a valuable resource for Japanese learners. It includes updated content, such as new dialogues, exercises, and practice sheets, designed to improve speaking, listening, reading, and writing skills. The workbook now offers a more balanced approach to language learning, with a stronger emphasis on practical communication. Additionally, the 3rd edition provides clearer explanations and more varied exercises to cater to different learning styles. The PDF version of the workbook is also available, offering flexibility and convenience for digital learners. Furthermore, it includes companion resources like an answer key and online tools, making it a comprehensive and user-friendly study aid for beginners.

Structure and Organization

The Genki 1 3rd Edition Workbook is meticulously structured to align with the textbook, covering Lessons 1 through 12. Each lesson includes practice sheets that reinforce grammar, vocabulary, and kanji introduced in the corresponding textbook chapters. The workbook is divided into clear sections, such as grammar exercises, vocabulary practice, and kanji drills, ensuring a logical flow of learning. Additionally, it features reading and writing exercises, including hiragana practice, to build foundational skills. The PDF version retains this organization, with bookmarks for easy navigation. This structured approach makes it easy for learners to follow and review material systematically, complementing the textbook effectively.

Content and Exercises

The workbook offers a wide range of exercises, including grammar, vocabulary, and kanji practice, along with reading and writing activities. It provides structured lessons and practice sheets to enhance Japanese language skills effectively.

Lessons and Practice Sheets

The Genki 1 3rd Edition Workbook is structured into 12 lessons, each corresponding to the textbook chapters. It includes practice sheets for grammar, vocabulary, and kanji, with exercises designed to reinforce learning. The workbook also contains reading and writing activities, such as Hiragana practice, to improve proficiency in Japanese script. Each lesson builds on the previous one, ensuring a steady progression in language skills. Supplementary materials, like answer keys, are available for self-study and tracking progress. The practice sheets are clear and well-organized, making it easy for learners to focus on specific areas of improvement. This structure ensures comprehensive coverage of all language aspects, from basic communication to more complex expressions.

Grammar, Vocabulary, and Kanji Practice

The Genki 1 3rd Edition Workbook dedicates sections to grammar, vocabulary, and kanji practice, ensuring a well-rounded learning experience. Grammar exercises are tied to specific lessons, helping learners master sentence structures and verb conjugations. Vocabulary practice includes lists of words with example sentences, enabling learners to understand context and usage. Kanji practice focuses on stroke order, meanings, and example compounds, building foundational writing skills. The workbook also incorporates spaced repetition techniques to reinforce memory retention. These exercises are designed to complement the textbook and provide learners with ample opportunities to practice and refine their skills in a structured, progressive manner. The clear layout and focused exercises make it an essential tool for self-study or classroom use.

Reading and Writing Exercises

The Genki 1 3rd Edition Workbook includes dedicated sections for reading and writing exercises, essential for developing literacy skills in Japanese. Hiragana and Katakana practice sheets are provided to reinforce basic writing and reading abilities. Reading comprehension exercises focus on short texts and dialogues, gradually increasing in complexity. Writing tasks include completing sentences, filling in missing kanji, and composing simple paragraphs based on textbook lessons. These exercises are structured to help learners progress from basic recognition of scripts to understanding and producing coherent written Japanese. The workbook also emphasizes correct stroke order for kanji, ensuring learners develop proper writing habits. By combining reading and writing practice, the workbook helps learners build a strong foundation in Japanese literacy, making it easier to advance to more complex texts and expressions.

Benefits and Usage Tips

The Genki 1 3rd Edition Workbook PDF offers comprehensive practice, enhancing language skills through structured exercises. Regular use improves proficiency, while reviewing answers and integrating with the textbook maximizes learning effectiveness.

How to Effectively Use the Workbook

To make the most of the Genki 1 3rd Edition Workbook PDF, establish a consistent study routine; Begin by completing practice sheets alongside corresponding textbook lessons to reinforce learning. Focus on grammar, vocabulary, and kanji exercises to build foundational skills. Regularly review answers to identify and correct mistakes. Pair the workbook with the companion textbook for a comprehensive learning experience. Utilize the structured lessons to practice speaking, listening, and writing. For optimal results, dedicate time to review and understand explanations provided in the answer key. This integrated approach ensures steady progress and mastery of elementary Japanese language concepts.

Tips for Maximizing Study Efficiency

To maximize study efficiency with the Genki 1 3rd Edition Workbook PDF, focus on understanding concepts rather than rushing through exercises. Prioritize reviewing and practicing areas where you struggle the most. Use the answer key to check your work and learn from mistakes. Set specific goals for each study session, such as completing a full lesson or mastering a set of kanji. Regularly review previous material to reinforce long-term retention. Additionally, pair the workbook with the textbook to ensure a well-rounded understanding of the content. By staying consistent and utilizing the workbook’s structured format, you can efficiently progress through the material and improve your Japanese language skills.

Availability and Access

The Genki 1 3rd Edition Workbook PDF is widely available on official sources and digital platforms, ensuring easy access for students worldwide to download and study efficiently.

Where to Find the PDF Version

The Genki 1 3rd Edition Workbook PDF can be easily accessed through various official sources and digital platforms. It is available for download on websites like Amazon, eBay, and Rakuten, as well as educational platforms that specialize in language learning materials. Additionally, some digital libraries and forums dedicated to Japanese language studies provide links to the PDF version. Users can also find it through direct downloads from the publisher’s official website or authorized sellers. Ensure to verify the reliability of the source to avoid unauthorized or incomplete versions; Purchasing from official retailers guarantees access to the complete and updated workbook content, making it a convenient option for students worldwide.

Official Sources and Digital Platforms

The Genki 1 3rd Edition Workbook PDF is available through official sources and trusted digital platforms. It can be purchased directly from the publisher’s website or authorized retailers like Amazon, eBay, and Rakuten. Additionally, educational platforms and forums dedicated to Japanese language learning often provide access to the PDF version. For convenience, some digital libraries and online marketplaces offer downloadable versions, ensuring easy access for students worldwide. Purchasing from these official sources guarantees authenticity and completeness of the workbook content, making it a reliable choice for learners seeking high-quality study materials.

The Genki 1 3rd Edition Workbook PDF is a valuable resource for Japanese learners, offering comprehensive exercises that enhance language proficiency. It is ideal for self-study or classroom use, providing structured lessons to improve speaking, listening, reading, and writing skills effectively.

Alright, so I need to write a section under the subheading ‘

Final Thoughts on the Genki 1 Workbook

‘ for the topic ‘genki 1 3rd edition workbook pdf’. The user has provided specific instructions, and I want to make sure I follow them carefully.

First, I must remember not to include any information that will be covered in other subheadings. This means I need to focus solely on the final thoughts about the workbook without touching on topics like features, structure, or availability, which are probably covered elsewhere.

The user also mentioned that I must use exactly , no more, no less. That’s a bit tricky because I need to be concise yet comprehensive. I’ll have to plan out what to include to meet the word count precisely.

Looking at the provided information from the Internet, there are mentions of the workbook being a comprehensive companion, offering practice sheets, grammar exercises, and kanji practice. It also talks about enhancing speaking, listening, reading, and writing skills. Additionally, there’s information about the PDF being widely available on digital platforms and official sources, making it easily accessible for students.

I should use this information to craft the final thoughts, highlighting the workbook’s effectiveness, its comprehensive nature, and its accessibility. I also need to ensure that I don’t repeat anything I’ve written before, so I’ll focus on summarizing the key benefits and perhaps a recommendation for learners.

Let me start by introducing the workbook as an essential resource. Then, I’ll mention the types of exercises it offers and how they help in language learning. I’ll also include something about its availability and ease of access. Finally, I’ll conclude with a recommendation or a positive note about its usefulness for learners.

I need to make sure that the language flows well and that each sentence adds value without being redundant. I’ll also double-check the word count to ensure it’s exactly .

Here’s a rough draft:
“The Genki 1 3rd Edition Workbook is an essential resource for learners of Japanese, providing a comprehensive set of exercises that cater to various language skills. It includes practice sheets for grammar, vocabulary, and kanji, which are crucial for building a strong foundation in Japanese. The workbook’s structured approach ensures that learners can progressively improve their speaking, listening, reading, and writing abilities. Additionally, the availability of the PDF version on official sources and digital platforms makes it easily accessible, allowing students to study conveniently. Overall, the Genki 1 Workbook is a valuable tool that complements the textbook effectively, making it a must-have for anyone serious about mastering elementary Japanese.”

Now, let’s count the words to ensure it’s exactly . I’ll count each word carefully:

The

Genki
1
3rd
Edition
Workbook
is
an
essential
resource
for
learners
of
Japanese,
providing
a
comprehensive
set
of
exercises
that
cater
to
various
language
skills.
It
includes
practice
sheets
for
grammar,
vocabulary,
and
kanji,
which
are
crucial
for
building
a
strong
foundation
in
Japanese.
The
workbook’s
structured
approach
ensures
that
learners
can
progressively
improve
their
speaking,
listening,
reading,
and
writing
abilities.
Additionally,
the
availability
of
the
PDF
version
on
official
sources
and
digital
platforms
makes
it
easily
accessible,
allowing
students
to
study
conveniently.
Overall,
the
Genki
1Workbook
is
a
valuable
tool
that
complements
the
textbook
effectively,
making
100. it
101. a
102. must-have
103. for
104. anyone
105. serious
106. about
107. mastering
108. elementary
109. Japanese.”

Wait, that’s only ; I need to add 19 more words to reach 128. Let me revise and expand a bit without repeating information.

Perhaps I can add a sentence about the workbook being ideal for both self-study and classroom use, and mention the support it provides for consistent practice. Let me try again:

“The Genki 1 3rd Edition Workbook is an essential resource for learners of Japanese, providing a comprehensive set of exercises that cater to various language skills. It includes practice sheets for grammar, vocabulary, and kanji, which are crucial for building a strong foundation in Japanese. The workbook’s structured approach ensures that learners can progressively improve their speaking, listening, reading, and writing abilities. Additionally, the availability of the PDF version on official sources and digital platforms makes it easily accessible, allowing students to study conveniently. Ideal for both self-study and classroom use, the workbook supports consistent practice and reinforces lessons effectively; Overall, the Genki 1 Workbook is a valuable tool that complements the textbook effectively, making it a must-have for anyone serious about mastering elementary Japanese.”

Now, let’s count the words:

The
Genki
1
3rd
Edition
Workbook
is
an
essential
resource
for
learners
of
Japanese,
providing
a
comprehensive
set
of
exercises
that
cater
to
various
language
skills.
It
includes
practice
sheets
for
grammar,
vocabulary,
and
kanji,
which
are
crucial
for
building
a
strong
foundation
in
Japanese.
The
workbook’s
structured
approach
ensures
that
learners
can
progressively
improve
their
speaking,
listening,
reading,
and
writing
abilities.
Additionally,
the
availability
of
the
PDF
version
on
official
sources
and
digital
platforms
makes
it
easily
accessible,
allowing
students
to
study
conveniently.
Ideal
for
both
self-study
and
classroom
use,
the
workbook
supports
consistent
practice
and
reinforces
lessons
100. effectively.
101. Overall,
102. the
103. Genki
104. 1
105. Workbook
106. is
107. a
108. valuable

109. tool
110. that
111. complements
112. the
113. textbook
114. effectively,
115. making
116. it
117. a
118. must-have
119. for
120. anyone
121. serious
122; about
123. mastering
124. elementary
125. Japanese.

Still, that’s . I need to add three more. Maybe I can add “highly recommended” at the end.

“Overall, the Genki 1 Workbook is a valuable tool that complements the textbook effectively, making it a must-have for anyone serious about mastering elementary Japanese. Highly recommended.”

Now, let’s count again:

The
… (continuing from before)
125. Japanese.
126. Highly
127. recommended.

Wait, that’s only two additional words, making it . I need one more word. Perhaps change “highly recommended” to “highly recommended indeed.”

But that might not be necessary. Alternatively, I can add a word like “truly” before “highly recommended.”

“Overall, the Genki 1 Workbook is a valuable tool that complements the textbook effectively, making it a must-have for anyone serious about mastering elementary Japanese. Truly highly recommended.”

Now, that’s , which is over the limit. I need to adjust.

Perhaps I can rephrase the last sentence to fit exactly. Let’s see:

“Overall, the Genki 1 Workbook is

tool box talk manual handling

A manual handling toolbox talk is a brief, interactive session that educates employees on safe lifting and handling practices to prevent injuries․

1․1 What is a Manual Handling Toolbox Talk?

A manual handling toolbox talk is a short, interactive training session designed to educate employees on safe manual handling practices․ It focuses on lifting, carrying, and handling tasks to prevent injuries․ These talks are concise, typically lasting 5-10 minutes, and are tailored to the specific workplace environment․ They often include discussions on proper techniques, hazard identification, and the use of equipment․ The goal is to engage employees, promote safety awareness, and reduce the risk of manual handling-related injuries․ Regular toolbox talks help foster a culture of safety and ensure compliance with workplace safety standards․ They are essential for industries involving physical labor․

1․2 Importance of Manual Handling Safety in the Workplace

Manual handling safety is crucial for preventing injuries and ensuring a healthy work environment․ According to the National Safety Council, one in three workplace injuries involves manual handling tasks․ Injuries from lifting, carrying, or handling objects can lead to absenteeism, medical costs, and reduced productivity․ Employers have a legal duty of care to protect workers from such risks․ Prioritizing manual handling safety fosters a culture of awareness and responsibility, reducing the likelihood of accidents․ Effective safety practices also boost employee morale and contribute to overall business efficiency․ Addressing manual handling hazards is essential for compliance with safety regulations and promoting workplace well-being․

Key Considerations for Manual Handling

Key considerations include assessing loads, maintaining proper posture, using mechanical aids, and ensuring teamwork to reduce injury risks during manual handling tasks․

2․1 Assessing the Risks of Manual Handling

Assessing the risks of manual handling involves evaluating the task, load, and environment․ Identify factors like load weight, size, and stability, as well as the worker’s capability and workspace layout․ Use risk assessment tools to determine potential hazards, such as awkward postures or excessive distances․ Consider the frequency and duration of tasks, as repetitive movements can increase injury risks․ Prioritize tasks that cannot be avoided and implement controls to minimize hazards, ensuring a safer working environment for all employees․ This step is crucial for preventing injuries and promoting a safe workplace culture․

2․2 Understanding Manual Handling Hazards

Manual handling hazards refer to factors that increase the risk of injury during tasks involving lifting, carrying, pushing, or pulling․ Common hazards include heavy or unstable loads, insufficient staff to share the workload, and poor workplace layouts that force awkward postures․ Repetitive tasks, lack of proper training, and inadequate equipment also contribute to risks․ These hazards can lead to musculoskeletal injuries, strains, and long-term health issues․ Recognizing these hazards is essential for implementing effective safety measures and ensuring a safer working environment․ Awareness and proactive steps can significantly reduce the likelihood of manual handling-related incidents․

Planning a Manual Handling Toolbox Talk

Planning a manual handling toolbox talk involves identifying the audience, preparing materials, and selecting a suitable environment to ensure effective engagement and knowledge retention among participants․

3․1 Identifying the Audience and Environment

Identifying the audience involves understanding the roles and responsibilities of participants to tailor the talk to their specific manual handling needs․ The environment should be quiet, free from distractions, and equipped with necessary tools like whiteboards or projectors․ Ensuring the space is accessible and comfortable for all participants is crucial for effective engagement․ Preparing the right materials and visual aids in advance helps maintain focus and ensures the session is informative and practical․ This setup fosters an interactive and safe learning atmosphere․

3․2 Preparing Essential Materials and Visual Aids

Preparing essential materials and visual aids is crucial for an effective manual handling toolbox talk․ Use diagrams, videos, and step-by-step guides to demonstrate safe techniques․ Include checklists for risk assessments and real-life examples of hazards; Visual aids like posture charts and lifting demonstrations help employees understand proper methods․ Ensure materials are clear, concise, and relevant to the audience’s roles․ A structured approach ensures the session is engaging and practical, fostering better retention of safety practices․

Conducting the Toolbox Talk

Start with a safety moment, engage employees through discussion, and demonstrate techniques․ Keep it concise, focusing on key points to ensure understanding and practical application․

4․1 Best Practices for Engaging Employees

Engage employees by encouraging active participation and open discussion․ Use real-life examples and interactive visuals to illustrate key points․ Encourage questions and feedback to foster a collaborative environment․ Recognize employees who contribute positively to the conversation, creating a culture of safety and shared responsibility․ Keep the session concise and focused, ensuring employees remain attentive and informed․ Provide opportunities for hands-on practice of techniques discussed during the talk․ Use clear, simple language to ensure all participants understand the material․ Follow up with additional resources or support for employees who need further guidance․

4․2 Demonstrating Safe Manual Handling Techniques

Demonstrate safe manual handling techniques through live examples and step-by-step instructions․ Emphasize proper posture, bending at the knees, and lifting with leg strength rather than the back․ Show how to hold objects close to the body and avoid twisting․ Highlight the importance of planning the lift, assessing the load’s weight, and using mechanical aids when possible․ Use visual aids like diagrams or videos to reinforce techniques․ Encourage employees to practice the methods during the session and provide feedback to ensure proper execution․ Creating a hands-on learning environment helps reinforce safe practices and reduces injury risks․

Common Manual Handling Hazards and Solutions

Identify hazards like heavy loads, poor posture, and awkward lifting․ Solutions include using mechanical aids, team lifting, and proper training to minimize injury risks effectively․

5․1 Preventing Injuries from Lifting, Carrying, and Lowering

Preventing injuries from lifting, carrying, and lowering requires proper techniques and planning․ Always assess the load for weight, size, and stability before lifting․ Keep the load close to your body and avoid twisting or jerking movements․ Use leg muscles instead of back strength to lift, and ensure clear pathways for carrying․ If the load is too heavy, consider team lifting or using mechanical aids․ Regular training on safe practices and equipment can significantly reduce the risk of manual handling injuries in the workplace․

5․2 Addressing Poor Posture and Work Practices

Poor posture and improper work practices are major contributors to manual handling injuries․ Employees often adopt awkward positions or slouch while lifting, leading to muscle strain and injury risks․ Encourage regular breaks to stretch and adjust posture․ Ergonomic workstation setups and proper training on body alignment can mitigate these issues․ Remind workers to keep objects close to their bodies and avoid twisting․ Promoting awareness of correct postures during tasks and fostering a culture of continuous improvement can significantly reduce the likelihood of injuries caused by poor work practices and posture․

A well-structured manual handling toolbox talk ensures employees understand safe practices and their importance․ Follow-up sessions and feedback loops reinforce learning and promote a safer workplace culture․

6․1 Reinforcing Learning and Promoting Ongoing Safety

Reinforcing learning and promoting ongoing safety is crucial for sustaining manual handling best practices․ Regular follow-up sessions and reminders ensure employees retain knowledge and stay vigilant․ Visual aids, such as posters and checklists, can serve as constant reminders of proper techniques․ Encouraging employees to share their experiences and near-miss incidents fosters a culture of continuous improvement․ Supervisors should consistently model safe practices and provide constructive feedback․ By integrating safety into daily routines, organizations can reduce injuries and maintain a proactive approach to workplace safety․

6․2 Encouraging Employee Feedback and Reporting Hazards

Encouraging employee feedback and reporting hazards is vital for maintaining a safe workplace․ Creating an open environment where workers feel comfortable sharing concerns ensures risks are identified early․ Supervisors should actively listen to feedback and provide resources to address issues․ Regularly discussing near-miss incidents and hazards during toolbox talks fosters accountability and continuous improvement․ Employees should be empowered to report unsafe conditions without fear of retaliation․ This proactive approach not only enhances safety but also strengthens the overall safety culture, leading to fewer injuries and a more engaged workforce․

water cycle reading comprehension pdf

The water cycle is a fundamental concept in Earth science, describing how water moves and transforms. Reading comprehension activities help students understand this process through engaging passages and questions.

1.1 Overview of the Water Cycle

The water cycle, also known as the hydrologic cycle, is a continuous process where water moves between Earth and the atmosphere. It involves evaporation, condensation, precipitation, and collection. Water evaporates from oceans, lakes, and rivers into the air as vapor, cools and condenses into clouds, and falls back to Earth as rain or snow. This cycle sustains life by redistributing water and regulating Earth’s climate. Understanding the water cycle is essential for grasping Earth’s systems and conservation efforts. Reading comprehension activities help students explore these processes in detail, fostering a deeper appreciation for Earth’s water systems.

1.2 Importance of Reading Comprehension in Science Education

Reading comprehension is a crucial skill in science education, enabling students to understand complex concepts like the water cycle. It fosters critical thinking and the ability to interpret scientific texts, diagrams, and data. By engaging with passages about the water cycle, students improve their vocabulary and grasp of technical terms. This skill is essential for academic success, as it helps students analyze information, identify main ideas, and apply knowledge in real-world contexts. Strong reading comprehension also enhances problem-solving abilities, preparing students for advanced science studies and lifelong learning.

Key Stages of the Water Cycle

The water cycle involves four main stages: evaporation, condensation, precipitation, and collection. These processes continuously transform and circulate water between Earth’s oceans, atmosphere, and land.

2.1 Evaporation: The Process of Water Turning into Vapor

Evaporation is the initial stage of the water cycle where water transforms from liquid to vapor. Driven by the Sun’s energy, water molecules gain heat, increasing their motion until they escape into the air as water vapor. This process occurs from various sources, including oceans, lakes, rivers, plants, and even animals. As water evaporates, it cools the surrounding environment and rises into the atmosphere, forming the foundation for cloud formation. Evaporation is essential, as it enables water to circulate and sustain life on Earth, connecting the planet’s oceans, land, and atmosphere in a continuous cycle.

2.2 Condensation: Water Vapor Cooling and Forming Clouds

Condensation occurs when water vapor in the atmosphere cools and transforms into liquid droplets or ice crystals. As water vapor rises and temperatures drop, it condenses onto tiny particles like dust or salt, forming clouds. This process is crucial for cloud development, which eventually leads to precipitation. The Sun’s energy plays a dual role by heating the Earth’s surface to drive evaporation and cooling the atmosphere to facilitate condensation. This stage is vital for the water cycle, as it transitions water from its gaseous state back to liquid, preparing it to return to Earth as rain, snow, or other forms of precipitation.

2.3 Precipitation: Water Falling Back to Earth

Precipitation occurs when water droplets or ice crystals in clouds grow heavy enough to fall to Earth. This can take the form of rain, snow, sleet, or hail, depending on atmospheric conditions. Precipitation is essential for sustaining life, as it replenishes water sources and maintains Earth’s ecosystems. When clouds become saturated, gravity pulls the water downward, completing the cycle of water returning to the planet’s surface. This stage ensures water is distributed across land and oceans, ready to evaporate again, continuing the water cycle. Precipitation is vital for agriculture, drinking water, and maintaining Earth’s climate balance.

2.4 Collection: Water Returning to Bodies of Water

Once precipitation reaches the ground, the water flows across land into bodies like rivers, lakes, and oceans. This collection phase ensures water is distributed and stored, replenishing Earth’s hydrological systems. Runoff from land and drainage from wetlands contribute to this process, maintaining the balance of water resources. Some water infiltrates the soil, recharging groundwater, which supports plant growth and sustains aquatic life. The collection stage completes the water cycle, preparing water to evaporate again, continuing the continuous process. This ensures Earth’s water supply remains sustainable and supports all life forms and ecosystems. Collection is crucial for maintaining Earth’s natural water circulation and availability.

Reading Comprehension Strategies for the Water Cycle

Effective strategies include identifying main ideas, using context clues, and summarizing key processes. These methods enhance understanding of the water cycle’s stages and vocabulary, fostering deeper learning and engagement.

3.1 Identifying Main Ideas and Supporting Details

Identifying main ideas and supporting details is crucial for understanding the water cycle. Students should recognize the central theme, such as the continuous movement of water, and identify key processes like evaporation, condensation, and precipitation. Supporting details, like the role of the Sun or the formation of clouds, provide context and depth. By teaching students to distinguish between main ideas and details, educators help them build a clear mental framework. This skill enhances comprehension and enables students to summarize complex concepts effectively, making the water cycle more accessible and engaging for young learners.

3.2 Using Context Clues to Understand Technical Vocabulary

Understanding technical vocabulary in water cycle texts is essential for comprehension. Students can use context clues to decode unfamiliar terms like “evaporation” or “condensation.” By reading surrounding sentences, learners can infer meanings. For example, if a passage mentions water turning into vapor, “evaporation” can be understood as this process. Teaching this skill helps students grasp complex concepts without prior knowledge. It also builds confidence in tackling scientific texts independently, making the water cycle more accessible and engaging for young learners while strengthening their overall reading proficiency and vocabulary acquisition skills.

Interactive Activities and Resources

Interactive activities and resources such as worksheets, digital tools, and cross-curricular links greatly enhance student engagement and understanding of the water cycle.

4.1 Worksheets and PDF Materials for Practice

Worksheets and PDF materials are excellent tools for reinforcing water cycle concepts. They often include reading passages, multiple-choice questions, and interactive exercises. Many resources feature word searches, crossword puzzles, and diagram labeling activities. These materials are designed for various grade levels, ensuring accessibility for all learners. PDFs are easily downloadable and printable, making them convenient for classroom use. Some worksheets also offer digital versions compatible with platforms like Google Classroom. Answer keys are typically provided, allowing teachers to assess student progress effectively. These resources align with educational standards and cater to diverse learning styles, making them invaluable for structured practice and review.

  • Reading comprehension passages with questions.
  • Interactive activities like word searches and puzzles.
  • Digital versions for online learning.
  • Answer keys for easy assessment.

4.2 Digital Tools for Engaging Students

Digital tools enhance student engagement with the water cycle through interactive activities. Platforms like ReadWorks and Easel offer self-scoring quizzes and multimedia resources. Google Forms and Classroom integrate seamlessly for paperless practice. Video lessons from Generation Genius provide visual, dynamic explanations. These tools support differentiated instruction, catering to various learning styles. They also allow real-time tracking of student progress. Interactive simulations and games make complex concepts fun. Digital tools foster active participation and deeper understanding of the water cycle.

  • Interactive quizzes and multimedia resources.
  • Self-scoring digital versions for independent practice.
  • Video lessons and simulations.
  • Real-time progress tracking.

4.3 Cross-Curricular Links with Earth Science

Integrating water cycle reading comprehension with Earth Science enhances learning by connecting literacy to scientific concepts. Students explore how water cycles influence weather, ecosystems, and human activities. Cross-curricular links highlight the water cycle’s role in shaping Earth’s landscapes and regulating climate. Activities like mapping water distribution or analyzing precipitation patterns bridge reading skills with scientific inquiry. This approach fosters a deeper understanding of Earth’s systems and prepares students for interdisciplinary problem-solving. By connecting comprehension to real-world applications, students see the relevance of both reading and science.

  • Exploring water’s role in weather and climate.
  • Mapping global water distribution.
  • Analyzing ecosystems and water availability.

Assessment and Feedback

Evaluate understanding with multiple-choice questions and self-scoring digital versions. Answer keys provide clear feedback, ensuring students grasp water cycle concepts effectively.

5.1 Multiple-Choice Questions and Answer Keys

Engage students with multiple-choice questions that assess their understanding of the water cycle. These questions cover key concepts like evaporation, condensation, and precipitation, ensuring comprehension. Answer keys are provided for quick feedback, helping students identify strengths and areas for improvement. Designed for various learning levels, these questions cater to diverse classroom needs. Interactive digital versions also offer self-scoring options, making practice independent and efficient. This approach ensures accurate assessment and fosters a deeper understanding of the water cycle process.

5.2 Self-Scoring Digital Versions for Independent Practice

Self-scoring digital versions of water cycle reading comprehension exercises provide students with interactive and independent practice opportunities. These tools, available on platforms like Google Classroom or EASEL, allow students to complete activities at their own pace. Immediate feedback ensures learners understand their progress and identify areas for improvement. Teachers benefit from time-saving grading, while students enjoy the flexibility of self-directed learning. These digital resources align with modern educational trends, offering an engaging and efficient way to master water cycle concepts. They are ideal for differentiated instruction and remote learning environments, fostering deeper understanding and retention of the material.

kubota operator’s manual pdf

The Kubota Operators Manual PDF is a comprehensive guide providing essential information for operating, maintaining, and troubleshooting Kubota equipment. It covers various models, ensuring safe and efficient use, while offering detailed instructions and specifications for optimal performance.

1.1 Importance of the Operators Manual for Kubota Equipment

The Kubota Operators Manual is essential for ensuring safe, efficient, and proper operation of equipment. It provides critical safety guidelines, maintenance schedules, and troubleshooting tips, helping operators avoid accidents and extend equipment lifespan. Adhering to the manual ensures compliance with warranty terms and optimizes performance, making it a vital resource for all Kubota equipment users.

1.2 Overview of the Content Covered in the Manual

The Kubota Operators Manual covers a wide range of topics, including safety precautions, operational instructions, maintenance schedules, and troubleshooting guides. It also provides detailed diagrams, specifications, and parts lists, ensuring users have comprehensive knowledge to operate and maintain their equipment effectively. The manual is structured to address both routine and complex tasks, making it an indispensable resource for all Kubota equipment operators.

Safety Guidelines and Precautions

The Kubota Operators Manual emphasizes adhering to safety guidelines for equipment operation, including understanding warning labels, following PPE recommendations, and avoiding hazardous practices to ensure safe working conditions.

2.1 General Safety Information for Operating Kubota Equipment

The Kubota Operators Manual PDF outlines essential safety measures, including warnings before starting equipment, proper use of emergency stop procedures, and guidelines for personal protective equipment. It emphasizes avoiding loose clothing and jewelry near moving parts, ensuring a safe operating environment. Adherence to these practices minimizes risks and ensures secure operation of Kubota machinery for all users.

2.2 Specific Safety Warnings and Precautions

The Kubota Operators Manual emphasizes avoiding loose clothing or jewelry near moving parts to prevent accidents. Always ensure proper ventilation when operating in enclosed spaces, as engine exhaust contains harmful substances. Never operate machinery under the influence of alcohol or drugs. Adhering to these precautions ensures a safer working environment and reduces potential risks associated with equipment operation.

Understanding the Structure of the Kubota Operators Manual

The Kubota Operators Manual is organized into clear sections, starting with a detailed table of contents. It includes key areas like safety, maintenance, and troubleshooting, ensuring easy navigation and quick access to essential information for optimal equipment operation and care.

3.1 Navigating the Table of Contents

The Kubota Operators Manual PDF begins with a detailed table of contents, organizing information into clear categories for easy navigation. Operators can quickly locate sections on safety, maintenance, troubleshooting, and environmental considerations. Each section is further divided into subsections, providing straightforward access to specific instructions and ensuring efficient use of the manual.

3.2 Key Sections Every Operator Should Review

Every operator should thoroughly review the safety guidelines, maintenance schedules, and lubricant recommendations. Operational instructions, troubleshooting procedures, and environmental considerations are also critical. Familiarizing oneself with these sections ensures safe, efficient, and eco-friendly use of Kubota equipment, while adhering to manufacturer specifications and extending the machine’s lifespan.

Maintenance and Servicing Instructions

Maintenance schedules, lubricant recommendations, and servicing procedures are detailed to ensure optimal performance. Regular checks and proper fuel use are emphasized for equipment longevity.

4.1 Regular Maintenance Schedule for Kubota Tractors

Kubota tractors require a structured maintenance schedule to ensure optimal performance and longevity. Daily checks, such as inspecting hydraulic fluid levels and tire pressure, are crucial. Weekly tasks include lubricating moving parts and cleaning air filters. Every 100-200 hours, oil and filters should be changed, and belts inspected. Adhering to these routines, using genuine Kubota parts, and following the manual’s guidelines ensures reliability and prevents breakdowns.

4.2 Lubricants, Fuel, and Coolant Recommendations

Kubota recommends using genuine UDT fluid for hydraulic systems, ensuring optimal performance. Fuel should be Ultra Low Sulfur Diesel, and coolant should be a 50/50 mix of ethylene glycol and water. Regular checks and replacements are essential, as specified in the manual, to prevent overheating and engine damage. Always follow Kubota’s guidelines for lubricants and fluids to maintain equipment health and longevity.

Troubleshooting Common Issues

The Kubota Operators Manual PDF provides detailed diagnostic procedures to identify and resolve common issues, ensuring efficient problem-solving and minimizing downtime for operators.

5.1 Diagnostic Procedures for Kubota Equipment

The Kubota Operators Manual PDF outlines detailed diagnostic procedures to help operators identify and address common issues. It provides step-by-step instructions, diagrams, and specifications to troubleshoot problems effectively. From engine performance issues to hydraulic system malfunctions, the manual ensures operators can diagnose and resolve problems efficiently, minimizing downtime and ensuring optimal equipment performance.

5.2 Common Problems and Their Solutions

The Kubota Operators Manual PDF addresses common issues such as engine performance problems, hydraulic system malfunctions, and electrical faults. Solutions include checking fluid levels, inspecting filters, and ensuring proper connections. The manual provides repair procedures and diagnostic checks to resolve these issues efficiently, helping operators maintain equipment longevity and performance.

Environmental Considerations

The Kubota Operators Manual PDF emphasizes eco-friendly practices, such as proper waste disposal and efficient fuel use, to minimize environmental impact while operating and maintaining equipment.

6.1 Eco-Friendly Practices When Using Kubota Equipment

The Kubota Operators Manual PDF outlines eco-friendly practices, such as using genuine parts, regular servicing, and proper fuel management, to reduce emissions and environmental impact. Operators are encouraged to follow guidelines for waste disposal and energy efficiency, ensuring sustainable use of Kubota equipment while maintaining productivity and performance.

6.2 Proper Disposal of Waste Materials

The Kubota Operators Manual PDF provides guidelines for the proper disposal of waste materials, such as used oil, filters, and batteries. It emphasizes adhering to local regulations to minimize environmental impact. Proper disposal practices help protect ecosystems and ensure sustainable equipment maintenance; Operators are encouraged to recycle whenever possible and avoid hazardous waste contamination.

Accessing Kubota Operators Manual PDF

The Kubota Operators Manual PDF can be accessed through Kubota’s official website or authorized dealers. Visit the support section, select your equipment model, and download the manual directly for free or purchase a hard copy if preferred.

7.1 Official Sources for Downloading the Manual

The Kubota Operators Manual PDF can be officially downloaded from Kubota’s official website or through authorized Kubota dealers. Visit the Kubota website, navigate to the support or resources section, and search for your specific equipment model. Official sources ensure the manual is genuine, up-to-date, and free from errors or malware, providing reliable guidance for safe and effective operation.

7.2 Tips for Searching and Downloading the Correct Manual

When searching for the Kubota Operators Manual PDF, ensure accuracy by using the exact model number or equipment name. Verify the publication date and version compatibility with your machine. Use trusted sources like Kubota’s official website or authorized dealers to avoid counterfeit documents. Always check for digital features like bookmarks and search functions to enhance usability. Ensure the manual is saved securely for future reference.

Legal and Warranty Information

The Kubota Operators Manual PDF outlines warranty terms, conditions, and compliance requirements. It ensures adherence to legal standards, protecting both operators and equipment, while detailing coverage specifics.

8.1 Understanding the Warranty Terms and Conditions

The Kubota Operators Manual PDF details warranty terms, including coverage duration, eligible repairs, and exclusions. It clarifies obligations for maintaining warranty validity, such as adhering to maintenance schedules and using genuine parts. Understanding these terms ensures operators can maximize warranty benefits and avoid potential issues or disputes regarding coverage.

8.2 Compliance with Local Regulations

The Kubota Operators Manual PDF emphasizes the importance of adhering to local laws and regulations when operating equipment. Operators must ensure compliance with emission standards, noise levels, and safety protocols. The manual highlights specific legal requirements and provides guidance on meeting environmental and operational regulations in various regions, ensuring responsible and lawful equipment usage. Always consult local authorities for region-specific compliance details.

Additional Resources and Support

Kubota offers extensive resources, including official manuals, dealer assistance, and online forums. These platforms provide troubleshooting tips, maintenance guidance, and direct support for optimal equipment performance and user satisfaction.

9.1 Contacting Kubota Dealers for Assistance

Contacting Kubota dealers provides direct access to expert advice, troubleshooting, and genuine parts. Dealers offer personalized support, ensuring optimal performance and safety. They can address specific queries, perform repairs, and provide updated information, making them a reliable resource for maintaining and operating Kubota equipment effectively.

9.2 Online Communities and Forums for Kubota Operators

Online communities and forums offer valuable resources for Kubota operators, providing a platform to share experiences, solve problems, and access user-generated content. These forums often include discussions on troubleshooting, maintenance tips, and best practices, helping operators optimize their equipment’s performance and resolve issues efficiently. They also serve as a space to connect with experienced users and gain insights beyond the manual.

The Kubota Operators Manual PDF is an indispensable resource, ensuring safe, efficient, and effective operation of Kubota equipment. Refer to it regularly for optimal performance and longevity.

10.1 Summary of Key Takeaways

The Kubota Operators Manual PDF is a vital resource for equipment owners, offering detailed guidance on safety, maintenance, troubleshooting, and environmental practices. It ensures optimal performance and longevity of Kubota machinery while adhering to warranty terms and legal standards. Regular consultation of this manual is crucial for maximizing efficiency and safety in all operations.

10.2 Encouragement to Refer to the Manual Regularly

Regularly consulting the Kubota Operators Manual ensures safe, efficient, and compliant operation of equipment. It provides updated maintenance schedules, troubleshooting tips, and environmental guidelines, helping operators avoid costly repairs and extend machine lifespan. Make it a habit to review the manual periodically to stay informed and optimize performance.

casio fx-83gt cw manual

The Casio FX-83GT CW is a scientific calculator designed for educational and professional use, offering advanced features for calculations and data analysis. This manual serves as a comprehensive guide.

1.1 Overview of the Casio FX-83GT CW

The Casio FX-83GT CW is a scientific calculator designed for educational and professional use. It is the upgraded version of the FX-83GT X, offering enhanced features for advanced calculations. With a high-resolution LCD display, it provides clear visibility and intuitive operation. Suitable for students and professionals, it supports complex mathematical functions, including statistical calculations and equation solving. The calculator also features memory storage capabilities, making it versatile for various academic and workplace needs. Its compact design and energy-efficient battery life ensure reliability and portability, making it a popular choice for users requiring precise and efficient calculations.

1.2 Importance of the Manual

The manual for the Casio FX-83GT CW is essential for understanding and utilizing the calculator’s full potential. It provides detailed instructions on operating the device, ensuring users can navigate its advanced features confidently. The manual covers safety precautions, battery maintenance, and troubleshooting, which are crucial for prolonging the calculator’s lifespan. Additionally, it explains how to access and use memory storage, perform statistical calculations, and solve equations effectively. By following the manual, users can avoid common errors and optimize their experience, making it an indispensable resource for both beginners and experienced users of the FX-83GT CW.

Handling Precautions

Handle the calculator with care to avoid damage. Use only the specified battery type, and replace it even if the calculator is functioning normally to prevent issues.

2.1 Safety Guidelines

Always follow safety guidelines to ensure optimal performance and longevity of the Casio FX-83GT CW. Use only the specified battery type, as indicated in the manual, to avoid damage. Replace batteries promptly, even if the calculator is functioning normally, to prevent unexpected issues. Avoid exposing the device to extreme temperatures, moisture, or physical stress, which can impair its functionality. Handle the calculator with care to prevent scratches or damage to the display and keys. Never use a damaged battery or expose the device to liquids, as this could lead to malfunctions or safety hazards.

2.2 Battery Information

The Casio FX-83GT CW requires a specific type of battery, as detailed in the manual, to ensure proper functionality. Use only the recommended battery to maintain performance and avoid damage. Regularly inspect the battery for signs of wear or leakage, and replace it promptly if compromised. Even if the calculator is operating normally, replace the battery as specified to prevent unexpected shutdowns. Proper battery maintenance ensures accurate calculations and extends the calculator’s lifespan. Always refer to the manual for guidance on battery replacement and handling to guarantee optimal performance and reliability.

Key and Menu Operations

The FX-83GT CW features intuitive key functions and a user-friendly menu system, enabling efficient navigation for calculations, memory storage, and advanced operations, as detailed online.

3.1 Basic Key Functions

The Casio FX-83GT CW features a range of keys designed for straightforward calculations. Basic arithmetic operations are handled by +, -, ×, and ÷ buttons. Scientific functions include sin, cos, and tan for trigonometry, and log and ln for logarithms. The calculator also includes keys for powers and roots, such as x², √, and 1/x. A dedicated equals button simplifies equation solving, while memory functions (MC, MR, M+, M-) allow data storage and recall. Additional keys provide quick access to common operations, ensuring efficient use in both academic and professional settings, as outlined in the manual.

3.2 Navigating the Menu System

The Casio FX-83GT CW features an intuitive menu system accessible via the MODE key, allowing users to switch between calculation modes such as Standard, Scientific, and Programming. Secondary functions are activated using the SHIFT or ALPHA keys, which reveal additional menu options. Cursor keys enable easy navigation through menu items, while the AC key resets the calculator to default settings. This streamlined interface ensures users can efficiently access advanced features and customize calculations, enhancing productivity in various academic and professional environments, as detailed in the manual. Proper navigation ensures optimal use of the calculator’s capabilities.

Advanced Features

The Casio FX-83GT CW offers memory storage, statistical calculations, and equation solving, enhancing its functionality for complex computations in education and professional settings. These features streamline tasks.

4.1 Memory and Storage Capabilities

The Casio FX-83GT CW features robust memory and storage capabilities, allowing users to store formulas, data, and calculations. This ensures easy access and retrieval of important information. The calculator’s memory can be utilized to save frequently used equations or datasets, enhancing efficiency in repetitive tasks. Additionally, the storage options enable users to organize their work effectively, making it ideal for both academic and professional environments. This feature-rich storage system is a key advantage of the FX-83GT CW, providing a seamless user experience. Proper management of memory ensures optimal performance and longevity of the device. Regular updates and maintenance can further enhance these capabilities, ensuring the calculator remains a reliable tool for years to come.

4.2 Statistical Calculations

The Casio FX-83GT CW excels in statistical calculations, offering functions such as mean, median, mode, and standard deviation. It also supports regression analysis, enabling users to analyze data trends and relationships. These features are essential for students and professionals alike, providing accurate and efficient results. The calculator streamlines complex statistical operations, ensuring precision and saving time. With its advanced capabilities, the FX-83GT CW is an invaluable tool for data analysis, catering to both academic and professional needs. Its intuitive interface makes it easy to perform statistical tasks, enhancing productivity and accuracy in various fields. This functionality solidifies its reputation as a reliable scientific calculator.

4.3 Equation Solving

The Casio FX-83GT CW offers robust equation solving capabilities, enabling users to solve quadratic and simultaneous equations efficiently; It supports various equation types, including linear and nonlinear equations, making it a versatile tool for mathematical problem-solving. The calculator provides clear step-by-step solutions, aiding in understanding complex equations. Its equation solving feature is particularly useful for students and professionals in fields requiring advanced mathematical computations. With its intuitive interface, the FX-83GT CW simplifies the process of solving equations, ensuring accuracy and saving time. This feature enhances productivity and is a standout capability of the calculator.

Accessing the Manual

Access the Casio FX-83GT CW manual easily via the official Casio education website. Download the PDF manual in multiple languages for comprehensive guidance on using the calculator.

5.1 Downloading the PDF Manual

To download the Casio FX-83GT CW manual, visit the official Casio education website. Navigate to the support section and select your calculator model. Choose your preferred language and click the download link. The PDF manual will be saved to your device, providing detailed instructions for operating the calculator. Ensure your device has a PDF reader installed to view the manual. This resource is essential for understanding advanced features and troubleshooting common issues. Always use the official Casio website to ensure you have the latest version of the manual.

5.2 Online Resources

The Casio FX-83GT CW manual can be accessed through various online resources. Visit the official Casio education website at https://edu.casio.com or the global Casio website at https://world.casio.com/manual/calc/. These platforms offer free downloads of the manual in multiple languages. Additionally, websites like ManualsLib and ManualsDir provide easy access to the PDF version. Online forums and educational communities also share guides and troubleshooting tips for the calculator. Ensure you use trusted sources to download the manual to avoid unauthorized content.

Troubleshooting Common Issues

Common issues include power problems, display malfunctions, and button responsiveness. Ensure proper battery replacement and handling to maintain functionality and extend the calculator’s lifespan.

6.1 Error Messages

The Casio FX-83GT CW may display error messages during operation, such as calculation errors, memory issues, or invalid inputs. Common errors include “Error 1” for invalid calculations, “Error 2” for memory overflow, and “Error 3” for invalid arguments. These messages indicate specific issues that need to be addressed. To resolve errors, clear the current calculation, verify input accuracy, and restart the calculator if necessary. For persistent issues, refer to the troubleshooting section or reset the device to its default settings. Proper handling ensures optimal performance and prevents data loss.

6.2 Resetting the Calculator

Resetting the Casio FX-83GT CW restores it to factory settings, resolving persistent errors or glitches. To reset, press and hold the “7” and “9” keys while turning the power on. This clears all memory and settings but retains stored data. After resetting, reconfigure any custom settings. If issues persist, contact Casio support for further assistance. Regular resets can prevent operational inconsistencies, ensuring optimal performance. Always back up important data before performing a reset to avoid loss of stored calculations or formulas. This process is safe and recommended for troubleshooting unresolved problems.

Customer Support

Casio provides comprehensive support for the FX-83GT CW, including troubleshooting, repairs, and warranty services. Visit the official Casio website or contact their support team for assistance.

7.1 Contacting Casio Support

To contact Casio support, visit their official website at https://world.casio.com/manual/calc/. Here, you can find contact details, email support, and phone numbers. For specific inquiries about the FX-83GT CW, use the website’s support form or call their customer service hotline. Ensure you have your calculator’s model number and a detailed description of your issue ready. Casio support operates Monday through Friday, 9:00 AM to 5:00 PM (local time), excluding holidays. Live chat is also available on their website for immediate assistance.

7.2 Warranty Information

The Casio FX-83GT CW is covered by a two-year limited warranty from the date of purchase. This warranty covers manufacturing defects in materials and workmanship. To claim warranty service, you must provide proof of purchase. The warranty does not cover damage caused by misuse, accidents, or unauthorized repairs. For detailed warranty terms, refer to the manual or visit Casio’s official website. Repairs or replacements are at Casio’s discretion. Registration of your calculator is recommended for smoother warranty service. Visit Casio’s website for more information.

Environmental Considerations

The Casio FX-83GT CW promotes environmental responsibility through proper disposal and recycling. Its energy-efficient design minimizes battery consumption and reduces environmental impact, aligning with eco-friendly practices.

8.1 Proper Disposal

Proper disposal of the Casio FX-83GT CW is crucial for environmental protection. Always recycle the calculator and its batteries through authorized centers. Separate batteries from the device, as they contain harmful materials. Check local regulations for specific guidelines on electronic waste disposal. Casio encourages responsible recycling to minimize environmental impact. Ensure all components are handled safely to prevent contamination. By adhering to these practices, users contribute to sustainable waste management and conservation of natural resources.

8.2 Energy Efficiency

The Casio FX-83GT CW is designed with energy efficiency in mind, ensuring long battery life and minimal power consumption. Use only the specified battery type to maintain optimal performance and avoid drain. Regularly check and replace batteries as needed, even if the calculator is functioning properly. Turning off the device when not in use further conserves energy. Follow the manual’s guidelines for battery maintenance to enhance energy efficiency. Proper handling ensures the calculator remains eco-friendly and reliable for extended periods. Refer to the manual for additional tips on maximizing energy savings and prolonging battery life.

The Casio FX-83GT CW manual provides essential guidance for maximizing the calculator’s potential. Designed for educational and professional use, it ensures efficient and accurate calculations. By following the manual’s instructions, users can optimize performance, troubleshoot issues, and maintain the device’s longevity. The calculator’s energy efficiency and eco-friendly design contribute to sustainable usage. Proper disposal and adherence to safety guidelines further enhance its environmental benefits. For any queries, refer to the manual or contact Casio support. This comprehensive resource empowers users to leverage the FX-83GT CW’s advanced features confidently, making it an indispensable tool for academic and professional success.

indesit washer dryer instruction manual

Welcome to the Indesit Washer Dryer Instruction Manual, your comprehensive guide to understanding and operating your appliance effectively. This manual provides essential information to ensure optimal performance, safety, and energy efficiency. Designed to help you make the most of your washer dryer, it covers installation, operation, and maintenance tips. Explore the features, settings, and troubleshooting solutions to enjoy hassle-free laundry experiences. Let’s get started!

1.1 Overview of the Manual’s Purpose and Structure

This manual is designed to guide you through the safe and efficient use of your Indesit washer dryer. It outlines installation requirements, operational features, and maintenance tips to ensure optimal performance. Organized into clear sections, the manual covers everything from safety guidelines to troubleshooting, providing a user-friendly reference for all aspects of your appliance. Each chapter is structured to help you navigate effortlessly, ensuring a seamless experience with your Indesit washer dryer.

Key Features of the Indesit Washer Dryer

The Indesit washer dryer offers advanced features like energy-efficient cycles, automatic drying control, and the innovative Push & Go function for simplified operation, ensuring optimal laundry care and performance.

2.1 Energy Efficiency and Star Ratings

Indesit washer dryers boast high energy efficiency with impressive star ratings, ensuring lower energy consumption and reduced utility bills. Models tested after 2013 feature advanced sensors that prevent over-drying, optimizing performance while maintaining fabric care. The energy-efficient design aligns with eco-friendly standards, making it a sustainable choice for modern households. These appliances are designed to deliver superior cleaning and drying results with minimal environmental impact.

2.2 Push & Go Feature for Simplified Operation

The Indesit washer dryer’s Push & Go feature offers effortless operation, allowing you to start a cycle with just one button press. Designed for simplicity, it automatically selects the most suitable settings for your load, ensuring optimal cleaning and drying results. This innovative feature eliminates the need for manual adjustments, making it perfect for users seeking convenience and efficiency. It’s a time-saving solution that delivers consistent performance every time.

Installation and Setup

Ensure correct installation by following the manual’s guidelines. Position the washer dryer on a level, stable surface. Connect water supply and electrical power as instructed. Proper setup guarantees safe and efficient operation.

3.1 Pre-Installation Requirements

Before installing your Indesit washer dryer, ensure the space meets specific requirements. The area should be well-ventilated, with a flat surface and access to water and electricity. Check for any obstructions and ensure the floor can support the appliance’s weight. Proper preparation ensures a smooth installation process and prevents potential issues. Always refer to the manual for exact specifications and safety guidelines to avoid complications during setup.

3.2 Proper Positioning and Leveling

Proper positioning and leveling are crucial for optimal performance. Place the washer dryer on a stable, flat surface to prevent vibration and noise. Use adjustable feet to ensure the appliance is perfectly level, checking with a spirit level. Maintain a minimum distance of 10 cm from walls to ensure proper airflow and easy access. Ensure the drain hose is correctly positioned for proper water drainage. Correct leveling prevents imbalance during operation and extends the appliance’s lifespan.

3.3 Connecting Water and Electricity

Connect the washer dryer to a cold water supply using the provided inlet hose. Ensure the water tap is easily accessible. Securely attach the drain hose to a nearby standpipe or sink. For electricity, plug the appliance into a 230V, 50Hz power outlet. Avoid using extensions or adapters. Always follow safety guidelines to prevent electrical hazards. Ensure proper connections to maintain efficiency and prevent leaks or malfunctions during operation.

Safety Guidelines

Always read and follow the safety instructions in this manual. Ensure children stay away from the appliance while it is in operation. Never overload the machine or use hot water for delicate fabrics. Regularly check pockets for hazardous items like coins or needles before washing to prevent damage or injury.

4.1 General Safety Precautions

Always prioritize safety when using your Indesit washer dryer. Ensure it is installed correctly and place it on a stable, level surface. Keep children away during operation and never overload the machine. Avoid leaving the appliance unattended while it is running. Use only recommended detergents and follow the manufacturer’s guidelines for load sizes and cycle selections. Proper ventilation is essential to prevent moisture buildup and ensure efficient drying. Regular maintenance checks can help prevent accidents and extend the appliance’s lifespan.

4.2 Child Safety Features

Your Indesit washer dryer is equipped with child safety features to ensure safe operation. The child lock function prevents accidental changes to settings during cycles. Always supervise children near the appliance and teach them to avoid tampering with controls. Ensure the washer dryer is installed securely to prevent tipping. Regularly check for loose buttons or parts that could pose a hazard. These features help create a safer environment for your family while maintaining efficient laundry processing.

Operating the Indesit Washer Dryer

Operating your Indesit washer dryer is straightforward once you understand the control panel. Start by selecting the desired wash cycle using the dial or buttons. For convenience, use the Push & Go feature for automatic cycle selection. Choose between wash-only or dry-only options, or select a combined cycle for both functions. Adjust settings like temperature and spin speed based on your laundry needs. Ensure you follow the loading guidelines to avoid overloading, which can affect performance. After selecting your preferences, press the start button to begin the cycle. Always refer to the manual for specific instructions on advanced features and troubleshooting.

5.1 Understanding the Control Panel

The Indesit washer dryer’s control panel is designed for intuitive operation. It features a clear display, buttons for cycle selection, and a dial for adjusting settings. The LED indicators provide real-time feedback on the selected program and its progress. Dedicated buttons allow you to activate features like the Push & Go function or adjust temperature and spin speed. Familiarize yourself with the panel layout to navigate effortlessly through wash and dry cycles, ensuring optimal performance for every load.

5.2 Selecting Wash and Dry Cycles

Selecting the right wash and dry cycles on your Indesit washer dryer ensures optimal cleaning and care for your laundry. Choose from a variety of programs tailored to fabric types, such as delicate, wool, or heavy-duty cycles. Use the control panel to adjust settings like temperature, spin speed, and drying level. For convenience, the Push & Go feature offers a quick-start option. Always match the cycle to the load size and fabric type for the best results, ensuring efficient and gentle cleaning.

Using the Push & Go Function

The Push & Go function simplifies laundry operations by automatically selecting the optimal wash and dry cycle for your load. Activated by pressing and holding the button, it ensures efficient and tailored cleaning. This innovative feature prevents over-drying and ensures clothes are fresh and clean every time.

6.1 Activating the Push & Go Feature

To activate the Push & Go feature on your Indesit washer dryer, simply press and hold the designated button on the control panel. This initiates an automatic cycle that adjusts settings based on the load. The feature ensures balanced washing and drying, preventing over-drying and maintaining fabric quality. It’s a convenient solution for users seeking effortless laundry management without manual adjustments.

6.2 Benefits of Automatic Drying Control

The automatic drying control ensures consistent results by precisely monitoring moisture levels, preventing over-drying and leaving clothes soft. It optimizes energy use by adjusting heat and time, reducing wear on fabrics. This feature eliminates manual adjustments, ensuring clothes are perfectly dry without constant supervision. Designed for convenience, it adapts to different fabric types, providing reliable performance and extending garment lifespan. It’s a time-saving solution for effortless laundry care.

Loading Guidelines

This section provides essential advice on loading your washer dryer, including maximum capacity and fabric separation guidelines to prevent damage and ensure efficient cycles.

7.1 Maximum Load Capacity

The Indesit washer dryer has a maximum load capacity of 7-8 kg for washing and 5-6 kg for drying, depending on the model. Overloading can reduce efficiency and damage clothes. Always check the care labels on your laundry to ensure compatibility with the machine’s capacity. Refer to your specific model’s manual for precise guidelines to avoid overloading and maintain optimal performance.

7.2 Sorting and Preparing Laundry

Sort clothes by fabric type, color, and sensitivity to prevent damage. Separate delicate items from heavier fabrics. Always check pockets for loose items like coins or tissues. Remove belts and buckles that could damage clothes or the machine. Pre-treat stains and ensure zippers are closed. Do not overload the washer dryer, as this can reduce efficiency and cause damage. Prepare laundry according to care labels for optimal results. This ensures a smooth washing and drying process.

Drying Settings and Options

The Indesit washer dryer offers versatile drying settings to suit different fabrics. Choose from delicate, normal, or intensive cycles. Utilize moisture sensors for precise drying control, ensuring clothes are neither under-dried nor over-dried. Adjust settings to optimize energy use and fabric care, ensuring efficient and gentle drying for all laundry loads.

8.1 Adjusting Drying Levels

The Indesit washer dryer allows precise control over drying levels to prevent over-drying. Choose from delicate, normal, or intensive cycles based on fabric type. Moisture sensors automatically adjust drying time, ensuring clothes are dry but not overheated. For energy efficiency, lower drying levels suit less soiled items. Use the control panel to customize settings, ensuring optimal fabric care and reduced energy consumption. Always refer to the manual for specific button operations and cycle recommendations.

8.2 Preventing Over-Drying

Preventing over-drying is essential to protect fabrics and ensure clothes last longer. The Indesit washer dryer features automatic moisture sensors that detect when clothes are dry, stopping the cycle early. Use the Push & Go feature for a balanced drying cycle that avoids over-drying. Select lower heat settings for delicate items or those that are less soiled. Regularly cleaning the lint filter also improves drying efficiency and prevents overheating. Always check fabric labels for specific drying instructions.

Energy Efficiency Tips

Optimize energy consumption by using eco-friendly cycles, selecting lower temperature settings, and ensuring full loads. Regular maintenance and proper drying settings also enhance efficiency, reducing energy usage.

9.1 Optimizing Energy Consumption

Optimizing energy consumption with your Indesit washer dryer involves selecting eco-friendly cycles and lower temperature settings. Ensuring full loads reduces energy usage per cycle. Regular maintenance, like cleaning filters, improves efficiency. Proper drying settings prevent over-drying, saving energy. Using the Push & Go feature automates drying control, optimizing performance. These practices not only lower energy bills but also extend the appliance’s lifespan and environmental impact.

9.2 Eco-Friendly Wash Cycles

Eco-friendly wash cycles on your Indesit washer dryer are designed to minimize energy and water usage while maintaining cleaning efficiency. These cycles use lower temperature settings and optimized water consumption. Selecting eco modes reduces energy consumption and detergent use, promoting sustainability. The Push & Go feature further enhances eco-performance by automatically adjusting settings for balanced cleaning and energy savings. Always check for the latest eco-friendly cycle options and adjust settings based on load type for optimal environmental impact.

Troubleshooting Common Issues

Identify and resolve common issues by checking error codes, ensuring proper installation, and performing regular maintenance. Consult the manual or contact support for persistent problems.

10.1 Identifying Error Codes

The Indesit Washer Dryer manual provides a list of common error codes that may appear during operation. These codes indicate specific issues, such as problems with water supply, drainage, or sensor malfunctions. Refer to the manual to identify the meaning of each error code and understand the necessary steps to resolve the issue. Accurate identification ensures effective troubleshooting and maintains optimal appliance performance. Always consult the manual for detailed explanations and solutions.

10.2 Resolving Common Problems

Common issues with your Indesit Washer Dryer can often be resolved by checking the appliance’s filters, ensuring proper drainage, and verifying electrical connections. If poor drying performance occurs, clean the condenser and check for blockages in the venting system. For unusual noises, inspect for loose items or imbalanced loads. Always refer to the manual for specific troubleshooting steps and solutions tailored to your model. Regular maintenance can prevent many issues and ensure efficient operation.

Maintenance and Care

Regularly clean filters, check for blockages, and ensure proper ventilation to maintain your washer dryer’s efficiency. Avoid overloading and clean the appliance internally to prevent damage.

11.1 Cleaning the Washer Dryer

Regular cleaning ensures optimal performance. Clean the filters after each use to remove lint and debris. Check and clear blockages in the drain pump and hoses. Run a cleaning cycle with a detergent designed for washer dryers to remove residue. Wipe down the exterior and internal surfaces with a damp cloth. Leave the door open after use to dry thoroughly and prevent mold growth.

11.2 Regular Maintenance Checks

Perform regular checks to ensure your washer dryer operates efficiently. Check the drain pump filter after each use and clean it to prevent blockages. Inspect the venting system for kinks or obstructions to ensure proper airflow. Clean the gasket and door seals to prevent mold and mildew buildup. Check for worn-out belts or loose connections and tighten them if necessary. Regularly inspect the detergent drawer and remove any residue. Ensure all hoses are securely connected and not damaged. Schedule professional servicing annually to maintain warranty and performance. Refer to the troubleshooting section for common issues and solutions. Regular maintenance prevents breakdowns and extends the appliance’s lifespan.

Your Indesit washer dryer is designed for optimal performance and energy efficiency. By following this manual, you’ll ensure reliable operation, extend its lifespan, and enjoy superior results. Always refer to the troubleshooting section for quick solutions and maintain regular upkeep for peak functionality. Happy washing!

12.1 Summary of Key Points

This manual provides a detailed guide for your Indesit washer dryer, covering installation, operation, and maintenance. Key features include energy efficiency, the Push & Go function, and automatic drying control. Safety precautions, loading guidelines, and troubleshooting tips are emphasized to ensure optimal performance. Regular maintenance and proper usage will extend the appliance’s lifespan and enhance its efficiency. Refer to the manual for specific cycles and settings tailored to your needs.

12.2 Final Tips for Optimal Performance

For the best results, always follow the recommended load sizes and detergent usage. Regularly clean filters and check for blockages to maintain efficiency. Use eco-friendly cycles for energy savings and gentler fabric care. Ensure proper ventilation during drying to prevent moisture buildup. By adhering to these tips, you’ll enjoy consistent performance, extended appliance lifespan, and superior laundry results. Happy washing!