manual vs cvt transmission

Manual and CVT transmissions offer distinct driving experiences, balancing control, efficiency, and convenience. Manuals provide traditional driver engagement, while CVTs deliver seamless, adaptive performance, catering to different preferences.

Overview of Manual Transmission

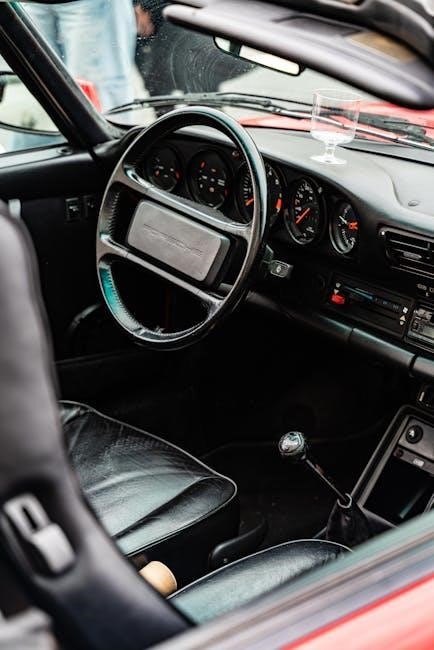
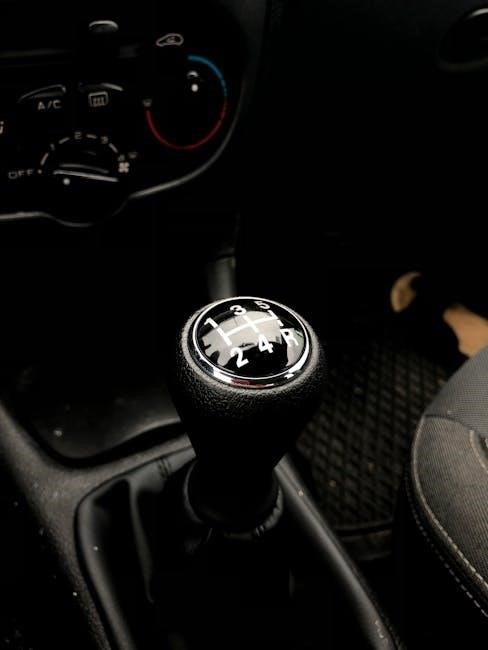
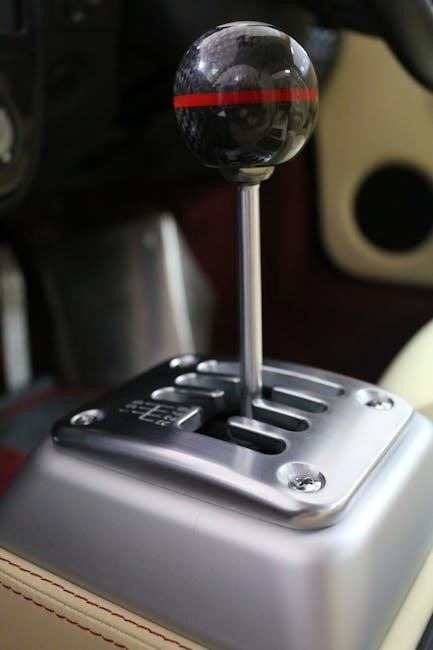
A manual transmission, also known as a stick shift, is a traditional gearbox requiring driver engagement. It uses a clutch pedal and gearshift to manually change gears, offering precise control over acceleration and speed. With fewer moving parts compared to automatics, manuals are simpler, lighter, and typically more cost-effective. They are favored by driving enthusiasts for their tactile feedback and ability to optimize engine performance. However, they demand more skill and attention, as drivers must coordinate clutch presses and gear shifts. Manuals are often preferred in performance-oriented vehicles and are generally more fuel-efficient than automatics, though this can depend on driving habits and conditions.

Overview of CVT Transmission

A continuously variable transmission (CVT) is an automatic gearbox that uses belts or pulleys to provide seamless, stepless gear ratio adjustments. Unlike traditional automatics, CVTs don’t have fixed gears, allowing the engine to stay within its optimal power range. This design enhances fuel efficiency and delivers smooth acceleration without the noticeable “shifts” of conventional transmissions. CVTs are lightweight, compact, and require less maintenance than manuals or automatics. They are ideal for urban driving, offering ease of use and comfort. However, some drivers find the lack of distinct gear changes unusual, and CVTs may lack the responsiveness of manuals during aggressive driving. Overall, CVTs strike a balance between efficiency and convenience, making them a popular choice for everyday vehicles.

Fuel Efficiency Comparison

CVTs often outperform manuals and automatics in fuel efficiency due to continuous gear ratio adjustments, optimizing engine performance. Manuals can excel in specific driving conditions but vary.

How Manual Transmissions Achieve Fuel Efficiency

Manual transmissions achieve fuel efficiency by allowing drivers to control gear shifts precisely, optimizing engine speed for specific conditions. With fewer mechanical components compared to automatics, manuals reduce energy loss, enhancing efficiency. Drivers can shift to higher gears early in low-load situations, lowering RPMs and fuel consumption. Additionally, manual transmissions are generally lighter, which improves overall vehicle efficiency. The direct connection between the engine and wheels allows for better power utilization, especially in city driving or hilly terrain where control over gears is advantageous. This driver engagement and mechanical simplicity make manuals a fuel-efficient choice for skilled operators.

How CVT Transmissions Optimize Fuel Efficiency

CVT transmissions optimize fuel efficiency by continuously adjusting gear ratios to keep the engine operating at its most efficient RPM range. Unlike traditional automatic or manual transmissions, CVTs eliminate fixed gear shifts, ensuring smooth power delivery without energy loss. This adaptive nature allows the engine to maintain optimal performance under varying driving conditions, reducing fuel consumption. The absence of physical gears and lighter construction further contribute to better mileage, especially in city driving or low-load situations. By minimizing unnecessary RPM fluctuations, CVTs maximize fuel economy, making them a practical choice for drivers seeking efficiency without compromising on performance.

Driving Comfort and Convenience

CVT transmissions enhance driving comfort by eliminating manual shifting, offering smooth acceleration and reducing driver fatigue, especially in city traffic and long drives.

Ease of Driving with Manual Transmission

Manual transmissions provide a hands-on driving experience, requiring the driver to actively engage with the vehicle by using the clutch and gearshift. This can be rewarding for enthusiasts who enjoy control over acceleration and deceleration. However, it demands attention and coordination, especially in heavy traffic or hilly terrain, where frequent shifting is necessary. While it may not be as convenient as automatic or CVT options, many drivers appreciate the connection it offers to the driving process. Over time, operating a manual transmission becomes second nature, though it can be challenging for beginners to master initially.

Ease of Driving with CVT Transmission

CVT transmissions offer a highly convenient driving experience by eliminating the need for manual gear shifting. This makes them ideal for city driving and heavy traffic, where frequent acceleration and deceleration occur. The CVT’s ability to seamlessly adjust ratios ensures smooth power delivery, reducing the effort required from the driver. Unlike manual transmissions, CVTs do not require clutch operation or gear selection, making them more accessible for new drivers. The continuous flow of power also minimizes interruptions during acceleration, creating a more relaxed and less fatiguing driving experience. This simplicity and ease of use make CVT transmissions particularly suited for daily commuting and long road trips, where comfort and convenience are prioritized.

Performance and Responsiveness

Manual and CVT transmissions deliver distinct performance traits, with manuals offering precise control and CVTs providing smooth, adaptive power delivery, each catering to unique driving preferences.

Acceleration and Control with Manual Transmission

Manual transmissions provide exceptional acceleration and driver control. With precise gear shifts, drivers can optimize engine performance, especially in dynamic driving conditions. The direct connection between the driver and the vehicle enhances responsiveness, allowing for quicker acceleration and better handling on both city roads and highways. This mechanical engagement is a key reason enthusiasts prefer manual transmissions, as they offer a more immersive and interactive driving experience compared to automatic or CVT options. The ability to manually select gears ensures that power delivery is tailored to the driver’s input, making it ideal for those who value performance and driving involvement.

Smooth Power Delivery with CVT Transmission

CVT transmissions deliver smooth, uninterrupted power by eliminating traditional fixed gear shifts. This seamless operation ensures the engine operates within its optimal RPM range, providing consistent acceleration. Unlike manual or automatic transmissions, CVTs avoid abrupt gear changes, resulting in a smoother driving experience. This characteristic is particularly beneficial in stop-and-go traffic, where continuous power delivery enhances comfort and reduces driver fatigue. The absence of distinct gear shifts also minimizes jerkiness, making CVTs ideal for urban commuting and low-speed maneuvers. While some drivers may find the lack of gear changes unusual, the smooth power delivery of CVTs offers a refined and effortlessly responsive driving experience, catering to those prioritizing comfort and ease of use.

Cost and Maintenance

Manual transmissions are generally more cost-effective due to fewer moving parts, while CVTs often require specialized maintenance. Both options balance initial cost and long-term upkeep needs.

Pricing Differences Between Manual and CVT

Manual transmissions are typically more affordable upfront compared to CVT-equipped vehicles. The simpler design of manual transmissions reduces production costs, making them a budget-friendly option for car buyers. CVTs, while more complex, often come at a higher price due to their advanced technology and components. However, the long-term savings from CVT’s improved fuel efficiency can offset the initial investment for some drivers. Pricing differences also vary by brand and model, with certain manufacturers offering CVT as a standard feature in higher trim levels. Balancing initial cost and potential savings is key when deciding between these transmission types.

Maintenance Requirements for Manual vs. CVT

Manual transmissions generally require less maintenance compared to CVTs due to their simpler mechanical design. They have fewer moving parts, reducing the likelihood of components wearing out. Routine maintenance for manuals typically involves fluid changes and clutch replacements, which are relatively straightforward and cost-effective. CVTs, on the other hand, have more complex systems, including belts and pulleys, which can be more expensive to repair or replace. Additionally, CVTs often require specialized fluids and more frequent servicing to maintain optimal performance. While manuals are more durable overall, CVTs may need earlier interventions, especially if driven under harsh conditions. This makes manuals a more maintenance-friendly choice for many drivers.

Reliability and Durability

Manual transmissions are often considered more reliable and durable due to their simpler design with fewer components. CVTs, while improving, can be less consistent long-term.

Reliability of Manual Transmissions

Manual transmissions are widely regarded for their reliability and durability. With fewer moving parts compared to CVTs, they are less prone to mechanical failures. The simplicity of their design means less can go wrong, reducing the need for complex repairs. Additionally, manual transmissions often require less maintenance over time, as they lack the intricate components found in CVTs. This makes them a more cost-effective option in the long run. Their straightforward mechanism also provides drivers with a sense of control and engagement, which many prefer. While CVTs have improved in reliability, manual transmissions remain a consistent choice for those prioritizing durability and minimal upkeep.

Reliability of CVT Transmissions

CVT transmissions have historically faced reliability concerns due to their complex design. Unlike manual transmissions, CVTs rely on belts and pulleys, which can wear out over time, leading to issues like slipping or hesitation. Early models were particularly prone to these problems, though modern designs have improved significantly. However, CVTs still require precise maintenance to ensure longevity, and repairs can be costly when components fail. Despite advancements, some drivers remain skeptical about their durability compared to manuals. Nevertheless, many contemporary CVTs now offer reliable performance, especially in everyday driving conditions, making them a viable option for those seeking convenience and efficiency without the need for manual shifting.

Choosing between manual and CVT transmissions depends on personal preferences for control, efficiency, and comfort. Manuals offer driver engagement, while CVTs provide smooth, adaptive performance, each catering to different driving needs and lifestyles effectively.

Final Thoughts on Choosing Manual vs. CVT

When deciding between manual and CVT transmissions, consider your priorities. Manuals offer a more engaging driving experience with better control, while CVTs provide smooth acceleration and improved fuel efficiency. If you value the traditional feel of shifting gears and driving involvement, a manual transmission is ideal. However, for those seeking convenience and efficiency without the need for manual shifting, a CVT is a strong option. Both options have their strengths, making the choice dependent on personal preferences, driving habits, and the type of vehicle you intend to use. Balancing these factors will help you make the best decision for your needs.

service manual aa

The AA Service Manual is a cornerstone document guiding Alcoholics Anonymous’ service structure and operations. It outlines the framework for committees, the General Service Conference, and the Twelve Concepts for World Service, ensuring effective, unified efforts in supporting recovery worldwide.

1.1 Overview of the Manual

The AA Service Manual serves as a comprehensive guide outlining the structure, principles, and practices of Alcoholics Anonymous’ service operations. It provides detailed insights into the organization’s governance, committees, and the roles they play in maintaining the fellowship’s integrity. The manual emphasizes the importance of unity and coordination among various service entities, ensuring effective support for members and groups worldwide. It also includes the Twelve Concepts for World Service, which are essential for understanding the broader purpose of AA’s service structure. The document is regularly updated to reflect the evolving needs of the fellowship, making it a vital resource for anyone involved in AA service work. Its clarity and thoroughness ensure that members can navigate the complexities of service with confidence and purpose.

1.2 Importance in AA Operations

The AA Service Manual is indispensable for ensuring the effective functioning of Alcoholics Anonymous at all levels. It provides a unified framework for decision-making, guiding members and committees in their service efforts. By outlining the principles and practices of AA’s service structure, the manual ensures consistency and clarity in operations. It plays a crucial role in maintaining the integrity of the fellowship, fostering collaboration, and supporting the overall mission of helping alcoholics achieve sobriety. The manual also serves as a resource for understanding the General Service Conference and the Twelve Concepts for World Service, which are vital for sustaining AA’s global impact. Its importance lies in its ability to empower members to carry out their service work effectively, ensuring the continued growth and relevance of the AA program.

Structure of the AA Service Manual

The AA Service Manual is organized into clear sections, detailing committees, the General Service Conference, and the Twelve Concepts for World Service, ensuring a logical flow of information to guide members effectively.

2.1 Committees and Their Roles

The AA Service Manual details the structure and functions of various committees essential to AA’s operations; These include the General Service Board, Area Committees, and District Committees, each responsible for overseeing specific aspects of service work. The General Service Board manages the overall direction and finances of AA’s global services. Area Committees coordinate efforts across regions, while District Committees focus on local activities. These committees ensure that AA’s principles and traditions are upheld, providing guidance and support to groups and members. Their roles are crucial in maintaining the unity and effectiveness of AA’s service structure, enabling the fellowship to fulfill its primary purpose of helping alcoholics achieve sobriety.

2.2 The General Service Conference

The General Service Conference is the primary decision-making body for Alcoholics Anonymous, ensuring the fellowship’s unity and effectiveness. Held annually, it gathers delegates from various areas to represent the collective voice of AA members. These delegates discuss and vote on matters affecting the entire organization, guided by the Twelve Traditions. The conference sets goals for AA’s world services and reviews progress, maintaining the integrity of the program. It collaborates with the General Service Board to implement decisions, ensuring that AA remains true to its purpose of helping alcoholics achieve sobriety. This democratic process reflects AA’s commitment to group conscience and shared responsibility, making the General Service Conference a cornerstone of AA’s service structure.

Twelve Concepts for World Service

The Twelve Concepts for World Service provide a framework for effective service in Alcoholics Anonymous. They emphasize unity, accountability, and the importance of trusted servants, guiding members to serve with humility and responsibility at all levels of AA.

3.1 Understanding the Concepts

The Twelve Concepts for World Service, developed by Bill W., are foundational principles guiding AA’s global operations. They emphasize unity, accountability, and the importance of trusted servants, ensuring the Fellowship remains focused on its primary purpose. These concepts address both the spiritual and practical aspects of service, fostering effective communication and cooperation at all levels. By understanding these principles, members can better navigate the complexities of AA’s service structure, contributing to the organization’s stability and growth. The concepts remind us that service is not about personal gain but about carrying the message of recovery to those still suffering, ensuring AA’s legacy endures.

3.2 Practical Application in Service

The Twelve Concepts for World Service are not just theoretical; they provide a practical guide for effective service within AA. For instance, Concept III emphasizes the importance of group conscience, ensuring decisions reflect the collective wisdom of the Fellowship. Committees, like the General Service Conference, apply these concepts to address real-world challenges, such as adapting AA’s message for modern audiences. Members in service roles use these principles to maintain unity and focus, ensuring that meetings remain a safe space for recovery. By applying these concepts, AA avoids distractions and stays committed to its primary purpose of helping alcoholics achieve sobriety. This practical approach ensures the Fellowship remains vibrant and relevant, reaching those in need while upholding its traditions. The result is a cohesive, effective service structure that supports recovery worldwide.

Historical Background of the AA Service Manual

The AA Service Manual originated from Bill W.’s 1951 draft of the Third Legacy Manual, evolving to guide AA’s service structure and ensure effective, unified support for recovery efforts globally.

4.1 Origins and Evolution

The AA Service Manual traces its origins to Bill W.’s 1951 draft of the Third Legacy Manual, which laid the groundwork for AA’s service structure. Initially designed to address the growing need for organized service efforts, the manual has evolved over decades to reflect the changing needs of the Fellowship. Early editions focused on establishing the General Service Conference and defining the roles of committees. Over time, updates incorporated new concepts and practices, ensuring the manual remains a vital resource for guiding AA’s mission. This evolution underscores the adaptability and commitment of AA to maintain effective support systems for recovery worldwide.

4.2 Bill W.’s Contribution

Bill W., co-founder of Alcoholics Anonymous, played a pivotal role in shaping the AA Service Manual. His 1951 draft of the Third Legacy Manual laid the foundation for the Service Manual, emphasizing the importance of structured service to ensure the Fellowship’s unity and effectiveness. Bill W. also authored the Twelve Concepts for World Service in 1962, which were later integrated into the manual. His vision for a decentralized yet unified service structure has guided AA’s operations for decades; Bill W.’s contributions ensured that the manual remains a dynamic document, evolving to meet the needs of the Fellowship while staying true to AA’s core principles. His work continues to inspire service efforts worldwide;

The 2024-2025 Edition Updates

The 2024-2025 Edition of the AA Service Manual includes key revisions, updated content, and digital accessibility. It is now available as Item BM-31, reflecting AA’s evolving service structure.

5.1 Key Revisions and Additions

The 2024-2025 Edition of the AA Service Manual features significant updates to align with modern service needs. New sections focus on enhancing accessibility, inclusivity, and digital engagement; Revisions include streamlined committee roles, updated meeting formats, and expanded resources for remote participation. These changes aim to strengthen the global AA network and ensure adaptability in a rapidly changing world. The manual also incorporates feedback from members, reflecting the collective wisdom of the Fellowship. These revisions underscore AA’s commitment to maintaining relevance while preserving its core principles.

5.2 Availability in Digital Format

The 2024-2025 AA Service Manual is now accessible in a convenient digital format, ensuring widespread availability for members worldwide. This edition, combined with the Twelve Concepts for World Service, can be downloaded as a PDF; The digital version enhances readability and portability, allowing members to access essential service information anytime, anywhere. It is distributed through official AA websites and platforms, making it easier for individuals to engage with the material. The digital format also supports environmental sustainability and aligns with modern communication preferences. This shift reflects AA’s dedication to adapting to technological advancements while maintaining the integrity of its core literature.

The AA Service Handbook

The AA Service Handbook complements the Service Manual, offering practical guidelines for effective service work. It provides detailed instructions for committees and members to fulfill their roles efficiently.

6.1 Handbook Details and Purpose

The AA Service Handbook serves as a detailed resource for members engaged in service work. It provides clear guidelines on roles, responsibilities, and best practices within the AA service structure. Designed to ensure consistency and effectiveness, the handbook covers topics such as committee operations, meeting procedures, and communication strategies. It acts as a practical companion to the AA Service Manual, offering actionable insights for those involved in local, regional, and international service efforts. By outlining specific duties and expectations, the handbook empowers members to contribute meaningfully to the fellowship’s mission. Its purpose is to foster unity and coherence in service, ensuring AA’s traditions and principles are upheld at all levels.

6.2 How to Access the Handbook

The AA Service Handbook is readily available in digital format, ensuring accessibility for all members. It can be downloaded as a PDF file, with a size of 4 MB, from official AA websites or through specific service links. Members can access it by visiting the “Handbooks” section under the “Members Document Categories” on AA’s official portals. Additionally, it is categorized under “Help and Support” for easy navigation. The handbook is also available on regional AA websites, such as the Australian AA Service Manual page, where it can be read online or downloaded for offline use; This convenient access ensures that all AA members can stay informed and engaged in their service work effectively.

manual readers crossword clue

Crossword puzzles are word games with clues leading to answers filling a grid. They enhance vocabulary, logic, and pattern recognition, making them popular worldwide for mental stimulation and fun.

1.1 What Are Crossword Puzzles?

Crossword puzzles are word-based games where clues lead to answers filling a grid of squares. Each clue directs to a word, either “across” (horizontal) or “down” (vertical), fitting into the grid pattern. They challenge vocabulary, logic, and pattern recognition, providing mental stimulation and entertainment. Crosswords are widely popular, appearing in newspapers, magazines, and online platforms, catering to diverse skill levels and interests.

1.2 The Popularity of Crosswords

Crossword puzzles have enduring appeal due to their unique blend of mental stimulation and entertainment. They are widely enjoyed in newspapers, magazines, and online platforms, offering a challenge that enhances vocabulary and logical thinking. Solving crosswords provides a sense of achievement, making them a beloved pastime for people of all ages and skill levels. Their popularity endures as a timeless, universal activity.

Understanding Cryptic Clues

Cryptic clues are phrases that lead to single answers through specific rules, often involving wordplay like anagrams or double definitions. They require careful analysis and practice to master.

2.1 The Structure of Cryptic Crossword Clues

Cryptic clues are carefully crafted phrases combining a definition and wordplay. They often include anagrams, reversals, or hidden words, requiring solvers to decipher both literally and creatively. These clues demand strong vocabulary and analytical skills to uncover the hidden answer within the text.

2.2 Common Techniques in Cryptic Crosswords

Cryptic crosswords employ various techniques like anagrams, reversals, hidden words, and charades. Anagrams involve rearranging letters, while reversals require reading words backward. Hidden words are embedded within the clue, and charades involve combining parts of words. These methods challenge solvers to think creatively and decode the clues step-by-step, making the puzzle both engaging and intellectually stimulating.

Strategies for Solving Crosswords

Effective strategies include starting with easy clues, using word lists, and leveraging anagram tools. Maintaining patience and systematically eliminating options enhances solving efficiency and overall enjoyment.

3.1 Using Contextual Clues

Contextual clues are hints within the puzzle that help solvers understand the answer better. These clues can be words, phrases, or even the position of the answer in the grid. For example, “dress warmly” might imply emotional warmth rather than physical clothing. Context is key to interpreting ambiguous or cryptic clues, making it easier to deduce the correct word. This strategy is especially useful for manual readers, as it relies on understanding the surrounding information.

3.2 Employing Word Lists and Anagrams

Word lists and anagrams are powerful tools for solving crosswords. A word list helps identify possible answers by matching letters in the grid. Anagrams, where letters are rearranged to form new words, are common in clues. For example, “listen” can become “silent.” Practice recognizing anagrams and using word lists to streamline your solving process. This technique is especially useful for manual readers aiming to enhance their crossword-solving efficiency.

Tools and Resources for Crossword Enthusiasts

Online crossword solvers and crossword communities are essential tools. They provide answers, tips, and forums for discussion, aiding enthusiasts in solving clues and improving their skills efficiently.

4.1 Online Crossword Solvers

Online crossword solvers are invaluable for enthusiasts, offering instant solutions and explanations. They use advanced algorithms to decipher clues, making them indispensable for both casual and competitive solvers. These tools often feature archives of past puzzles, enabling users to practice and refine their skills. Additionally, many solvers provide hints and anagram generators, aiding in overcoming tricky clues and enhancing overall crossword mastery.

4.2 Crossword Puzzle Communities

Crossword puzzle communities offer platforms for enthusiasts to share knowledge and strategies. Online forums and social media groups foster collaboration, enabling solvers to discuss clues and techniques. These communities often host tournaments and archives of past puzzles, promoting learning and healthy competition. They also provide resources for improving skills, making them essential for both casual and competitive crossword enthusiasts to enhance their problem-solving abilities and stay connected.

Practice and Skill Development

Regular practice enhances problem-solving skills and expands vocabulary. Starting with easy puzzles builds confidence, while consistent effort sharpens analytical thinking and improves overall crossword proficiency effectively.

5.1 Starting with Easy Puzzles

Beginners should start with easy crosswords to build confidence and foundational skills. Simple puzzles introduce basic clue structures and vocabulary. Start with Monday crosswords, as they are typically straightforward. Gradually move to more challenging puzzles to refine your abilities. Using dictionaries or online tools for unfamiliar words is encouraged. Consistent practice with easy puzzles helps develop problem-solving techniques and improves comprehension of clue patterns, making the transition to harder crosswords smoother and more enjoyable.

5.2 The Importance of Regular Practice

Regular practice is essential for mastering crosswords. Consistent solving enhances vocabulary, improves pattern recognition, and sharpens analytical skills. Even short daily sessions can significantly boost proficiency. Over time, solvers develop instincts for clue types and anagrams. Regular practice also builds resilience and confidence, helping tackle more complex puzzles. It’s a skill that improves with dedication, making each challenge more rewarding and enjoyable.

Common Themes and Patterns

Crossword puzzles often feature recurring themes like anagrams, hidden words, and double definitions. Seasonal or holiday-themed crosswords add variety, keeping solvers engaged and challenged creatively always.

6.1 Recurring Themes in Crosswords

Crosswords often incorporate recurring themes such as seasonal events, literary references, and historical facts. These themes provide structure and variety, making puzzles more engaging. They also encourage solvers to think creatively and expand their knowledge base. By focusing on specific topics, crosswords cater to diverse interests, ensuring there’s something for everyone. This approach keeps the puzzles fresh and intellectually stimulating for enthusiasts of all skill levels.

6.2 Identifying Patterns in Clues

Identifying patterns in crossword clues helps solvers decode answers more effectively. Common techniques include anagrams, reversals, and hidden messages. For example, “listen” can become “silent” through an anagram. Recognizing these patterns enhances problem-solving skills and speeds up the solving process. Paying attention to wordplay, puns, and double meanings also aids in uncovering answers. Over time, experienced solvers develop a keen eye for these patterns, making crosswords more enjoyable and challenging.

Advanced Crossword Techniques

Advanced techniques involve mastering anagrams, hidden answers, and complex wordplay. These skills refine problem-solving abilities and enhance the challenge, making crosswords more rewarding for experienced solvers.

7.1 Solving Anagrams

Anagrams are rearranged letters forming new words. Solving them requires identifying common letters and patterns. Start by listing vowels and frequent bigrams or trigrams. Crossword clues often hint at anagrams through phrases like “rearranged” or “mixed.” Practice enhances recognition of letter combinations, making anagram-solving more efficient. Patience and systematic approaches are key to cracking these puzzles, which add complexity and enjoyment to crosswords.

7.2 Decoding Hidden Answers

Hidden answers in crosswords often involve wordplay like anagrams, reversals, or embedded words. Clues may use phrases like “in” or “around” to indicate containment. For example, “flower in the garden” might hint at “rose.” Practice recognizing these patterns to decode answers effectively. Regular solving enhances your ability to spot these hidden gems, making crossword puzzles more rewarding and enjoyable.

Popular Crossword Variations

Crosswords come in various forms, including quick crosswords for fast solving and themed crosswords focused on specific topics. Both offer unique challenges and fun.

8.1 Quick Crosswords

Quick crosswords are designed for rapid solving, featuring straightforward clues and smaller grids. They focus on fun and mental agility, making them ideal for beginners or those seeking a quick challenge. With shorter word lists and simpler anagrams, quick crosswords provide an accessible entry point while still offering the satisfaction of completing a puzzle. Their popularity stems from their ability to deliver enjoyment without requiring extensive time or complex strategies.

8.2 Themed Crosswords

Themed crosswords center around specific subjects like movies, sports, or holidays, offering unique challenges. They often include related phrases or puns, enhancing engagement. These puzzles cater to diverse interests, making them appealing to both casual and dedicated solvers. Themes add depth and variety, allowing creators to craft clues that are both clever and relevant, thus creating a more immersive and enjoyable experience for enthusiasts.

Consistent practice and leveraging tools can significantly improve crossword-solving skills. Start with easier puzzles and gradually challenge yourself for steady progress and enjoyment.

9.1 Key Takeaways for Manual Readers

Manual readers should focus on understanding clue structures and practicing regularly. Using dictionaries for word meanings and exploring anagram techniques can enhance solving skills. Starting with simpler puzzles builds confidence, while consistent practice sharpens vocabulary and pattern recognition, essential for tackling more complex crosswords effectively over time. Patience and persistence are key to mastering this engaging mental exercise.

9.2 Encouragement for Persistent Practice

Consistent practice is vital for improving crossword skills. Each puzzle solved builds vocabulary and sharpens logical thinking. Celebrate small victories to stay motivated and embrace challenges as learning opportunities. Over time, patience and dedication will enhance your ability to tackle even the toughest clues with confidence and enjoyment, making crosswords a rewarding and lifelong hobby. Keep practicing and watch your progress grow steadily.

manual for food processor

Welcome to your food processor manual! This guide provides essential information for safe and effective use‚ ensuring you maximize its features and functions efficiently.

1.1 Understanding the Purpose and Features

This food processor is designed to simplify various kitchen tasks‚ offering versatile functions like chopping‚ slicing‚ shredding‚ and pureeing. Key features include interchangeable blades‚ multiple speed settings‚ and a robust motor for consistent performance. Safety mechanisms‚ such as automatic shut-off and secure-locking lids‚ ensure safe operation. The manual details these features to help users explore their full potential and maintain optimal functionality.

1.2 Importance of Reading the Manual

Reading this manual is crucial for understanding your food processor’s capabilities‚ ensuring safe operation‚ and maintaining its longevity. It provides detailed instructions on assembly‚ usage‚ and troubleshooting‚ helping you avoid potential hazards and warranty voidance. Familiarize yourself with safety guidelines‚ feature descriptions‚ and maintenance tips to optimize performance and enjoy a seamless cooking experience. The manual is your key to unlocking the processor’s full potential safely and effectively.

Safety Precautions and Guidelines

Ensure safe operation by following all safety instructions. Avoid exposing the processor to water or using it with wet hands. Keep it away from hot surfaces and sharp edges. Always adhere to the manual’s guidelines to prevent accidents and maintain warranty validity.

2.1 General Safety Instructions

Always read the manual thoroughly before using your food processor. Ensure the appliance is placed on a stable‚ dry surface. Avoid operating it with wet hands or near water sources. Keep children away while in use. Never immerse the processor in water or expose it to extreme temperatures. Follow all safety guidelines to prevent accidents and ensure optimal performance. Regularly inspect the cord and avoid overloading the machine. Proper usage maintains safety and prolongs the appliance’s lifespan.

2.2 Electrical Safety Tips

Ensure the food processor is used with the correct power supply as specified in the manual. Avoid overloading electrical circuits. Keep the cord away from hot surfaces‚ sharp edges‚ and water. Never operate the appliance if the cord is damaged. Always unplug it when not in use or before cleaning. Ensure the processor is grounded to prevent electrical shocks. Follow these tips to maintain electrical safety and prolong the appliance’s lifespan.

2.3 Handling and Operating Precautions

Always handle the food processor with care to avoid accidents. Ensure the appliance is placed on a stable‚ dry surface away from water. Never immerse the processor in water or expose it to excessive moisture. Operate the processor only for its intended purposes‚ avoiding overload. Keep children away and avoid touching moving parts. If the appliance overheats‚ turn it off immediately. Never leave it unattended while in use. Store the processor in a cool‚ dry place when not in use.

Components and Accessories

Your food processor includes a main unit‚ processing bowl‚ lid‚ chopping blade‚ shredding disc‚ and dough blade. Additional attachments like a citru juicer or grinding mill may be included‚ enhancing versatility. Always ensure all parts are securely locked before operation. Accessories vary by model but aim to expand functionality for diverse cooking tasks.

3.1 Overview of Parts and Functions

Your food processor consists of a main unit‚ processing bowl‚ lid‚ and interchangeable blades. The main unit houses the motor‚ while the bowl and lid ensure secure processing. The chopping blade is for general use‚ slicing‚ and mixing. Shredding and dough blades are specialized for specific tasks. Additional attachments‚ like a citrus juicer or grinding mill‚ may be included. Each part is designed for safe‚ efficient operation‚ ensuring versatility in food preparation.

3.2 Attachments and Additional Features

Your food processor may come with additional attachments like a citrus juicer‚ grinding mill‚ or French fry disc. These enhance functionality‚ allowing tasks beyond basic chopping. Some models include touch controls‚ preset programs‚ or variable speed settings. Ensure all attachments are securely locked before use. Refer to your manual for specific features and compatibility. These additions expand your processor’s versatility‚ making it a multi-functional kitchen tool for diverse culinary needs.

Installation and Setup

Proper installation and setup ensure your food processor runs smoothly. Place it on a stable surface‚ away from water sources‚ and plug it into a grounded outlet.

4.1 Unpacking and Initial Inspection

Carefully unpack your food processor and inspect all components for damage. Ensure all parts‚ including the bowl‚ lid‚ blades‚ and accessories‚ are included and in good condition. Check for any signs of damage or wear. If any components are missing or damaged‚ contact customer support immediately. Refer to the packing list to confirm all items are present before proceeding with setup.

4.2 Placement and Power Connection

Place the food processor on a stable‚ flat‚ and dry surface‚ away from direct sunlight and heat sources. Ensure the area is clear of clutter to prevent accidents. Plug the power cord into a nearby grounded electrical outlet rated for the processor’s voltage. Avoid using extension cords unless necessary‚ and keep the cord away from hot surfaces or sharp edges to prevent damage or fire hazards. Always follow electrical safety guidelines provided in the manual.

Operating the Food Processor

Learn to operate your food processor safely and efficiently with this section‚ covering basic functions‚ advanced features‚ and essential techniques for optimal performance.

5.1 Basic Functions and Controls

Understanding the basic functions and controls of your food processor is essential for smooth operation. Familiarize yourself with the power button‚ pulse function‚ and speed settings. The interlock system ensures safe operation by preventing the motor from running without the bowl and lid properly locked. Use the chopping blade for general tasks and the shredding disc for precise results. Always refer to the manual for specific guidance on each component’s use.

5.2 Advanced Features and Techniques

Explore advanced features like variable speed control and precision chopping modes for tailored results. Use the dough blade for kneading and the emulsifying disc for sauces. Time-saving attachments enable tasks like citrus juicing or meat grinding. For consistent outcomes‚ utilize the pulse function to avoid over-processing. Experiment with layering ingredients and adjusting speeds to achieve professional-grade results. Refer to the manual for troubleshooting tips to optimize your advanced techniques.

Maintenance and Cleaning

Regular cleaning ensures optimal performance. Hand wash parts with mild soap‚ avoiding abrasive materials. Dry thoroughly to prevent moisture buildup. Sanitize periodically with a vinegar solution. Check for wear and tear on blades and seals to maintain efficiency and safety.

6.1 Regular Cleaning Procedures

Clean your food processor after each use to maintain hygiene and performance. Wash removable parts with warm‚ soapy water‚ avoiding abrasive cleaners. Rinse thoroughly and dry to prevent water spots. For tough residue‚ soak parts in warm water before scrubbing gently with a soft sponge. Regularly wipe the motor base with a damp cloth‚ ensuring no moisture enters electrical components. Avoid submerging the entire unit in water or using harsh chemicals.

6.2 Storage and Long-term Maintenance

Store your food processor in a cool‚ dry place to prevent damage. Detach all accessories and clean them thoroughly before storage. Use the original packaging or a protective cover to shield the unit from dust. Avoid stacking heavy objects on top of the processor to maintain its structural integrity. Regularly inspect cords and components for wear. Follow these steps to ensure your appliance remains in optimal condition for years of reliable service.

Troubleshooting Common Issues

This section helps you identify and resolve common issues‚ such as the processor not starting or overheating‚ with practical solutions to ensure optimal performance.

7.1 Identifying and Resolving Malfunctions

If your food processor malfunctions‚ start by checking the power connection and ensuring the bowl is properly assembled. For issues like failure to start‚ verify the outlet is working and the motor is not overloaded. If overheating occurs‚ allow the processor to cool down before resuming use. For blade or disc issues‚ ensure they are securely locked in place. Refer to the troubleshooting guide for specific solutions or contact customer support if problems persist.

7.2 Resetting and Reinitializing the Processor

To reset your food processor‚ unplug it from the power source and let it cool for a few minutes. This allows the motor to reset. Reassemble all parts correctly‚ ensuring the bowl‚ lid‚ and blades are securely locked. Plug in the processor and test its operation. If issues persist‚ refer to the troubleshooting guide or contact customer support for assistance. Regular resets help maintain optimal performance.

Warranty and Support Information

Your food processor is backed by a limited warranty covering manufacturing defects for a specified period. Register your product for extended support and access to exclusive resources.

8.1 Understanding Warranty Terms

This section outlines the terms and conditions of your food processor’s warranty. It typically covers manufacturing defects for a specified period‚ ensuring repairs or replacements are provided free of charge. The warranty becomes void if the product is misused‚ tampered with‚ or not maintained according to the provided guidelines. Proper registration and adherence to usage instructions are vital for warranty validity.

8.2 Contacting Customer Support

For any inquiries‚ issues‚ or assistance‚ contact our customer support team through the official website‚ email‚ or phone number provided in the manual. Support is available to address troubleshooting‚ repairs‚ or maintenance needs. Ensure you have your product model number ready for efficient service. Our team is dedicated to resolving your concerns promptly. Refer to the manual for specific contact details and regional support options.

Accessories and Upgrades

Explore a variety of attachments and upgrades to enhance your food processor’s functionality. From slicing to shredding‚ these accessories expand your culinary possibilities.

9.1 Available Attachments and Accessories

Your food processor comes with versatile attachments designed to enhance its functionality. These include slicing discs‚ shredding plates‚ and dough blades‚ allowing you to perform multiple tasks efficiently. Additional accessories like storage cases and recipe books are also available‚ ensuring you make the most of your appliance. Explore these options to expand your culinary creativity and streamline kitchen tasks.

9.2 Upgrading and Customizing Your Processor

Elevate your food processor’s performance with optional upgrades and customizations. Add specialty blades‚ extra bowls‚ or attachments for tasks like juicing or meat grinding. Explore color panels or digital controls for a personalized touch. Visit official retailers or the manufacturer’s website for compatible upgrades. Ensure all modifications align with warranty terms to maintain coverage and optimal functionality. Customize your processor to suit your culinary needs and preferences.

Mastering your food processor unlocks endless culinary possibilities. Experiment with recipes‚ maintain it regularly‚ and explore new techniques to enhance your cooking experience and creativity.

10.1 Maximizing Your Processor’s Potential

To maximize your food processor’s potential‚ explore its versatile functions‚ from chopping to pureeing. Regularly clean and maintain the appliance to ensure optimal performance. Experiment with various attachments and techniques to diversify your cooking. By following the manual’s guidelines and staying creative‚ you’ll unlock a world of culinary possibilities. Always refer to troubleshooting tips for any issues and enjoy long-term efficiency.

10.2 Encouragement for Creative Usage

Unleash your culinary creativity by exploring the endless possibilities with your food processor. From crafting homemade sauces to preparing healthy snacks‚ this appliance is your kitchen companion. Experiment with new recipes and ingredients to create unique dishes. Don’t hesitate to try innovative techniques—your processor is designed to handle a variety of tasks‚ inspiring you to cook with confidence and flair.

wais-iv scoring manual pdf

The Wechsler Adult Intelligence Scale-Fourth Edition (WAIS-IV) is a standardized test assessing cognitive abilities in adults and older adolescents‚ published by Pearson. It provides Full Scale IQ (FSIQ) and General Ability Index (GAI) scores‚ essential for understanding intellectual functioning.

Structure of the WAIS-IV Scoring Manual

The WAIS-IV Scoring Manual is organized into chapters covering administration‚ scoring procedures‚ interpretation guidelines‚ technical details‚ and appendices with supplementary materials and case studies.

2.1. Chapters and Content Overview

The WAIS-IV Scoring Manual is divided into several chapters‚ each focusing on specific aspects of test administration and scoring. The initial chapters provide an overview of the test structure‚ including subtests and composite scores like the Full Scale IQ (FSIQ) and General Ability Index (GAI). Subsequent chapters delve into detailed scoring instructions‚ interpretation guidelines‚ and technical information. Appendices offer additional resources‚ such as norms‚ scoring tables‚ and case studies‚ ensuring comprehensive understanding and accurate application of the WAIS-IV assessment tools.

2.2. Visual Elements: Tables and Figures

The WAIS-IV Scoring Manual incorporates numerous tables and figures to facilitate accurate scoring and interpretation. Tables provide normative data‚ scoring criteria‚ and guidelines for calculating composite scores like FSIQ and GAI. Figures illustrate test structure‚ subtest relationships‚ and procedural steps‚ enhancing understanding of complex scoring rules. These visual aids simplify the process of interpreting score discrepancies and profiles‚ ensuring precise application of the manual’s instructions. They are essential for both manual and automated scoring methods‚ supporting examiners in generating reliable results.

Scoring Methods in WAIS-IV

The WAIS-IV offers manual scoring and automated tools‚ such as the Scoring Assistant and Q-global‚ ensuring accuracy and efficiency in calculating FSIQ‚ GAI‚ and index scores.

3.1. Manual Scoring: Step-by-Step Guide

Manual scoring involves calculating raw scores‚ converting them to scaled scores using normative tables‚ and deriving composite scores like FSIQ and GAI. Begin by summing correct responses for each subtest‚ applying scoring rules for partial credit and errors. Use the WAIS-IV scoring tables to convert raw scores to standardized values. Calculate index scores by summing relevant subtest scaled scores and applying the appropriate weights. Finally‚ derive the Full Scale IQ and interpret results based on the manual’s guidelines. Ensure accuracy by cross-verifying calculations.

3.2. Automated Scoring Tools and Software

Pearson offers the WAIS-IV Scoring Assistant and Q-global platform for efficient‚ error-free scoring. These tools automate raw score conversion‚ index calculation‚ and report generation‚ reducing manual effort. The Scoring Assistant software ensures accuracy by applying complex algorithms and provides comprehensive results interpretation. Q-global allows secure online scoring and storage‚ while the Report Writer tool generates detailed‚ customizable reports for clients. These tools enhance efficiency and accuracy‚ making test administration and interpretation more streamlined for professionals. Regular updates ensure compliance with the latest scoring guidelines and research.

Interpreting WAIS-IV Results

Interpreting WAIS-IV results involves understanding the Full Scale IQ (FSIQ) and General Ability Index (GAI) scores‚ which provide insights into cognitive functioning and intellectual abilities.

4.1. Understanding Composite Scores (FSIQ‚ GAI)

The Full Scale IQ (FSIQ) and General Ability Index (GAI) are key composite scores in the WAIS-IV. The FSIQ represents overall intellectual functioning‚ combining verbal and non-verbal abilities. The GAI focuses on core cognitive skills‚ excluding tasks that may be influenced by processing speed. Both scores are standardized with a mean of 100 and a standard deviation of 15. Understanding these scores is crucial for interpreting individual cognitive strengths and weaknesses‚ providing a foundation for comprehensive assessment and reporting.

4.2. Analyzing Score Discrepancies and Indexes

Analyzing score discrepancies and indexes in the WAIS-IV involves comparing individual subtest and composite scores to identify patterns of cognitive strengths and weaknesses. The manual provides tables (e.g.‚ B.1 and B.2) to evaluate the statistical significance of differences between index scores. Clinicians interpret these discrepancies to understand unique cognitive profiles‚ ensuring accurate assessment and reporting. This step is critical for meaningful interpretation of intellectual functioning and informing diagnostic or intervention strategies.

Accessories for WAIS-IV Administration

Accessories like the WAIS-IV Scoring Assistant Software and Report Writer Tools streamline administration and reporting‚ enhancing accuracy and efficiency in generating comprehensive results.

5.1. WAIS-IV Scoring Assistant Software

The WAIS-IV Scoring Assistant Software is a digital tool designed to simplify and automate the scoring process‚ reducing manual calculation errors. It provides detailed reports‚ including composite scores like FSIQ and GAI‚ and offers features for interpreting results and generating reports. The software is compatible with various platforms and integrates seamlessly with other WAIS-IV tools‚ ensuring efficient administration and accurate results. It’s a valuable resource for professionals administering the WAIS-IV.

5.2. Report Writer Tools for Comprehensive Reporting

The Report Writer Tools complement the WAIS-IV by generating detailed‚ professional reports from test results. These tools automate the interpretation of scores‚ including FSIQ‚ GAI‚ and index discrepancies‚ saving time for professionals. They also offer customizable templates to tailor reports to individual needs. With features for data analysis and visual graphs‚ these tools enhance the clarity and depth of reporting‚ making it easier to communicate findings to clients or stakeholders effectively. This ensures comprehensive and interpretable results for each assessment.

Adaptations of the WAIS-IV Manual

The WAIS-IV manual has been adapted for international use‚ ensuring cultural relevance and linguistic accuracy across diverse populations. These adaptations maintain the test’s validity and reliability worldwide.

6.1. International Adaptations and Cultural Considerations

The WAIS-IV has undergone extensive international adaptations to ensure cultural relevance and linguistic accuracy. For example‚ the Indian adaptation by Pearson Clinical incorporates local norms and language adjustments‚ making it suitable for diverse populations. Similar efforts have been made in Indonesia‚ where the test was validated for cultural appropriateness. These adaptations ensure that the WAIS-IV remains a reliable tool for assessing cognitive abilities across different cultural contexts‚ maintaining its validity and fairness globally. This process involves rigorous research and collaboration with local experts.

Updates and Revisions in the Manual

The WAIS-IV manual has been updated to reflect new scoring rules and revised tables‚ ensuring accurate interpretation of test results and improving assessment reliability globally.

7.1. Recent Changes and Revisions Explained

Recent updates to the WAIS-IV manual include revised scoring rules for subtests like Reading Comprehension and Oral Expression‚ enhancing clarity and consistency. New tables and guidelines address index score discrepancies‚ providing detailed criteria for interpretation. Additionally‚ the manual now incorporates cultural adaptations‚ ensuring fairness in diverse populations. These revisions aim to improve the accuracy and relevance of WAIS-IV assessments‚ reflecting current research and clinical practices. Users are advised to refer to the updated manual for the latest scoring procedures and interpretive guidelines.

Practical Application of the Manual

The WAIS-IV manual provides real-world examples and case studies‚ enabling professionals to apply theoretical knowledge in practical assessments and enhance their scoring accuracy and interpretation skills effectively.

8.1. Case Studies and Real-World Examples

The WAIS-IV manual includes detailed case studies‚ such as assessing individuals with neurological disorders or learning disabilities‚ providing practical insights into administration and scoring. Real-world examples illustrate how to interpret FSIQ and GAI scores‚ addressing discrepancies and cultural considerations. These examples help professionals apply theoretical concepts to actual assessments‚ ensuring accurate and meaningful results in diverse clinical and educational settings. This enhances their ability to make informed decisions based on comprehensive data.

Accessing the WAIS-IV Scoring Manual

The WAIS-IV scoring manual can be easily downloaded as a PDF from Pearson Clinical’s official website or through authorized distributors‚ ensuring convenient access for professionals.

9.1. How to Download the WAIS-IV Manual PDF

To download the WAIS-IV manual PDF‚ visit Pearson Clinical’s website. Navigate to the WAIS-IV product page and select the “Downloads” section. Choose the manual version‚ then click “Download PDF.” Ensure you have an account or purchase access if required. The PDF provides detailed scoring guidelines and interpretations‚ essential for accurate administration and analysis of test results. This resource is invaluable for psychologists and professionals needing comprehensive assessment tools.

The WAIS-IV scoring manual is an essential resource for psychologists and professionals assessing adult intelligence. It provides comprehensive guidelines for administering‚ scoring‚ and interpreting results‚ ensuring accurate and reliable assessments. With detailed instructions and updated scoring tools‚ the manual supports professionals in understanding cognitive abilities and making informed decisions. Available via Pearson’s official channels‚ the WAIS-IV manual remains a cornerstone in intellectual assessment‚ offering a robust framework for evaluating adult intelligence effectively.

brother xl2600i manual

The Brother XL2600i is a versatile sewing machine offering various stitches, user-friendly features, and durability. It’s an ideal choice for both beginners and experienced sewers, supported by a comprehensive manual.

1.1 Overview of the Brother XL2600i

The Brother XL2600i is a versatile sewing machine designed for both beginners and experienced sewers. It features 25 built-in stitches, a free-arm design, and an LCD display for easy stitch selection. The machine includes a variety of accessories, such as presser feet and bobbins, making it suitable for a wide range of sewing projects. Its lightweight and durable design ensures long-lasting performance. The comprehensive manual provides detailed guidance for setup, operation, and troubleshooting, ensuring users can maximize its capabilities.

1.2 Importance of the Instruction Manual

The instruction manual is essential for understanding the Brother XL2600i’s features and proper usage. It provides detailed guidance on setup, operation, and troubleshooting, ensuring users maximize the machine’s potential. The manual also covers maintenance tips and safety precautions, helping to extend the machine’s lifespan and prevent common issues. Referencing the manual is crucial for resolving problems and optimizing sewing results.

Unboxing and Initial Setup

Unbox the Brother XL2600i carefully, ensuring all accessories are included. Follow the manual’s setup guide to assemble and power on the machine for the first time successfully.

2.1 Unpacking the Machine and Accessories

Carefully unpack the Brother XL2600i sewing machine and verify all included accessories, such as presser feet, bobbins, and the instruction manual. Ensure no items are damaged or missing. The box contains everything needed to start sewing, including a comprehensive guide for setup and operation. Properly organizing these components will ensure a smooth initial setup experience.

2.2 First-Time Setup and Powering On

After unpacking, plug in the machine and ensure all components are properly connected. Refer to the manual for initial setup guidance. Raise the presser foot, insert the bobbin, and thread the machine as instructed. Power on the sewing machine to test its basic functions, ensuring all lights and controls operate smoothly. Perform a test stitch to confirm readiness for use.

Understanding the Machine’s Features

The Brother XL2600i offers multiple stitch options, customizable settings, and a range of accessories for versatile sewing projects. Its user-friendly interface and advanced features make it ideal for sewers of all skill levels.

3.1 Key Functions and Stitch Options

The Brother XL2600i features 25 built-in stitches, including straight, zigzag, and decorative options. It also offers automatic needle threading and a one-step buttonhole function. The machine’s customizable stitch length and width allow for precise control over sewing projects. Additional functions include a free-arm option for sewing cuffs and pant hems, making it versatile for various sewing tasks.

3.2 Customizable Settings and Accessories

The Brother XL2600i offers customizable stitch settings, allowing users to adjust length and width; It comes with a variety of accessories, including multiple presser feet, a sewing table, and a spool pin. The machine also supports optional attachments like embroidery hoops and quilting guides. A hard protective case is included for safe storage and transport, enhancing its portability and durability.

Threading and Basic Operations

Threading the Brother XL2600i requires raising the presser foot and carefully guiding the thread through the machine. Follow the manual for step-by-step instructions to ensure proper threading and smooth stitching operations.

4.1 Step-by-Step Threading Guide

To thread the Brother XL2600i, start by turning off the machine and raising the presser foot. Carefully guide the thread through the machine’s tension discs and take-up lever. Insert the thread into the needle bar, then use the automatic needle threader for the final step. Ensure the thread is properly seated and cut any excess before sewing for smooth operation.

4.2 Basic Sewing Techniques and Tips

Start by aligning fabric edges and using the machine’s built-in guides. Select the appropriate stitch type for your project, such as straight or zigzag. Gently guide the fabric under the needle, maintaining steady control. Use the reverse stitch button to secure seams. Always backstitch at the beginning and end of your sewing for durable results. Keep the machine well-threaded and tension-adjusted for optimal performance.

Maintenance and Troubleshooting

Regular maintenance ensures optimal performance and longevity of your Brother XL2600i; Clean and oil regularly, check for loose parts, and troubleshoot common issues like thread tangling or noise.

5.1 Regular Maintenance Tips

Regularly clean the Brother XL2600i by removing lint and debris from the bobbin area and feed dogs. Oil the machine as instructed to ensure smooth operation. Check and replace the sewing needle frequently to maintain stitch quality. Properly store the machine in a dry, cool place to prevent rust and damage. Always refer to the manual for specific maintenance schedules and guidelines.

5;2 Common Issues and Solutions

Common issues with the Brother XL2600i include thread jams, uneven stitches, or the machine not powering on. To resolve these, clean the bobbin area, check for lint buildup, and ensure the power cord is securely connected. If stitches are uneven, rethread the machine or replace the needle. Refer to the manual for troubleshooting specific error messages and maintenance tips to prevent future problems.

Advanced Features and Techniques

The Brother XL2600i offers advanced stitching options, customizable settings, and special modes for intricate sewing projects. Explore its potential with techniques like decorative stitching and precision control.

6.1 Using Special Stitches and Modes

The Brother XL2600i offers 17 built-in stitches, including decorative, stretch, and utility options. Special modes like free-arm sewing and reverse stitching enhance creativity. Users can explore intricate designs and professional finishes by utilizing these advanced features, making it ideal for both casual and complex sewing projects.

6.2 Customizing Projects with Advanced Settings

The Brother XL2600i allows users to tailor projects with adjustable stitch length, width, and custom stitching combinations. The LCD display simplifies selecting settings, while advanced modes enable precise control over fabric handling and decorative elements. These features empower sewers to create personalized, professional-quality results for diverse sewing tasks.

FAQs and Support

The Brother XL2600i manual includes a detailed FAQ section addressing common questions. For further assistance, users can access technical support and contact options through Brother’s official website.

7.1 Frequently Asked Questions

Common questions about the Brother XL2600i include threading techniques, error resolution, and maintenance tips. The manual provides clear answers, while Brother’s website offers additional FAQs, troubleshooting guides, and user forums for resolving issues and optimizing machine performance effectively. This ensures users can address concerns quickly and continue sewing without interruptions or frustration, enhancing their overall experience.

7.2 Contacting Brother Support

For assistance, users can contact Brother Support through their official website or toll-free numbers. The site offers live chat, email support, and downloadable resources like manuals and FAQs. Additionally, service centers and authorized dealers provide repair services, ensuring comprehensive help for any XL2600i-related inquiries or issues, making it easy to resolve problems efficiently and maintain machine performance.

Safety Precautions

Always read the manual before use. Avoid overheating and keep the machine away from children. Handle electrical components safely to prevent hazards and ensure optimal performance.

8.1 General Safety Guidelines

Always read the manual before use. Unplug the machine when not in use or during maintenance; Avoid exposure to water and extreme temperatures. Use only Brother-approved accessories to prevent damage. Keep children and pets away while operating. Ensure proper ventilation and follow all safety precautions outlined in the manual to ensure safe and optimal performance.

8.2 Handling Electrical Components Safely

Handle electrical components with care. Avoid touching wires or plugs with wet hands. Ensure all connections are secure to prevent short circuits. Never modify or repair cords yourself. If damage occurs, contact Brother support immediately. Always unplug the machine before cleaning or maintaining electrical parts to ensure safety and prevent potential hazards. Follow manual guidelines strictly for electrical safety.

The Brother XL2600i sewing machine is a versatile and user-friendly device, supported by a comprehensive manual. It offers a wide range of features for sewers of all levels.

9.1 Summary of Key Points

The Brother XL2600i sewing machine offers a variety of features, including multiple stitch options and customizable settings. Its user-friendly design makes it suitable for both beginners and experienced sewers. The included instruction manual provides clear guidance for setup, operation, and maintenance. Regular upkeep ensures optimal performance, while troubleshooting tips help resolve common issues efficiently.

9.2 Encouragement to Explore More Features

Explore the Brother XL2600i’s advanced features to unlock its full potential. From decorative stitches to customizable settings, this machine offers endless possibilities for creative projects. Refer to the manual for guidance on using specialized modes and accessories. Experimenting with these features will enhance your sewing experience and help you create professional-quality results with ease and confidence;

Additional Resources

Explore official resources for the Brother XL2600i, including downloadable manuals, online guides, and video tutorials. Visit the Brother website for comprehensive support and updates to maximize your machine’s capabilities.

10.1 Downloading the Full Manual

The Brother XL2600i manual is available online in PDF format, ensuring easy access to detailed instructions. Visit the official Brother website or authorized portals to download the complete guide, which covers setup, operation, and troubleshooting. This resource is essential for mastering your machine’s features and resolving any technical issues efficiently. Regular updates may also be available for the latest information.

10.2 Online Tutorials and Guides

Enhance your sewing skills with online tutorials and guides specifically designed for the Brother XL2600i. These resources offer step-by-step instructions, troubleshooting tips, and creative project ideas. Available on platforms like YouTube and Brother’s official website, they cater to various skill levels, ensuring a smooth learning experience. Explore these guides to unlock your machine’s full potential and improve your sewing techniques effortlessly.

Warranty and Repair Information

The Brother XL2600i comes with a limited warranty covering parts and labor. For repairs, contact authorized Brother service centers or refer to the manual for details.

11.1 Understanding the Warranty

The Brother XL2600i is backed by a 25-year limited warranty, covering mechanical parts, and a 5-year warranty for electronic components. The warranty protects against manufacturing defects, ensuring reliability. To maintain coverage, users must register the machine and follow manual guidelines for maintenance and usage. This comprehensive warranty provides peace of mind for sewers, supporting long-term performance and satisfaction.

11.2 Repair Options and Service Centers

For repairs, the Brother XL2600i can be serviced at authorized Brother centers. Use genuine parts to maintain warranty validity. Contact Brother Support for locating nearest service centers or troubleshooting. DIY guides in the manual assist with minor fixes, ensuring optimal performance and extending machine longevity. Proper repair practices are essential for sustained functionality and user satisfaction;

User Reviews and Feedback

Users praise the Brother XL2600i for its versatility, ease of use, and durable construction. Many highlight its variety of stitches and user-friendly interface, making it ideal for various sewing projects.

12.1 Common Praise for the XL2600i

Users frequently commend the Brother XL2600i for its versatility, ease of use, and durable construction. Many appreciate the variety of stitches, user-friendly interface, and included accessories. The comprehensive manual and quick-start guide are also highlighted for making setup and operation straightforward, even for beginners. Its reliability and performance across various sewing projects make it a favorite among both hobbyists and professionals.

12.2 User Tips for Optimal Performance

Users recommend regular maintenance, such as cleaning the machine and oiling parts, to ensure smooth operation. Proper threading techniques and using the correct needle size are also emphasized. Keeping the work area tidy and following the manual’s guidelines can prevent common issues. These tips help maximize the machine’s potential and enhance sewing experiences for both beginners and experienced users.

nissan frontier 6 speed manual transmission

The Nissan Frontier 6-Speed Manual Transmission offers smooth shifting‚ precise control‚ and excellent responsiveness‚ making it a popular choice for both on-road and off-road driving enthusiasts․

Overview of the Nissan Frontier and Its Transmission Options

The Nissan Frontier is a robust pickup truck known for its durability and performance․ It offers a range of transmission options‚ including the 6-speed manual‚ which pairs with the 4․0L V6 engine for enhanced control and towing capacity․ Available in both 2WD and 4WD configurations‚ the Frontier caters to diverse driving needs‚ from daily commuting to off-road adventures‚ with the manual transmission providing a classic driving experience for enthusiasts․

Importance of Manual Transmissions in Pickup Trucks

Manual transmissions in pickup trucks like the Nissan Frontier offer improved driver engagement and control‚ especially in challenging conditions․ They provide better fuel efficiency‚ lower maintenance costs‚ and precise gear control for towing and off-road use; The 6-speed manual enhances acceleration and driver connection‚ making it a preferred choice for enthusiasts who value performance and reliability in their work or adventure vehicles․

Key Features of the 6-Speed Manual Transmission

The Nissan Frontier’s 6-speed manual transmission features smooth shifting‚ precise gear engagement‚ and a low first-gear ratio for enhanced control and responsiveness in various driving conditions․

Engine Compatibility and Performance

The 6-speed manual transmission in the Nissan Frontier is seamlessly paired with the 4․0L V6 engine‚ delivering robust performance and torque․ This combination ensures responsive acceleration and efficient power delivery‚ making it suitable for both daily driving and demanding off-road adventures․ The engine’s capability‚ combined with the manual transmission‚ provides drivers with a balanced blend of strength and agility‚ enhancing overall driving dynamics and towing capacity․

Gearing Ratios and Shifting Mechanism

The Nissan Frontier’s 6-speed manual transmission features optimized gearing ratios‚ ensuring smooth acceleration and precise control․ The low first gear enhances towing and off-road capability‚ while higher gears provide efficient cruising․ The shifting mechanism is designed for intuitive operation‚ with a short‚ precise throw that makes gear changes feel deliberate and responsive‚ catering to both novice and experienced drivers alike․

Clutch System and Engagement Characteristics

The Nissan Frontier’s clutch system is designed for durability and smooth engagement‚ offering a truck-like feel that drivers often describe as intuitive and predictable․ With a moderate pedal effort‚ the clutch engages progressively‚ allowing for precise control during shifting․ This setup balances comfort and functionality‚ making it suitable for both daily driving and heavy-duty applications‚ while minimizing wear and tear over time․

Performance Benefits of the 6-Speed Manual

The Nissan Frontier’s 6-Speed Manual Transmission delivers enhanced acceleration‚ improved towing capacity‚ and a more engaging driving experience with precise control and fuel efficiency across various conditions․

Acceleration and Towing Capacity

The Nissan Frontier’s 6-Speed Manual Transmission enhances acceleration with a low first-gear ratio for quick takeoff and optimized mid-range gears for steady power delivery․ This setup allows for precise control‚ especially when towing heavy loads․ With a maximum towing capacity of up to 6‚690 pounds‚ the manual transmission ensures smooth power transfer‚ making it ideal for both everyday driving and heavy-duty tasks․ Drivers benefit from responsive performance and confident control in various conditions․

Fuel Efficiency and Driver Control

The 6-Speed Manual Transmission in the Nissan Frontier delivers improved fuel efficiency compared to automatic counterparts‚ especially in city driving․ Drivers enjoy precise control over gear shifts‚ optimizing engine performance and mileage․ The manual transmission’s direct connection enhances driving engagement‚ allowing for better fuel economy and responsive acceleration in various conditions‚ making it a practical choice for both daily commuting and adventurous off-road excursions․

Off-Road Capabilities with Manual Transmission

The Nissan Frontier’s 6-Speed Manual Transmission excels in off-road scenarios‚ offering precise driver control and optimal torque delivery․ The manual gearbox allows for better modulation of power‚ especially in low-range situations‚ making it ideal for challenging terrains like steep inclines or rocky trails․ The ability to manually select gears enhances traction and control‚ ensuring the Frontier performs confidently in rugged off-road conditions‚ making it a reliable choice for adventurous drivers seeking versatility and capability․

Reliability and Durability

The Nissan Frontier’s 6-Speed Manual Transmission is known for its robust construction and long lifespan‚ offering consistent performance with minimal maintenance requirements‚ ensuring durability and dependability over time․

Longevity and Low Maintenance

The Nissan Frontier’s 6-Speed Manual Transmission is designed for longevity‚ with a sturdy build and minimal components prone to wear․ Regular fluid changes and inspections ensure optimal performance․ Owners report high mileage without major issues‚ making it a cost-effective choice for long-term use; Its simplicity reduces the need for frequent repairs‚ appealing to drivers seeking durability and reliability in their pickup trucks․

Common Issues and Solutions

Some owners report issues with the 6-Speed Manual Transmission‚ such as clutch engagement difficulties and occasional hesitation during shifting․ Regular transmission fluid changes and inspections can prevent these problems․ Worn-out clutch components may need replacement‚ and ensuring proper alignment during installation is crucial․ Additionally‚ cold-weather shifting issues can be mitigated by allowing the transmission to warm up slightly before driving․ Proper maintenance often resolves these concerns effectively․

Owner Feedback and Real-World Experience

Owners praise the Nissan Frontier 6-Speed Manual Transmission for its smooth shifting and precise control‚ especially when warm․ Many enjoy the engaging drive it offers․ However‚ some report hard shifting in cold conditions and occasional hesitation․ Clutch feel is often described as truck-like‚ with a long engagement window․ Overall‚ owners appreciate its durability and performance‚ making it a reliable choice for both daily driving and off-road adventures with proper maintenance․

Shifting and Clutch Characteristics

The Nissan Frontier 6-Speed Manual Transmission delivers smooth shifting when warm‚ requiring patience during gear changes due to rev hang․ The clutch features a long‚ truck-like feel‚ engaging smoothly without notchiness‚ providing a satisfying‚ precise connection for drivers․

Smooth Shifting and Gear Engagement

The Nissan Frontier 6-Speed Manual Transmission ensures smooth shifting‚ especially when the engine is warmed up‚ with gears engaging seamlessly․ While some patience is needed due to slight rev hang‚ the transmission delivers precise control․ Each gear clicks into place with minimal effort‚ offering a satisfying connection that enhances the driving experience‚ particularly during spirited or off-road driving conditions․

Clutch Pedal Feel and Driver Experience

The Nissan Frontier’s clutch pedal provides a truck-like feel‚ requiring moderate effort but offering consistent engagement․ While some drivers describe the pedal as having a “long” feel‚ it becomes enjoyable once accustomed to‚ allowing for smooth transitions between gears․ The clutch’s predictable nature enhances the overall driving experience‚ making it both functional and engaging for drivers who prefer manual control over their vehicle․

Reverse Gear Functionality and Design

The Nissan Frontier’s 6-speed manual transmission includes a functional reverse gear designed for reliable operation; While some users note that reverse gear can feel slightly notchy or require careful engagement‚ its robust design ensures durability․ The gear ratio for reverse is optimized for maneuverability‚ though some drivers find it a bit high for tight spaces․ Overall‚ it performs well for both on-road and off-road scenarios‚ providing consistent reliability․

Maintenance and Repair Tips

Regular fluid checks and filter replacements are essential for the Nissan Frontier’s 6-speed manual transmission․ Inspect the clutch for wear and address any issues promptly to avoid costly repairs․

Transmission Fluid and Filter Replacement

Regular replacement of the transmission fluid and filter is crucial for maintaining the Nissan Frontier’s 6-speed manual transmission․ Use the recommended synthetic fluid to ensure optimal performance and longevity․ Replace the filter every 30‚000 to 60‚000 miles to prevent contaminants from affecting gear operation․ Always follow the manufacturer’s guidelines for the best results and to avoid premature wear on moving parts․

Clutch Replacement and Adjustment

Clutch replacement on the Nissan Frontier’s 6-speed manual transmission typically occurs every 80‚000 to 120‚000 miles‚ depending on driving conditions․ Adjustment is needed if the pedal feel becomes inconsistent․ Use OEM or high-quality aftermarket parts for optimal performance․ Proper alignment and bleeding of the hydraulic system ensure smooth engagement․ Regular inspection helps prevent sudden failure‚ keeping the clutch system reliable and responsive for a seamless driving experience․

DIY vs Professional Repair Considerations

DIY repairs for the Nissan Frontier’s 6-speed manual transmission can save costs but require mechanical expertise․ Simple tasks like fluid changes are manageable‚ but complex issues like gearbox overhauls demand professional skills․ Specialized tools and knowledge are often necessary for internal repairs․ Novice owners may risk further damage‚ while experienced enthusiasts can handle basic maintenance․ Weighing time‚ skill level‚ and potential risks helps decide whether to tackle repairs personally or seek professional assistance․

Model Year Variations

The Nissan Frontier’s 6-speed manual transmission has evolved across model years‚ with consistent engine compatibility and slight design improvements‚ ensuring reliability and performance in various generations․

Changes in Transmission Design Over the Years

The Nissan Frontier’s 6-speed manual transmission has undergone subtle design improvements over the years․ Earlier models featured a robust‚ straightforward mechanism‚ while later versions incorporated refined gear ratios and enhanced clutch systems for smoother engagement․ Recent updates include better synchronization and reduced noise‚ ensuring optimal performance and reliability across various model years‚ particularly in the 2024 Frontier with its 4․0L V6 engine․

Specific Features in Different Model Years

Different model years of the Nissan Frontier 6-speed manual transmission offer distinct features․ The 2024 model includes a refined 4․0L V6 engine pairing‚ while earlier years like 2016 feature a durable 6-speed gearbox with 4WD capability․ The 2020 model introduced smoother clutch engagement‚ and recent updates in 2024 enhanced gear ratios for improved towing capacity and off-road performance‚ ensuring each year brings unique advancements to the transmission system․

Upgrades and Improvements in Recent Models

Recent Nissan Frontier models feature improved 6-speed manual transmissions with enhanced gear ratios for better towing and acceleration․ The 2024 model includes refined clutch systems and stronger materials for increased durability․ Additionally‚ updated gear engagement mechanisms provide smoother shifting and reduced wear over time‚ ensuring optimal performance for both on-road and off-road driving experiences․

Aftermarket Modifications and Upgrades

The Nissan Frontier 6-speed manual transmission can be enhanced with aftermarket upgrades‚ including lightweight flywheels and heavy-duty clutches for improved performance and durability․

Performance Enhancements for the 6-Speed Manual

Performance enhancements for the Nissan Frontier’s 6-speed manual include lightweight flywheels and upgraded clutch kits‚ which improve acceleration and reduce wear․ These modifications enhance shifting smoothness and responsiveness‚ making the transmission more robust for heavy-duty use․ Additionally‚ aftermarket gear ratio adjustments can optimize torque delivery‚ especially for off-road or towing applications‚ ensuring the truck performs at its best in various conditions․

Clutch and Gear Upgrades for Heavy-Duty Use

Clutch and gear upgrades for the Nissan Frontier’s 6-speed manual transmission enhance its resilience for heavy-duty applications․ Heavy-duty clutches with high-friction materials are designed to handle increased torque and heat‚ reducing wear․ Upgraded gear sets with reinforced components improve durability under stress․ These modifications ensure smoother engagement and reduced risk of failure during towing or off-road use‚ making the truck more capable for demanding tasks․

Compatibility with Other Nissan Models

The Nissan Frontier’s 6-speed manual transmission is compatible with other models like the Nissan Xterra and Suzuki Equator․ This versatility allows for shared parts and easier maintenance․ The transmission’s design ensures seamless integration across compatible vehicles‚ making it a practical choice for enthusiasts seeking durability and performance․ This compatibility also expands aftermarket modification options‚ enhancing its appeal for those looking to upgrade their Nissan vehicles․

The Nissan Frontier’s 6-speed manual transmission is renowned for smooth shifting‚ durability‚ and excellent control‚ making it a top choice for enthusiasts seeking performance and simplicity․

Final Thoughts on the Nissan Frontier 6-Speed Manual

The Nissan Frontier’s 6-speed manual transmission stands out as a reliable and performance-oriented option‚ offering smooth gear engagement and excellent clutch feel․ Its durability and low maintenance requirements make it a favorite among truck enthusiasts․ Whether for towing‚ off-road adventures‚ or daily driving‚ this transmission delivers a satisfying and engaging driving experience‚ proving why it’s a top choice for many pickup truck lovers․

Future Prospects for Manual Transmissions in Trucks

While automatics dominate‚ manual transmissions remain a niche favorite in trucks like the Nissan Frontier․ Enthusiasts appreciate the control and connection they offer‚ especially in off-road scenarios․ As trucks evolve‚ manuals may adapt with advanced features‚ ensuring their relevance․ However‚ their future hinges on market demand and technological integration‚ balancing tradition with innovation in the automotive industry․

Recommendation for Potential Buyers

The Nissan Frontier 6-Speed Manual Transmission is ideal for drivers seeking a balance of performance‚ control‚ and efficiency․ It suits both daily commuting and off-road adventures․ For those who value driving engagement and reliability‚ this manual transmission is a practical choice․ Buyers prioritizing fuel efficiency‚ durability‚ and a smooth shifting experience will find it a standout option in the mid-size pickup truck segment․

bowflex xtl owners manual

Welcome to the Bowflex XTL Owner’s Manual, your comprehensive guide to understanding and utilizing your fitness equipment effectively. This manual provides essential information on safety, assembly, operation, and maintenance to ensure optimal performance and longevity of your machine.

Inside, you’ll find detailed instructions, troubleshooting tips, and warranty details to help you make the most of your Bowflex XTL. Read carefully before use to maximize your workout experience and maintain your equipment properly.

1.1 Key Features and Components of the Bowflex XTL

The Bowflex XTL is designed for versatile home workouts, featuring adjustable resistance levels and a robust construction. Key components include the Power Rod resistance system, offering progressive resistance for effective strength training. The machine includes a bench for seated exercises, leg press attachment, and multiple cable pulleys for a wide range of movements. Additional features like the spring lock seat pin allow for easy adjustments between exercises. Durable materials ensure long-lasting performance, while the compact design fits well in home gyms. The XTL also comes with a comprehensive warranty, covering defects in materials and workmanship. These features make it a reliable choice for users seeking a full-body workout solution.

Assembly and Installation Instructions

Assembly requires a 9/16 wrench, 7/16 wrench, 1/2 open-end wrench, crescent wrench, rubber mallet, and Phillips screwdriver. Follow step-by-step instructions carefully to ensure proper installation and functionality.

2.1 Tools and Equipment Required for Assembly

To successfully assemble your Bowflex XTL, gather the following tools and equipment: a 9/16 wrench, 7/16 wrench, 1/2 open-end wrench, crescent wrench, rubber mallet, and Phillips head screwdriver. These tools are essential for securing bolts, adjusting components, and ensuring proper alignment during assembly. Additionally, having a clean, flat workspace and a soft cloth to protect surfaces during assembly is recommended. Organize all tools beforehand to streamline the process and avoid delays. Refer to the manual for specific instructions on when and how to use each tool, as improper use could damage the equipment or compromise safety. Proper tool preparation ensures a smooth and efficient assembly experience.

2.2 Step-by-Step Assembly Guide

Begin by carefully unboxing and organizing all components and hardware. Start with the base frame, attaching the seat and backrest using the provided bolts. Align the holes precisely and tighten securely. Next, assemble the bench by attaching the seat rail and spring lock pin mechanism. Move on to the media rack, ensuring proper alignment with the frame. Install the power rod system, following the manual’s torque specifications for each bolt. Use the rubber mallet to tap parts into place gently. Finally, attach the resistance rods to the pulley system and test all moving parts for smooth operation. Refer to the manual for detailed diagrams and specific instructions for each step.

Operating the Bowflex XTL

Engage the power rod system by pulling the cable handle, adjusting resistance levels as needed. Ensure proper form and safety during exercises to maximize efficiency and prevent injury.

3.1 Adjusting Resistance Levels and Settings

To adjust resistance levels on the Bowflex XTL, engage the Power Rod system by pulling the cable handle. Use the provided wrenches to secure bolts and ensure proper alignment. The machine features multiple resistance settings, allowing customization based on workout goals. Always refer to the manual for specific instructions to avoid damage and ensure optimal performance. Regularly check and tighten all connections to maintain consistency in resistance levels during exercises.

3.2 Performing Exercises Safely and Effectively

To ensure a safe and effective workout with the Bowflex XTL, start by selecting the appropriate resistance level for your fitness goals. Begin with lighter settings and gradually increase as your strength improves. Maintain proper posture and form throughout each exercise to prevent injury and maximize results. Focus on controlled movements, avoiding jerky motions that could strain muscles or damage the equipment. Incorporate a variety of exercises to target different muscle groups, and consider creating a balanced workout routine. Always warm up before starting and cool down afterward to enhance flexibility and recovery. For specific exercise instructions, refer to the manual or accompanying guides to achieve optimal outcomes.

Maintenance and Troubleshooting

Regularly inspect and lubricate moving parts to ensure smooth operation. Check cables for wear and tighten connections as needed. Refer to the manual for troubleshooting common issues and solutions to maintain optimal performance.

4.1 Regular Maintenance Tips for Optimal Performance

Regular maintenance is crucial to ensure your Bowflex XTL functions efficiently and lasts longer. Start by inspecting the cables and pulleys for wear or fraying, replacing them if necessary. Lubricate all moving parts, such as hinges and rollers, to reduce friction and prevent rust. Tighten any loose bolts or screws to maintain stability during workouts. Clean the equipment regularly with a damp cloth to remove sweat and dust, which can damage the finish over time. Additionally, check the resistance rods for proper alignment and ensure they are securely locked in place. Refer to the manual for specific lubrication recommendations and cleaning products to avoid damaging the machine. By following these steps, you can maintain your Bowflex XTL in excellent condition and enjoy consistent performance.

4.2 Common Issues and Solutions

Common issues with the Bowflex XTL include squeaking noises, resistance malfunctions, and cable misalignment. For squeaking, lubricate moving parts with silicone-based spray. If resistance levels aren’t adjusting properly, check for loose bolts or misaligned rods and tighten or realign them as needed. Cable misalignment can be fixed by rethreading the cables through the pulleys and ensuring they are securely fastened. If the machine fails to fold properly, inspect the folding mechanism for obstruction or wear. For persistent issues, refer to the troubleshooting section in the manual or contact Bowflex customer support for assistance. Regular maintenance and inspections can prevent many of these problems, ensuring smooth operation and longevity of your equipment.

Warranty and Support Information

The Bowflex XTL is backed by a comprehensive warranty program, ensuring protection against defects in materials and workmanship. The Power Rod resistance system is covered by a no-time-limit warranty, while other components are typically under warranty for a specified period. For details, refer to the warranty section in your manual. Additionally, Bowflex offers dedicated customer support to address any questions or concerns. You can contact their support team via phone, email, or through the official website. For further assistance, downloadable resources, including assembly manuals and troubleshooting guides, are available online. This ensures you have all the tools needed to maintain and enjoy your Bowflex XTL for years to come.

Additional Resources

Access additional resources, including the PDF manual, exercise guides, and troubleshooting tips, to enhance your Bowflex XTL experience and ensure proper assembly and effective workouts.

6.1 Downloading the PDF Version of the Manual

The Bowflex XTL Owner’s Manual is available for download as a PDF, providing convenient access to all the information you need. The manual is free to download and can be accessed from the official Bowflex website or trusted online repositories. Ensure you have Adobe Reader installed to view and print the document. The PDF version includes all sections, such as assembly instructions, exercise guides, and troubleshooting tips, making it a valuable resource for both new and experienced users. Additionally, the manual is available in multiple languages, including Spanish and French, to cater to a broader audience. Downloading the PDF ensures you always have a backup copy for quick reference.

6.2 Accessing Workout Plans and Exercise Guides

To maximize your Bowflex XTL experience, explore the diverse workout plans and exercise guides available. These resources are designed to help you achieve your fitness goals, whether you’re focusing on strength, endurance, or weight loss. Detailed exercise routines, including instructions for shoulder presses, chest workouts, and core-strengthening exercises, are included in the manual. Additionally, optional resources like Ellington Darden’s 6-Week Fast Fat Loss/Body Plan provide structured programs to enhance your training. These guides are accessible online, often in PDF format, and can be downloaded alongside the owner’s manual for a comprehensive fitness toolkit. Consistency in following these plans, combined with proper nutrition and hydration, will help you achieve optimal results.

badger 500 garbage disposal manual

The Badger 500 is a popular garbage disposal known for its reliability and efficiency in handling food waste. Designed for continuous feed operation, it offers a powerful yet quiet performance, making it a practical choice for homeowners. With its durable construction and easy installation process, the Badger 500 is a cost-effective solution for kitchen waste management, providing long-term value and convenience.

1.1 Overview of the Badger 500 Model

The Badger 500 garbage disposal is a reliable, continuous-feed model designed for efficient food waste management. It features a 1/2 HP Dura-Drive induction motor, galvanized steel construction, and a compact design for space-saving installation. Suitable for various kitchen setups, it offers durable performance and easy maintenance, making it a practical choice for homeowners seeking consistent waste disposal solutions.

1.2 Importance of Proper Installation and Maintenance

Proper installation ensures optimal performance and prevents issues like leaks or noise. Regular maintenance, including cleaning and avoiding clogs, extends the unit’s lifespan. Following manufacturer guidelines helps maintain efficiency and reduces waste effectively, ensuring the Badger 500 operates smoothly and reliably for years.

Key Features of the Badger 500

The Badger 500 features a 1/2 HP Dura-Drive induction motor, continuous feed operation, and galvanized steel construction for durability. Its compact design saves space, ensuring efficient food waste disposal while maintaining quiet performance and long-lasting reliability.

2.1 Motor Specifications and Performance

The Badger 500 is equipped with a powerful 1/2 HP Dura-Drive induction motor, designed for efficient food waste grinding. Its single-phase motor operates smoothly, delivering consistent performance while maintaining low noise levels. This robust motor ensures durability and reliable operation, making it ideal for handling everyday kitchen waste with minimal effort and maintenance.

2.2 Dura-Drive Induction Motor and Galvanized Steel Construction

The Badger 500 features a Dura-Drive induction motor, known for its quiet operation and high torque, ensuring efficient waste grinding. Its rugged galvanized steel construction enhances durability, resisting corrosion and wear. This combination provides long-lasting performance, making the unit a reliable choice for handling tough food waste in busy kitchens.

2.3 Space-Saving Compact Design

The Badger 500 boasts a compact design, ideal for kitchens with limited under-sink space. Its streamlined dimensions ensure easy installation without compromising performance. This space-efficient unit fits seamlessly into existing plumbing setups, making it a practical solution for homeowners seeking a discreet yet powerful garbage disposal system.

Installation Process

The Badger 500 installation is straightforward, requiring basic tools and fitting seamlessly into most existing sink setups. Its compact design ensures easy placement under the sink.

3.1 Step-by-Step Installation Guide

Mount the Badger 500 under the sink by attaching the included hardware. Connect the discharge tube and electrical wiring, ensuring all connections are secure. Use a wrench to tighten the mounting screws. Apply plumber’s putty around the sink opening for a leak-proof seal. Finally, test the disposal by running cold water and checking for proper function.

3.2 Tools and Materials Required

Install the Badger 500 with essential tools like adjustable pliers, screwdrivers, and a wrench. Materials needed include plumber’s putty, a rubber gasket, and mounting hardware. Ensure a power source is nearby, and consult the manual for specific instructions. Proper preparation ensures a smooth and efficient installation process, minimizing potential leaks or electrical issues.

3.3 Connecting to the Dishwasher

Connect the Badger 500 to your dishwasher by attaching the dishwasher drain hose to the disposal’s designated port. Ensure a secure connection to prevent leaks. After installation, run a test cycle to verify proper water flow and system functionality. This integration enhances kitchen efficiency by streamlining waste management and dishwasher operation.

Maintenance and Care

Regular maintenance ensures optimal performance of your Badger 500 garbage disposal. Clean the unit by flushing cold water and grinding ice cubes to sharpen blades. Use baking soda and vinegar to eliminate odors. Avoid overloading and putting grease, tough peels, and non-food items down the drain. For persistent issues, refer to the troubleshooting guide in the manual.

4.1 Regular Cleaning and Deodorizing

Regular cleaning is essential for maintaining the Badger 500’s efficiency. Flush cold water through the disposal while running it to clear debris. For deeper cleaning, grind ice cubes to sharpen blades and scour the interior. To deodorize, pour 1/2 cup of baking soda down the drain, followed by 1 cup of white vinegar. Let it sit, then rinse with cold water. This process helps eliminate odors and keeps the unit running smoothly.

4.2 Avoiding Common Clogs and Blockages

To prevent clogs, avoid disposing of fat, oils, and greasy foods, as they solidify and block pipes. Cut large food particles into smaller pieces and avoid starches, fibrous materials, and hard objects. Regularly flush the system with cold water to clear debris. Use a natural cleaner like ice cubes to sharpen blades and maintain flow.

4.3 Recommended Usage and Best Practices

For optimal performance, run cold water during operation to flush food particles. Avoid overloading the disposal with too much waste at once. Use natural cleaners like citrus peels to deodorize and maintain efficiency. Regularly check for worn or loose parts and refer to the manual for guidelines. Proper usage ensures longevity and prevents costly repairs.

Troubleshooting Common Issues

Address jams, leaks, and noisy operation promptly. Check for blockages, tighten loose connections, and reset the unit if necessary. Regular maintenance helps prevent recurring problems.

5.1 Diagnosing Jammed or Slow Motors

A jammed or slow motor may result from food blockages or worn-out components. Check for unusual noises or the motor stopping during operation. Ensure the disposal is clear of debris and reset if necessary. Regular maintenance, like cleaning and ensuring proper food waste management, can prevent such issues and maintain optimal performance levels over time.

5.2 Resolving Leaks and Noisy Operation

Leaks often occur due to loose connections or worn seals, while noise may result from an imbalanced unit or debris buildup. Tighten all connections and replace damaged seals. For noise, ensure the disposal is properly installed and free of obstructions. Regular cleaning and maintenance can prevent these issues and ensure smooth operation over time.

5.3 Resetting the Disposal Unit

To reset the Badger 500, press and hold the reset button located at the bottom of the unit. Release it after a few seconds and test the disposal. This process resolves issues like overloads or jams. Ensure the unit is turned off before resetting. If problems persist, inspect for blockages or consult the manual for further guidance.

Replacement and Upgrading

Replacing or upgrading the Badger 500 involves removing the old unit and installing a new disposal. Consider newer models for improved features or alternative disposals for enhanced performance.

6.1 When to Replace the Badger 500

Replace the Badger 500 when it shows signs of aging, such as declining performance or increased noise. If repair costs exceed half the unit’s value or parts are no longer available, replacement is advisable. Additionally, consider upgrading to newer models offering improved energy efficiency or advanced features that align with your evolving needs.

6.2 Upgrading to Newer Models or Alternative Disposals

Upgrading from the Badger 500 to newer models or alternative disposals offers enhanced features like advanced noise reduction, improved horsepower, or eco-friendly designs. Consider models with better energy efficiency or quieter operation. Alternative brands may provide unique benefits, ensuring you find a disposal that meets your specific needs and preferences for long-term satisfaction.

6.3 Disposal and Recycling of Old Units

Proper disposal of the Badger 500 involves eco-friendly practices. Check local regulations for guidelines on appliance disposal. Consider donating or recycling the unit if still functional. Partner with recycling centers or retailers that accept old appliances. Ensure the disposal is disconnected and drained before disposal to prevent environmental harm and comply with local standards.

Environmental Impact and Benefits

The Badger 500 reduces landfill waste by efficiently grinding food scraps, promoting water conservation through proper waste management and minimizing environmental contamination from decomposing waste.

7.1 Reducing Waste Sent to Landfills

The Badger 500 helps minimize landfill contributions by breaking down organic waste into smaller particles that can be flushed into sewage systems. This process reduces the volume of waste sent to landfills, lowering environmental impact and promoting sustainable waste management practices in households.

7.2 Energy Efficiency and Water Conservation

The Badger 500 promotes energy efficiency with its optimized motor design, reducing power consumption while maintaining performance. Additionally, it supports water conservation by efficiently processing food waste with minimal water usage, making it an eco-friendly choice for households aiming to lower their environmental footprint.

7.3 Eco-Friendly Disposal Practices

The Badger 500 encourages eco-friendly habits by efficiently processing food waste, reducing landfill contributions. Its galvanized steel construction is recyclable, promoting sustainability. Proper use minimizes water treatment needs and supports composting, aligning with green practices and minimizing environmental impact, thus fostering responsible waste management and eco-conscious living for homeowners.

Warranty and Customer Support

The Badger 500 comes with a 3-year in-home warranty, covering parts and labor. Manufacturer support is accessible for troubleshooting, ensuring assistance and peace of mind for users.

8.1 Overview of the 3-Year In-Home Warranty

The Badger 500 is backed by a 3-year in-home warranty, ensuring coverage for parts and labor. This warranty provides homeowners with assurance, covering repairs and replacements within the comfort of their homes, reflecting InSinkErator’s commitment to customer satisfaction and product reliability.

8.2 Contacting Manufacturer Support

InSinkErator provides dedicated customer support for the Badger 500. Homeowners can contact the manufacturer via phone at 1-800-872-8868 or through their official website. Support is available Monday-Friday, 8 AM-5 PM CST, ensuring prompt assistance for any inquiries, troubleshooting, or warranty-related issues, offering peace of mind for users seeking help.

8.4 Common Warranty Claims and Solutions

Common warranty claims for the Badger 500 include motor issues or corrosion. Solutions involve contacting InSinkErator’s support for in-home service. The 3-year warranty covers repairs or replacements, ensuring minimal inconvenience. Proper installation and maintenance are key to avoiding claims, with support readily available to address any issues promptly and effectively for homeowners.

Customer Reviews and Feedback

Customers praise the Badger 500 for its ease of installation, durability, and value. Many highlight its reliable performance and quiet operation, making it a top choice for home use.

9.1 Positive Aspects Highlighted by Users

Users consistently praise the Badger 500 for its ease of installation, durable construction, and quiet operation. Many appreciate its ability to handle tough food waste efficiently, while others highlight its space-saving design and excellent value for the price. The pre-installed power cord and compatibility with existing sink setups are also frequently commended.

9.2 Common Complaints and Concerns

Some users report issues with the disposal outlet being positioned below the waste arm, causing drainage problems. Others mention occasional noisy operation and difficulty handling tough food waste with the 1/2 HP motor. A few note that the pre-installed power cord can be vulnerable to damage, such as chewing by pets, requiring careful handling during installation.

9.3 Satisfaction Ratings and Recommendations

Customers generally rate the Badger 500 highly, praising its value for money, easy installation, and reliable performance. Many recommend it as a durable replacement for older models, appreciating its quiet operation and space-saving design. Overall satisfaction is strong, with users suggesting it as a solid choice for efficient food waste management in residential kitchens.

The Badger 500 garbage disposal is a reliable, efficient, and eco-friendly solution for kitchen waste management. Its easy installation and durable design make it a great long-term investment for homeowners.

10.1 Summary of Key Points

The Badger 500 offers a powerful, quiet operation with a 1/2 HP Dura-Drive motor and galvanized steel construction. Its compact design and continuous feed function enhance efficiency. Easy installation and a 3-year warranty add value. Regular maintenance and proper usage ensure longevity, making it a cost-effective, eco-friendly choice for kitchen waste disposal.

10.2 Final Recommendations for Potential Buyers

The Badger 500 is a reliable choice for efficient waste management. Its powerful motor, durable construction, and compact design make it ideal for homeowners seeking a cost-effective solution. With a 3-year warranty and easy installation, it offers great value. Consider your specific needs and space constraints before purchasing, ensuring it meets your kitchen requirements.

motopower mp69033 manual

Welcome to the Motopower MP69033 Manual, your guide to mastering this universal OBD2 scanner․ Designed for car enthusiasts and professionals, it offers easy diagnostics for engine troubleshooting, ensuring optimal vehicle performance without requiring updates․ This manual provides detailed instructions to help you navigate its features and functions seamlessly․

Overview and Features of the Motopower MP69033 OBD2 Scanner

The Motopower MP69033 is a universal OBD2 scanner designed for efficient engine diagnostics․ It features a clear LCD display for easy reading of diagnostic trouble codes (DTCs) and supports multiple languages․ This tool is plug-and-play, requiring no updates, and works with all OBD II-compliant vehicles․ It offers advanced capabilities like reading and clearing codes, monitoring real-time engine data, and performing CAN diagnostic scans․ Lightweight and portable, it includes a user-friendly interface, making it ideal for both professionals and DIY enthusiasts․ The scanner also supports various vehicle protocols, ensuring compatibility with a wide range of cars, trucks, and SUVs for comprehensive diagnostic testing․

Safety Precautions When Using the Motopower MP69033

Always follow safety guidelines when using the Motopower MP69033․ Ensure proper connection, avoid loose cables, and never operate the tool near open flames or sparks to prevent hazards․

Key Safety Measures for Automotive Testing

When using the Motopower MP69033 for automotive testing, ensure the vehicle is on a level surface and apply the parking brake․ Avoid touching electrical components to prevent shocks․ Connect the device correctly to the OBD2 port and keep the area clear of flammable materials․ Never operate the tool near open flames or sparks․ Follow the manual’s instructions and your vehicle’s manufacturer guidelines for safe testing procedures․ Ignoring these precautions can lead to accidents or damage to the device․ Always prioritize safety to ensure accurate diagnostics and protect yourself and your vehicle․

Installation and Initial Setup of the Motopower MP69033

Installation is straightforward: locate your vehicle’s OBD2 port, typically under the dashboard․ Plug in the Motopower MP69033 and turn the ignition to the “ON” position; The device powers up automatically, ready for use without additional software installations․

Connecting the Device to Your Vehicle

To connect the Motopower MP69033, locate your vehicle’s OBD2 port, typically found under the steering wheel or near the glove compartment․ Plug the device’s cable into the port, ensuring a secure fit․ Turn the vehicle’s ignition to the “ON” position—no need to start the engine․ The scanner will automatically power on and initialize․ Once connected, the LCD screen will display diagnostic options․ If your vehicle is OBD2 compliant, the device will begin communicating with the engine control unit․ This process is quick and requires no additional software installation, making it user-friendly for both professionals and DIY enthusiasts․ Always ensure the vehicle is in park or neutral for safe testing․

Preparing Your Vehicle for Diagnostic Testing

Before using the Motopower MP69033, ensure your vehicle is properly prepared․ Park the vehicle on a level surface and engage the parking brake․ Turn the ignition to the “ON” position but do not start the engine․ Switch off all accessories like lights, radio, and HVAC to avoid electrical interference․ Locate the OBD2 port, typically under the steering wheel or near the glove compartment․ Ensure the port is clean and free of debris․ Check the vehicle’s battery connections for stability․ If the engine has been running, allow it to cool slightly․ These steps ensure accurate readings and safe testing․ Always refer to your vehicle’s manual for specific OBD2 port locations if unsure․

Reading and Clearing Codes with the Motopower MP69033

The Motopower MP69033 is a plug-and-play OBD2 scanner designed for quick diagnostics․ It reads and clears trouble codes with ease, offering a user-friendly interface for accurate results․

Understanding Diagnostic Trouble Codes (DTCs)

Diagnostic Trouble Codes (DTCs) are alphanumeric codes generated by your vehicle’s computer to identify specific issues․ The Motopower MP69033 decodes these codes, providing clear explanations to help diagnose problems accurately․ DTCs typically consist of a letter and numbers, such as P0171, where the letter indicates the system (e․g․, P for Powertrain) and the numbers specify the issue․ Understanding these codes allows you to address malfunctions efficiently, ensuring your vehicle runs smoothly․ The MP69033’s detailed code explanations empower users to make informed decisions, whether resolving issues independently or seeking professional assistance․

Navigation and LCD Display Features

The Motopower MP69033 features a clear LCD display for easy reading of diagnostic results․ Navigation buttons enable quick scrolling through menus and selecting functions efficiently․

Using the LCD Screen for Clear Diagnostic Results

The Motopower MP69033 features a user-friendly LCD screen designed to deliver clear and concise diagnostic results․ The display provides real-time data, including diagnostic trouble codes (DTCs), engine parameters, and system status․ With its intuitive interface, users can easily navigate through menus using the navigation buttons, ensuring quick access to the information needed․ The LCD screen is backlit, making it easy to read in both bright and low-light conditions․ Additionally, the device supports multiple languages, catering to a wide range of users․ This feature ensures that diagnostic results are presented clearly, helping users identify and address issues efficiently․ The screen’s clarity and responsiveness make it an essential tool for accurate and hassle-free vehicle diagnostics․

Troubleshooting Common Issues

The Motopower MP69033 may face issues like screen malfunctions or connection problems․ Ensure the OBD cable is secure, restart the device, and check the vehicle’s DLC location for proper diagnostics․

Resolving Connection and Code Reading Problems

When encountering issues with the Motopower MP69033, start by verifying the OBD2 port connection․ Ensure the cable is securely plugged in and free from damage․ If the device fails to power on, check the vehicle’s ignition—some cars require the ignition to be in the “ON” position․ For code reading problems, reset the device or retry the scan․ Ensure your vehicle is OBD2 compliant and consult the manual for DLC location guidance․ If issues persist, refer to the troubleshooting section or contact customer support for assistance․

Warranty and Product Support

The MOTOPOWER MP69033 is backed by a two-year warranty covering defects in materials and workmanship․ For support, refer to the manual or contact the manufacturer directly for assistance․

Understanding the Warranty Terms and Conditions

The MOTOPOWER MP69033 is covered by a two-year warranty from the date of purchase․ This warranty protects against defects in materials and workmanship, ensuring reliability and performance․ However, it does not cover damages resulting from misuse, normal wear and tear, or unauthorized repairs; To maintain warranty validity, users must adhere to the guidelines outlined in the manual․ For warranty claims, proof of purchase is required․ This coverage provides peace of mind, allowing users to focus on diagnosing and resolving vehicle issues confidently․ Refer to the manual for full details on warranty terms and conditions․

Advanced Features of the Motopower MP69033

The Motopower MP69033 offers advanced diagnostic capabilities, including live data streaming, freeze frame data, and multi-language support․ It ensures comprehensive vehicle monitoring and troubleshooting for enhanced performance and accuracy․

Exploring Additional Diagnostic Capabilities

The Motopower MP69033 goes beyond basic code reading with advanced features like live data streaming, freeze frame data, and multi-language support․ It enables real-time monitoring of engine parameters, allowing for precise troubleshooting․ The device also supports various OBD2 protocols, ensuring compatibility with a wide range of vehicles․ Additionally, its ability to display detailed diagnostic information, such as emissions status and vehicle information, makes it a versatile tool for both professionals and DIY enthusiasts․ These capabilities enhance diagnostic accuracy and provide a comprehensive understanding of your vehicle’s performance, helping you identify and resolve issues efficiently․ This makes the MP69033 an essential tool for maintaining your car’s health․

Thank you for following this guide! Properly using the Motopower MP69033 ensures accurate diagnostics․ Regularly update software, store the device safely, and reference this manual for troubleshooting․ Happy diagnosing!

Maximizing the Use of Your Motopower MP69033 OBD2 Scanner

To maximize the use of your Motopower MP69033, ensure you regularly update the software for the latest features․ Store the device in a dry, cool place to maintain its longevity․ Always follow the manual’s guidelines for proper handling and connection to avoid damage․ Utilize the LCD screen’s clarity to review diagnostic results thoroughly․ Familiarize yourself with the button controls for efficient navigation․ For optimal performance, refer to the troubleshooting section if issues arise․ By adhering to these tips, you can extend the scanner’s lifespan and enhance your diagnostic experience․ This ensures your Motopower MP69033 remains a reliable tool for years to come․