nikon f3 manual

The Nikon F3, introduced in 1980, is a legendary SLR camera designed by Giorgetto Giugiaro, known for its durability and versatility. This guide provides a comprehensive overview, making it essential for photographers seeking to master its features and operation.

1.1 Historical Background of the Nikon F3

The Nikon F3, introduced in 1980, was a groundbreaking SLR camera that became a symbol of professional photography. Designed by the renowned Italian designer Giorgetto Giugiaro, it combined durability, ergonomics, and advanced features. Produced until 2000, the F3 was widely adopted by professionals and enthusiasts alike, earning its place in the history of photography as a reliable and versatile tool for capturing high-quality images.

1.2 Key Features of the Nikon F3

The Nikon F3 boasts a titanium focal plane shutter, offering speeds from 8 seconds to 1/2000th of a second. It features aperture priority and manual modes, providing photographers with precise control. The camera supports a wide range of Nikkor lenses and is compatible with various accessories like viewfinders and flash units. Its robust design and electronic shutter control make it a reliable choice for both professional and amateur photographers seeking versatility and durability in their work.

1.3 Importance of the Nikon F3 Manual

The Nikon F3 manual is essential for unlocking the camera’s full potential. It provides detailed instructions on operating modes, lens compatibility, and troubleshooting. Photographers can master features like aperture priority, manual focus, and exposure compensation. The manual also covers maintenance tips, ensuring optimal performance. Whether you’re a novice or an expert, this guide is indispensable for understanding and utilizing the F3’s advanced capabilities effectively, enhancing your overall photography experience with this iconic camera.

Key Features and Technical Specifications

The Nikon F3 boasts a titanium shutter, aperture priority mode, manual controls, and compatibility with Nikkor lenses. Its robust design and advanced features make it a professional favorite.

2.1 Design and Build Quality

The Nikon F3 is renowned for its exceptional design and build quality, with a durable titanium shutter and a robust, weather-sealed body. Its ergonomic design, crafted by Giorgetto Giugiaro, ensures a comfortable grip and intuitive controls. The camera’s mechanical components are precision-engineered for longevity, making it a reliable choice for professional photographers. Its timeless design has solidified its status as a classic in the world of photography.

2.2 Aperture Priority and Manual Modes

The Nikon F3 offers two primary exposure modes: Aperture Priority (A) and Manual (M). In Aperture Priority, the camera automatically selects the shutter speed based on the chosen aperture, ideal for controlling depth of field. Manual Mode provides full control over both aperture and shutter speed, allowing for precise creative adjustments. These modes cater to both professional and amateur photographers, ensuring flexibility and artistic control over exposures. The F3’s design seamlessly integrates these modes, making it a versatile tool for various photographic situations.

2.3 Shutter Speed Control

The Nikon F3 features a robust shutter system with speeds ranging from 1/2000 sec. to 8 sec., plus Bulb (B) and Time (T) modes. Automatic modes handle electronic control, while manual settings provide precise adjustment. A mechanical backup shutter at 1/60 sec. ensures reliability in manual mode. This dual-system design offers flexibility and reliability, catering to both automatic and manual shooting preferences, making the F3 a versatile choice for photographers seeking control and precision in various lighting conditions.

2.4 Lens Compatibility

The Nikon F3 is compatible with a wide range of Nikkor lenses, including AI, AI-S, and Series E lenses, ensuring versatility for photographers. It supports manual-focus lenses and earlier non-AI lenses with proper adjustment. The camera’s AI indexing system enables accurate metering with compatible lenses. While autofocus lenses are not supported, the F3’s manual focus design allows use of a broad array of optics, making it adaptable for various shooting needs and lens preferences.

Getting Started with the Nikon F3

Unpack and inspect the camera, ensuring all components are included. Read the manual thoroughly to understand controls and settings. Start by assembling the camera with a lens and viewfinder, then explore basic functions to begin shooting confidently.

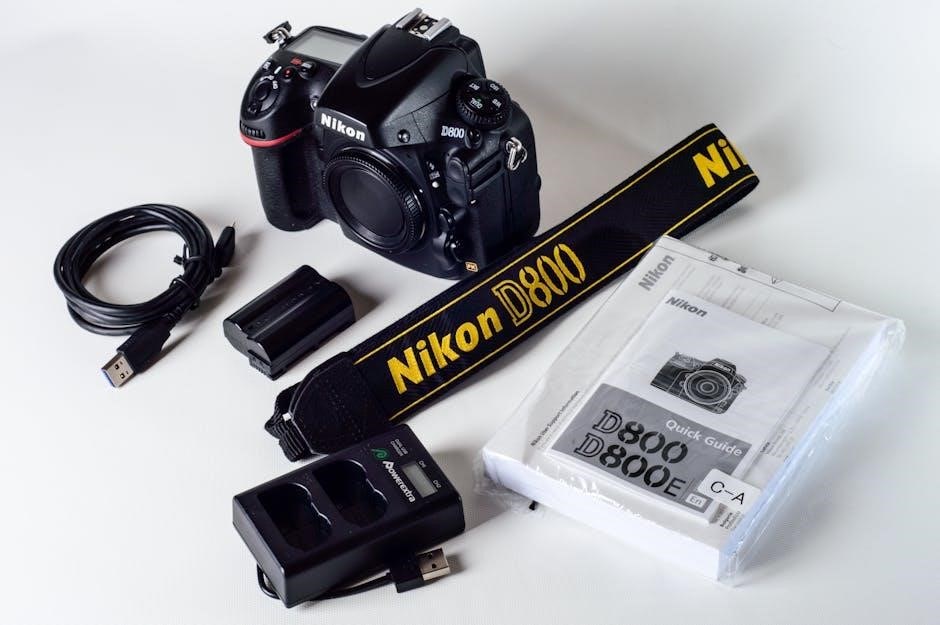
3.1 Unpacking and Initial Setup

Begin by carefully unpacking the Nikon F3, ensuring all accessories, such as the lens, viewfinder, and manual, are included. Inspect for any damage or defects. Attach the lens by aligning the mounting index on the lens with the indicator on the camera body, then twist gently to secure. Install the viewfinder if not already attached. Finally, perform a basic check of the camera’s controls and functions to ensure everything operates smoothly before loading film or shooting.

3.2 Understanding the Camera Controls

Familiarize yourself with the Nikon F3’s intuitive control layout. The mode dial on the top plate offers Aperture Priority and Manual modes. The shutter speed dial, located beneath, allows manual control from 1/2000 sec. to 8 sec., including X, B, and T settings. Adjust aperture via the lens aperture ring, which works in conjunction with the camera’s shutter speed dial for precise exposures. The lens mount is designed for compatibility with Nikkor lenses, ensuring versatility for various shooting needs.
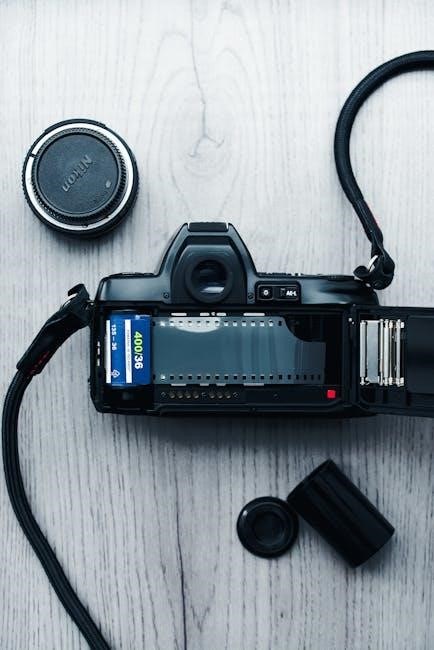
3.3 Loading Film

Loading film into the Nikon F3 is straightforward. Open the camera back by pulling the film advance lever. Attach the film leader to the take-up spool, ensuring it aligns properly. Close the back and advance the lever once to set the film counter to “S.” Make sure the film is seated correctly and the leader is aligned with the spool. The F3 is compatible with 35mm film rolls. Once loaded, set the film speed using the ISO dial on the shutter speed dial. Your camera is now ready for use.

Focusing and Metering

The Nikon F3 offers precise manual focusing and advanced metering modes, ensuring accurate exposure control. Its built-in meter supports aperture priority and manual modes, allowing for creative flexibility.

4.1 Manual Focusing Techniques

Manual focusing on the Nikon F3 is precise and intuitive, utilizing its bright viewfinder and microprism focusing screen for sharp focus. The camera supports various focusing aids, including split-image prisms and grid screens, enhancing accuracy. Photographers can use the focusing ring on Nikkor lenses for smooth, manual adjustments. The F3’s design ensures tactile control, making manual focusing a seamless process for achieving professional-grade results in both still and dynamic compositions.

4.2 Metering Modes

The Nikon F3 features a reliable metering system using a silicon photodiode for accurate exposure control. It supports aperture priority and manual modes, offering flexibility for various lighting conditions. The camera provides consistent metering regardless of the attached finder, ensuring precise results. Additionally, exposure compensation allows for fine-tuning, making the F3 adaptable to diverse photographic scenarios. Its metering capabilities remain a hallmark of its enduring popularity among photographers.

4.3 Exposure Compensation

The Nikon F3 allows for exposure compensation, enabling adjustments of ±2 stops in 1/3-stop increments. This feature is accessed via a dedicated dial, providing precise control over exposure without altering aperture or shutter speed. It is particularly useful in challenging lighting conditions, ensuring optimal results. The compensation dial simplifies fine-tuning exposures, making the F3 highly adaptable for professional and creative photography needs. This functionality enhances the camera’s versatility and user control.

Advanced Shooting Modes

The Nikon F3 offers advanced modes like Aperture Priority, Manual, and Shutter Priority, providing precise control over exposure. These modes cater to professional photographers, enabling creative freedom and technical accuracy.

5.1 Aperture Priority Mode

In Aperture Priority Mode, the Nikon F3 allows photographers to set the aperture manually, while the camera automatically adjusts the shutter speed for optimal exposure. This mode is ideal for controlling depth of field, ensuring subjects stand out against blurred or sharp backgrounds. Professionals widely use this feature for creative control, especially in portrait and landscape photography. The F3’s precise metering system ensures accurate exposures, making it a reliable choice for various lighting conditions.

5.2 Manual Mode

The Nikon F3’s Manual Mode offers full creative control, allowing photographers to set both aperture and shutter speed independently. This mode is ideal for experienced shooters who prefer precise control over exposure settings. Shutter speeds range from 1/2000 sec. to 8 sec., including X, B, and T settings. The F3’s mechanical shutter release at 1/90 sec. ensures reliability. Manual Mode is particularly useful in challenging lighting conditions, giving photographers the freedom to customize their shots for optimal results, making it a favorite among professionals and enthusiasts alike.

5.3 Shutter Priority Mode

In Shutter Priority Mode, photographers can manually set the shutter speed from 1/2000 sec. to 8 sec., while the camera automatically adjusts the aperture for proper exposure. This mode is ideal for capturing motion effects, such as freezing fast-moving subjects or creating artistic blur. The F3’s electronic shutter control ensures precise speed settings, and the titanium focal plane shutter provides durability and reliability. This mode is particularly useful for sports, wildlife, and low-light photography, offering a balance of control and convenience for creative shooting.

Maintenance and Troubleshooting

Regular cleaning of the camera and viewfinder is essential. Avoid touching the titanium shutter curtains. Lubricate hinges sparingly to prevent dust accumulation. For issues like stuck shutters or inaccurate metering, check battery life and ensure proper film loading. Consult the manual or contact a professional for complex repairs.

6.1 Cleaning the Camera

Regular cleaning ensures optimal performance and longevity. Use a soft, dry cloth to wipe the camera body and external surfaces. For the mirror and viewfinder, employ a small blower or soft-bristle brush to remove dust. Avoid harsh chemicals or abrasive materials. The titanium shutter curtains should never be touched. Clean the lens with a microfiber cloth and lens cleaning solution. Proper maintenance prevents damage and ensures precise functionality.

6.2 Common Issues and Solutions

Common issues with the Nikon F3 include stuck shutter curtains, inaccurate metering, or fogging in the viewfinder. For stuck shutters, clean the curtains with a soft brush or replace them if damaged. Inaccurate metering can be resolved by checking battery levels or recalibrating the system. Viewfinder fogging is often caused by condensation; use silica gel packets to absorb moisture. Regular maintenance and professional servicing can prevent these issues. Always handle the camera with care to avoid mechanical damage.

6.3 Battery Maintenance

The Nikon F3 uses 6V silver-oxide batteries, ensuring reliable performance. To maintain battery life, avoid extreme temperatures and moisture. Check voltage regularly with a multimeter to prevent sudden power loss. Store spare batteries in a cool, dry place. Replace batteries every 1-2 years or when metering inaccuracies occur. Use silica gel packets to absorb moisture in the battery compartment. Proper care extends battery life and ensures optimal camera performance. Always handle batteries with clean, dry hands to avoid corrosion.

Accessories for the Nikon F3

The Nikon F3 supports various accessories, including interchangeable viewfinders, flash units like the SB-11, Nikkor lenses, lens hoods, and camera bags, enhancing versatility and functionality.

7.1 Viewfinders

The Nikon F3 offers interchangeable viewfinders, including the standard DE-2 Eye Level Finder, which provides 100% frame coverage and a clear view for precise composition. Additional options like the DA-2 Action Finder enable easier shooting with fast-moving subjects; These accessories enhance usability, catering to different photography styles and preferences, ensuring optimal performance in various shooting conditions.

7.2 Flash Units

The Nikon F3 supports various flash units, such as the SB-11, which automatically sets the shutter speed to 1/80 sec. for optimal flash synchronization. In manual mode, users can adjust settings like 1/30 sec. for more creative control. These flash units integrate seamlessly with the F3’s manual controls, offering versatility for different lighting needs. They enhance the camera’s functionality, making it suitable for professional and amateur photographers seeking precise lighting control in their work.

7.3 Lenses and Compatibility

The Nikon F3 is compatible with a wide range of Nikkor and Nikon Series E lenses, including AF-Nikkors. This broad compatibility ensures versatility for photographers, whether using manual focus or autofocus lenses. The F3AF body supports all these lenses, regardless of the finder in use. Manual focus lenses provide precise control, while M/A mode offers a blend of autofocus and manual adjustment. This adaptability makes the F3 a professional-grade camera, catering to diverse photographic needs and preferences with ease and precision.

The Nikon F3, introduced in 1980, is a legendary SLR camera known for its durability and versatility. This guide provides a comprehensive overview, making it essential for photographers seeking to master its features and operation.

8.1 Final Thoughts on the Nikon F3

The Nikon F3 is a timeless classic, revered for its durability, versatility, and professional-grade features. Its manual controls and aperture priority mode make it a favorite among photographers. The F3’s robust build and compatibility with a wide range of lenses ensure its lasting relevance. Whether you’re a seasoned professional or a photography enthusiast, the Nikon F3 remains an iconic choice, offering unparalleled creative control and reliability.

8.2 Resources for Further Learning

For deeper understanding, the official Nikon F3 manual is indispensable. Online resources like Hyperion-world.com offer free PDF downloads and repair guides. Photography forums and communities provide insights and troubleshooting tips. Additionally, Nikon’s official website and authorized dealers offer detailed technical specifications. Books on film photography and workshops can enhance your skills. Explore these resources to master the F3’s capabilities and unlock its full potential for exceptional photography.

manual steel

Manual steel refers to standardized guidelines for steel construction, detailing design, safety, and application practices. It ensures structural integrity and compliance with industry standards, essential for engineers and architects.

1.1 Overview of Manual Steel and Its Importance

Manual steel encompasses comprehensive guidelines for steel construction, ensuring adherence to design, safety, and application standards. It provides detailed frameworks for structural steel projects, promoting accuracy and reliability. The AISC Steel Construction Manual is a cornerstone resource, offering tables, formulas, and best practices. These manuals are essential for engineers and architects, facilitating efficient and safe steel construction processes while minimizing errors and enhancing durability. They play a crucial role in modern building practices.

  • Ensures structural integrity and compliance with industry standards.
  • Provides detailed frameworks for design and execution.
  • Enhances safety and efficiency in construction projects.

1.2 Historical Background of Steel Manuals

Steel manuals have evolved significantly since their inception, with the AISC Steel Construction Manual first published in 1927. Over the years, updates like the 14th, 15th, and 16th editions have incorporated advancements in design, safety, and materials. Other notable manuals, such as the Canadian Handbook of Steel Construction, emerged to address regional standards. These documents have historically provided foundational guidelines for structural steel design, ensuring compliance and innovation in construction practices. Their development reflects the growing complexity and sophistication of steel applications in modern engineering. By documenting best practices, steel manuals have become indispensable tools for professionals worldwide.

  • Originated in the early 20th century to standardize steel construction practices.
  • Regular updates reflect technological advancements and industry needs.
  • Regional manuals adapt global standards to local requirements.

AISC Steel Construction Manual

The AISC Steel Construction Manual is the premier reference for structural steel design and construction in the U;S., offering comprehensive guidelines and standards since 1927. Essential for engineers and architects.

2.1 Key Features of the AISC Steel Construction Manual

The AISC Steel Construction Manual, now in its 16th edition, is a primary reference for structural steel design and construction in the U.S. It provides comprehensive design information, detailed tables, formulas, and best practices. Key updates in the 14th, 15th, and 16th editions include expanded tables for combined axial load and bending, enhancing design accuracy and structural integrity.

2.2 Applications of the AISC Steel Construction Manual

The AISC Steel Construction Manual is widely applied in designing steel buildings, bridges, and other structures. It aids engineers, architects, and contractors in selecting steel members, calculating loads, and ensuring safety. Its tables and formulas support efficient design synthesis, making it indispensable for modern construction projects requiring precision and compliance with industry standards.

2.3 Troubleshooting and Safety Guidelines

The AISC manual provides troubleshooting guides for common structural issues, such as material defects and load miscalculations, ensuring timely resolutions. It emphasizes safety protocols like proper PPE usage and adherence to construction standards to minimize risks and ensure compliance. By following these guidelines, professionals can prevent accidents and maintain high-quality construction standards, ensuring reliability and durability in steel structures.

Other Steel Construction Manuals

Besides the AISC manual, the Canadian Handbook of Steel Construction and the Indian Stainless Steel Bridge Design Manual provide region-specific guidelines for steel design and application.

3.1 Canadian Handbook of Steel Construction

The Canadian Handbook of Steel Construction is a comprehensive guide published by the Canadian Institute of Steel Construction. It provides detailed design and detailing practices for structural steel in Canada, adhering to Canadian standards and codes. The handbook covers various aspects, including loading, material specifications, and connection details, making it an essential resource for Canadian engineers and architects working with steel structures.

3.2 Indian Stainless Steel Bridge Design Manual

The Indian Stainless Steel Bridge Design Manual, promoted by the Indian Stainless Steel Development Association, emphasizes stainless steel’s durability and corrosion resistance for bridge construction. It provides detailed design guidelines, material specifications, and best practices, aligning with global standards to ensure safety and structural integrity, making it a vital resource for modern bridge infrastructure development in India.

Features and Applications of Steel Manuals

Steel manuals provide comprehensive design guidelines, tables, formulas, and best practices for structural steel applications. They are essential for construction projects, engineering, and education, ensuring accuracy and safety.

4.1 Design and Detailing of Structural Steel

Steel manuals provide detailed guidelines for designing and detailing structural steel components, including beams, columns, and connections. They offer formulas, load calculations, and best practices to ensure safety and compliance with industry standards. These resources are essential for engineers and architects, covering material properties, fabrication methods, and erection procedures. They also include checklists to verify design accuracy and structural integrity.

4.2 Tables, Formulas, and Calculations

Steel manuals contain comprehensive tables, formulas, and calculations essential for structural steel design. These tools enable precise load calculations, beam sizing, and connection design. They include charts for member properties, load tables, and design equations, ensuring accuracy and efficiency. The resources simplify complex engineering tasks, providing quick references for professionals to meet project specifications and safety standards effectively.

Editions and Updates

The AISC Steel Construction Manual has evolved through multiple editions, with the 14th, 15th, and 16th editions introducing updated design standards, expanded tables, and improved formulas.

5.1 14th Edition of the AISC Steel Construction Manual

The 14th Edition of the AISC Steel Construction Manual is a comprehensive guide for structural steel design, featuring 2,432 pages of detailed information. It includes updated tables, formulas, and design standards, replacing the 13th Edition. First published in 1927, this manual remains a cornerstone for engineers and architects, providing essential resources for modern steel construction projects.

5.2 15th and 16th Edition Updates

The 15th and 16th editions of the AISC Steel Construction Manual introduced significant updates, including expanded tables for combined axial load and bending, improved deflection calculations, and enhanced design standards. These updates reflect advancements in structural steel technology and practices, ensuring alignment with current engineering demands and safety protocols, while maintaining the manual’s role as a critical resource for professionals.

Safety and Best Practices

Safety measures ensure compliance with industry standards, preventing accidents. Best practices include proper material handling, regular inspections, and adherence to environmental sustainability, optimizing steel construction efficiency and safety.

6.1 General Safety Guidelines for Steel Construction

General safety guidelines emphasize personal protective equipment (PPE), proper material handling, and equipment maintenance. Regular inspections ensure compliance with standards, while training programs enhance awareness. Proper storage of steel components prevents accidents, and adherence to environmental practices minimizes ecological impact. Following these guidelines ensures a safe and efficient construction process, protecting both workers and the environment.

  • Use appropriate PPE like helmets and gloves.
  • Ensure proper lifting and handling techniques.
  • Regularly inspect equipment and materials.

6.2 Environmental and Sustainability Practices

Environmental practices in steel construction focus on sustainable material use, recycling, and energy efficiency. Stainless steel is highlighted for its durability and resistance, reducing long-term environmental impact. Proper waste management and recycling of steel materials are encouraged. Energy-efficient processes minimize carbon emissions, aligning with global sustainability goals. These practices promote eco-friendly construction while maintaining structural integrity and performance.

  • Optimize material usage to reduce waste.
  • Promote recycling of steel components.
  • Use energy-efficient manufacturing processes.

Product-Specific Steel Manuals

Product-specific steel manuals provide detailed instructions for particular steel products, such as knives and appliances. They cover material properties, maintenance, and usage guidelines, ensuring optimal performance.

  • Real Steel Crusader Knife Manuals: Sandvik steel, Frame Lock mechanism.
  • Appliance manuals (e.g., Miele, Maunfeld): Stainless steel care and operation.

7.1 Real Steel Crusader Knife Manuals

The Real Steel Crusader Knife Manual details the Sandvik 14C28N steel blade and Frame Lock mechanism. It provides maintenance tips, usage guidelines, and safety precautions. Designed for durability, the knife features a lightweight handle and ergonomic design. The manual ensures users understand the knife’s capabilities, proper care, and storage. Ideal for outdoor enthusiasts, it emphasizes functionality and longevity, making it a trusted tool for various applications.

7.2 Appliance Steel Manuals (e.g;, Miele, Maunfeld)

Appliance steel manuals, like those for Miele and Maunfeld, provide detailed instructions for stainless steel products. Miele’s manuals cover models such as the M6160TC EDST/CLST CleanSteel microwave, outlining operation, maintenance, and troubleshooting. Maunfeld’s manuals, like the TRAPEZE 602M, include installation and technical support. These manuals ensure safe and efficient use, highlighting material durability and design features for optimal performance and longevity in kitchen appliances.

Benefits and Challenges

Manual steel guidelines offer standardized practices, ensuring safety and efficiency. Challenges include complexity in updates and adapting to new materials, requiring continuous professional development and adherence to evolving standards.

8.1 Advantages of Using Steel Manuals

Steel manuals provide standardized guidelines, ensuring consistency and compliance with safety protocols. They offer detailed design specifications, formulas, and troubleshooting solutions, enhancing project accuracy. Manuals also promote environmental sustainability and cost efficiency, while their regular updates keep professionals informed about industry advancements and best practices, ultimately improving structural integrity and reliability in construction projects.

8.2 Challenges in Implementing Steel Construction Guidelines

Implementing steel construction guidelines can be complex due to frequent manual updates and evolving industry standards. Design complexities, material variability, and environmental regulations add challenges. Additionally, ensuring compliance with international codes and training professionals to interpret guidelines accurately requires significant effort and resources, potentially delaying project timelines and increasing costs.

Steel manuals are crucial for modern construction, ensuring safety and efficiency. They adapt to emerging trends, promoting sustainable practices and advanced structural steel solutions globally.

9.1 The Role of Steel Manuals in Modern Construction

Steel manuals play a pivotal role in modern construction by providing standardized guidelines for design, safety, and application. They ensure compliance with industry standards, promoting structural integrity and innovation. These manuals are essential for engineers and architects, offering detailed information on materials, techniques, and best practices to meet contemporary building demands efficiently and sustainably.

9.2 Future Trends in Steel Construction Manuals

Future trends in steel construction manuals include enhanced digital integration, AI-driven design tools, and expanded sustainability practices. Updates will reflect evolving industry standards, with a focus on innovative materials like high-strength steel and stainless steel. Manuals will also emphasize green building practices and international code harmonization, ensuring they remain indispensable resources for modern construction professionals.

element tv remote manual

Welcome to the Element TV Remote Manual. This guide provides comprehensive instructions for setting up, operating, and troubleshooting your Element TV remote control effectively.

1.1 Key Features of the Element TV Remote

The Element TV Remote is designed for intuitive control, offering essential features like power, volume, and channel buttons. It supports universal remote codes for seamless compatibility with various devices. The remote includes a user-friendly layout with clear markings, ensuring easy navigation. Key functionalities also include access to special modes such as HDMI and source menu options. Additionally, it allows pairing with external devices like cable boxes and gaming consoles. The remote operates via infrared signals, requiring proper battery installation for optimal performance. Its compact design ensures comfort and portability. By following the manual, users can program and customize the remote to suit their viewing preferences, enhancing their overall TV experience. This ensures efficient control and convenience for all connected devices.

1.2 Importance of the Remote Control Manual

The Element TV Remote Manual is essential for understanding your remote’s capabilities and troubleshooting issues. It provides detailed instructions for setting up, programming, and maintaining your remote control. With this guide, you can learn how to pair the remote with your TV and other devices, ensuring seamless operation. The manual also covers basic operations like power, volume, and channel controls, as well as advanced features such as accessing HDMI and source menus. It offers maintenance tips, such as replacing batteries and cleaning the remote, to extend its lifespan. By following the manual, users can resolve common problems and make the most of their TV experience. This resource is invaluable for both new and experienced users, ensuring smooth and efficient operation of their Element TV remote control.

How to Use the Element TV Remote Control

Start by inserting batteries, ensuring correct polarity. Point the remote at the TV and test basic functions like power, volume, and channel buttons for proper operation.

2.1 Basic Operations: Power, Volume, and Channel Buttons

The Element TV remote allows seamless control of your television. Press the Power button to turn the TV on or off. Adjust the volume using the Volume Up/Down buttons for optimal sound. Navigate channels effortlessly with the Channel Up/Down buttons. Ensure the remote is pointed directly at the TV, typically within 1.5 to 1.8 meters, for reliable operation. Proper battery installation is crucial for these functions to work correctly. Regularly test these buttons to ensure they are functioning as intended. Troubleshoot by replacing batteries if issues arise. These basic operations form the foundation of your viewing experience, ensuring smooth and efficient TV control.

2.2 Navigating the TV Menu with the Remote

To navigate the TV menu, press the MENU button on the remote. Use the UP and DOWN arrow buttons to scroll through options and the OK button to select. Access settings like picture, sound, or channel options by highlighting and confirming your choices. Use the BACK or EXIT buttons to return to the previous screen or exit the menu. Ensure the remote is within the recommended range for reliable signal transmission. Refer to the manual for detailed instructions on specific menu features and customization options. Proper navigation ensures optimal TV performance and personalization of your viewing experience. Always point the remote directly at the TV sensor for consistent control.

Programming the Element TV Remote

Programming the Element TV remote involves using universal codes or Bluetooth pairing. Find specific codes online or in the manual. Enter codes step-by-step, ensuring correct sequence for successful pairing. Use fresh batteries and follow manual instructions carefully; Test all buttons post-programming to confirm functionality. If issues arise, try alternative codes or reprogram as needed. Ensure TV and remote are compatible for optimal performance. Refer to the manual for detailed guidance on both code entry and Bluetooth pairing methods to achieve seamless control. Proper programming enhances your viewing experience by enabling full control over TV functions.

3.1 Universal Remote Codes for Element TV

Universal remote codes for Element TVs are essential for programming your remote control. These codes, typically 4-digit sequences, enable your remote to communicate with the TV. Common codes include 1234, 1357, and 4321, but exact codes vary by model. Refer to your TV’s manual or online databases for specific codes. Enter the code using the remote’s number pad, ensuring the TV is in pairing mode. Test the remote’s functionality post-entry. If the code fails, try alternative codes or reprogram the remote. For compatibility, ensure the remote supports your TV’s brand and model. Proper code entry ensures seamless control over TV functions, enhancing your viewing experience. Always verify codes from reliable sources to avoid errors.

3.2 Step-by-Step Guide to Pairing the Remote

To pair your Element TV remote, start by inserting the batteries correctly, ensuring the polarities match the compartment markings. Point the remote at the TV’s sensor, typically located on the front panel. Press and hold the POWER or SETUP button until the LED light blinks. Release the button and enter the universal remote code for your Element TV. Once paired, test the remote by adjusting the volume or changing channels. If pairing fails, repeat the process with a different code or reset the remote. Ensure the remote is within 1.5 to 1.8 meters of the TV for optimal signal reception. Proper pairing ensures smooth control over all TV functions. Always refer to the manual for specific instructions tailored to your TV model.

Troubleshooting Common Remote Control Issues

If the remote isn’t working, replace batteries with correct polarity, ensure it’s within range, and verify codes. Clean sensors and avoid signal blockages for optimal performance.

4.1 What to Do If the Remote Is Not Working

If your Element TV remote stops working, start by checking the batteries. Ensure they are installed correctly with matching polarity. Replace them if necessary. Next, verify the remote is within the operating range (1.5–1.8 meters from the TV). Check for obstructions between the remote and the TV sensor. Clean the remote’s infrared sensor and the TV’s sensor with a soft cloth. If issues persist, restart the TV and ensure it is turned on. For Bluetooth remotes, re-pair the remote with the TV. If none of these steps work, reset the remote by removing batteries for 30 seconds or consult the user manual for further troubleshooting options.

4.2 Replacing Batteries and Maintaining the Remote

To ensure optimal performance, replace the remote’s batteries when they weaken. Open the battery compartment, located on the back, and insert new batteries matching the polarity signs. Avoid mixing old and new batteries to prevent power issues. Regularly clean the remote’s sensors with a soft cloth to maintain signal strength. Store the remote in a dry place to avoid moisture damage. For long-term maintenance, remove batteries if the remote will not be used for an extended period to prevent leakage. Refer to the manual for specific battery type recommendations and additional care tips to prolong the remote’s functionality and ensure reliable operation.

Additional Features of the Element TV Remote

The Element TV remote offers advanced features like HDMI selection, source menu access, and control for external devices, enhancing your viewing experience with convenience and functionality.

5.1 Using the Remote for External Devices

The Element TV remote can control external devices like Blu-ray players, gaming consoles, and soundbars connected via HDMI. To use this feature, ensure devices are connected to the TV’s HDMI ports. Press the SOURCE button on the remote to select the desired input. Use the remote’s navigation buttons to adjust settings or playback. For compatible devices, the remote can also control power, volume, and playback functions. This feature streamlines control, reducing the need for multiple remotes. Ensure your TV and devices support HDMI-CEC for seamless operation. Refer to the manual for specific instructions on setting up and troubleshooting external device control;

5.2 Accessing Special Functions (e.g., HDMI, Source Menu)

To access special functions like HDMI and Source Menu, press the SOURCE button on the remote. This displays available input sources connected via HDMI. Use the arrow buttons to select the desired input. For HDMI-specific functions, such as switching between devices, ensure your devices are properly connected to the TV’s HDMI ports. The remote allows seamless navigation between connected devices. If issues arise, check HDMI connections or restart the TV. This feature enhances multitasking and provides easy access to all connected devices, ensuring a smooth viewing experience. Refer to the manual for detailed troubleshooting steps if HDMI functions are not responding as expected.

How to Download and Access the Element TV Remote Manual

Visit the official Element Electronics website or trusted platforms like Manualslib.com to download the PDF manual. Search for your model and follow the download instructions provided online.

6.1 Finding the PDF Version of the Manual Online

To find the PDF version of the Element TV Remote Manual, visit the official Element Electronics website or trusted platforms like Manualslib.com. Use the search bar to type “Element TV Remote Manual” along with your specific model number for accurate results. Browse through the search results and select the correct PDF file corresponding to your TV model. Ensure the source is reliable to avoid downloading incorrect or malicious files. Once found, click the “Download” button to save the manual to your device. This PDF version allows easy access to instructions, troubleshooting guides, and remote control setup details. Always verify the file size and publisher before downloading to ensure authenticity and safety.

6.2 Using Online Resources for Remote Control Setup

Online resources provide convenient access to Element TV Remote Control setup guides and troubleshooting tips. Visit the official Element Electronics support page or trusted websites like Manualslib.com for detailed instructions. Use specific search terms like “Element TV remote setup” or “Element TV universal remote codes” to find relevant guides. Many online forums and tech support communities offer step-by-step tutorials and FAQs to address common issues. Additionally, platforms like YouTube host video guides that visually demonstrate remote pairing and programming processes. Utilize these resources to resolve setup challenges, access universal codes, and optimize your remote’s functionality. Online support ensures quick and effective solutions for your Element TV remote setup needs.

weber spirit e 210 manual

Product Overview

The Weber Spirit E-210 is a gas grill featuring the GS4 grilling system, two stainless steel burners, and a primary cooking area of 450 square inches․ It includes a warming rack, supports direct and indirect grilling, and comes with a 10-year warranty on key components․ The grill is designed for durability and ease of use, making it a versatile option for outdoor cooking enthusiasts․

1․1 Key Features of the Weber Spirit E-210

The Weber Spirit E-210 features the advanced GS4 grilling system, including two stainless steel burners, Flavorizer bars, and a grease management system․ It offers 26,500 BTU per hour, a 450-square-inch primary cooking area, and a 90-square-inch warming rack for efficient cooking․ The grill is built with durable materials and includes a 10-year warranty․

1․2 Design and Dimensions

The Weber Spirit E-210 has a compact design with dimensions of 32․5 inches in height, 50․5 inches in width, and 24․5 inches in depth․ Its durable construction includes a porcelain-enameled lid and steel frame, ensuring both style and longevity for outdoor use․ The grill weighs approximately 100 pounds, making it sturdy yet maneuverable․

1․3 Color Options and Warranty Information

The Weber Spirit E-210 is available in classic colors such as black and gray, offering a sleek appearance․ It comes with a 10-year warranty on key components like burners and porcelain-enameled parts, ensuring long-term durability and customer satisfaction․ This warranty underscores Weber’s commitment to quality and reliability․

Safety Precautions

Always follow safety guidelines to avoid accidents․ If you smell gas, turn off the supply immediately and avoid igniting flames․ Read the manual thoroughly before use and keep flammable liquids away․ Ensure the grill is placed on a stable, heat-resistant surface․

2․1 General Safety Guidelines

Always follow safety precautions to prevent accidents․ If you smell gas, immediately turn off the supply and avoid open flames․ Keep flammable liquids and vapors away from the grill․ Ensure the grill is placed on a stable, heat-resistant surface and maintain a safe distance from combustible materials․

2․2 Gas Safety Tips

  • Always turn off the gas supply when the grill is not in use․
  • Check for gas leaks regularly by applying soapy water to connections․
  • Never store flammable liquids or vapors near the grill․
  • Ensure the grill is placed in a well-ventilated area to prevent gas buildup․
  • Follow proper lighting procedures to avoid accidental ignition․

2․3 Emergency Procedures

In case of an emergency, immediately shut off the gas supply and do not operate any electrical switches․ Evacuate the area and contact a professional or local fire department․ Never attempt to extinguish a gas fire yourself․ Always prioritize safety and follow proper shutdown procedures․

Assembly and Installation

Assembly requires basic tools like a screwdriver and wrench․ Follow the manual instructions carefully to ensure proper installation․ Allow about 1-2 hours for complete setup․ Ensure all parts are securely tightened for safety and functionality․

3․1 Tools and Parts Required

Assembly of the Weber Spirit E-210 requires screwdrivers, wrenches, and Allen keys․ Essential parts include burners, grates, hardware, and instructional guides․ Ensure all components are included before starting for a smooth setup experience․

3․2 Step-by-Step Assembly Instructions

Begin by unpacking all components and organizing hardware․ Attach the legs to the grill base, then install the burners and heat deflectors․ Connect the gas line securely and ensure proper alignment of the cooking grates․ Refer to the manual for detailed visuals and tightening specifications․ Test ignition before first use․

3․3 Installation Requirements

Ensure the grill is placed on a stable, well-ventilated surface away from flammable materials․ Properly connect the gas line, following local regulations․ Ensure the grill is level and securely positioned․ Refer to the manual for specific installation guidelines to ensure safe and optimal performance․ Ventilation is crucial for safety․

Ignition and Operation

The Weber Spirit E-210 features an electronic ignition system for easy startup․ The burner controls offer precise heat adjustment, ensuring consistent cooking results․ Always preheat the grill before use for optimal performance․

4․1 Ignition System Overview

The Weber Spirit E-210 is equipped with a reliable electronic ignition system, ensuring a quick and consistent start every time․ Simply turn the burner knob and press the igniter button to light the burners․ This system is designed for safety and efficiency, preventing gas leaks and ensuring proper burner lighting․ Proper maintenance of the ignition components is essential for continued performance․

4․2 Operating the Grill: Basic Controls

The Weber Spirit E-210 features intuitive controls, including burner knobs that regulate gas flow and ignition․ The temperature gauge helps monitor heat levels, while the heat deflector ensures even distribution․ Simply preheat, adjust burners, and use the lid to control cooking conditions for optimal grilling results every time․

4․3 Troubleshooting Ignition Issues

For ignition problems, ensure the gas supply is on and the tank is not empty․ Check for blockages in burner ports or debris in the ignition system․ Clean the burner ports and retry ignition․ If issues persist, consult the manual or contact Weber support for assistance․

Cooking Techniques

Master grilling with preheating, direct and indirect methods, and even heat distribution․ Achieve perfect sears and consistent cooking by adjusting burners and using the warming rack effectively․

5․1 Preheating and Temperature Control

Preheat the Weber Spirit E-210 by turning all burners to high for 10-15 minutes․ Use the built-in thermometer to monitor temperature․ For even heat, ensure the lid is closed during preheating․ Adjust burners to maintain consistent temperatures for optimal grilling results and food safety․

5․2 Direct vs․ Indirect Grilling

Direct grilling places food over active burners for searing, while indirect grilling uses heat from closed burners․ For indirect, turn off one burner to create a cooler zone․ This method prevents burning and is ideal for slower cooking of larger or delicate foods on the Weber Spirit E-210․

5․3 Tips for Achieving Even Heat Distribution

To ensure even heat distribution on the Weber Spirit E-210, always preheat the grill for 10-15 minutes․ Use the burner controls to adjust heat zones, and consider placing a heat deflector for indirect cooking․ Clean grates regularly and rotate food for consistent cooking results․

Maintenance and Cleaning

Regularly clean the grates with a wire brush and wipe down surfaces with a damp cloth․ Check burner ports for blockages and store the grill in a dry, protected area during off-season․

6․1 Routine Cleaning and Lubrication

For the Weber Spirit E-210, clean grates with a wire brush before and after use․ Wipe down surfaces with a damp cloth and lubricate grates with food-grade oil to prevent rust․ Regularly inspect and clean burner ports to ensure proper gas flow and performance․

6․2 Deep Cleaning and Rust Prevention

Perform deep cleaning by removing grates and heat deflectors, then scrub the firebox with a stiff brush and mild detergent․ Apply rust-inhibiting oil to metal parts annually․ Replace any rusty components to maintain grill performance and longevity․

6․3 Seasonal Maintenance Tips

Inspect the grill after winter storage for damage or rust․ Clean burners and vents to ensure proper gas flow․ Protect the grill with a cover during off-seasons․ At the end of grilling season, clean thoroughly, removing grease and food residue․ Store propane tanks securely and apply rust-inhibiting oil to metal parts․

Troubleshooting Common Issues

Address ignition problems by cleaning burner ports and ensuring proper gas flow․ Check for blockages in vents or hoses․ If issues persist, refer to the manual for detailed solutions or contact Weber support․

7․1 Common Problems and Solutions

Common issues include low flame, uneven heating, and ignition failures․ Clean burner ports for low flames and check gas line connections․ For uneven heating, ensure proper preheating and adjust vents․ Consult the manual or Weber support for persistent problems to maintain optimal performance and safety․

7․2 Gas Flow and Burner Issues

Common gas flow issues include clogged burner ports and improper gas pressure․ Clean burner ports with a wire brush and ensure the regulator is correctly set․ Always check for gas leaks and verify connections are secure to maintain safe and efficient burner performance․

7․3 Heat Retention and Performance Problems

Heat retention issues may arise from worn-out gaskets or improper lid alignment․ Ensure all connections are tight and preheat the grill correctly․ Cleaning burner ports regularly can improve airflow and maintain consistent heat distribution for optimal grilling performance․

Accessories and Upgrades

Enhance your grilling experience with Weber’s range of accessories, including grilling tools, cooking surfaces, and grill covers․ Upgrades like replacement grates or burners can also improve performance and longevity․

8․1 Recommended Accessories for the Weber Spirit E-210

Recommended accessories include grilling tools, cooking surfaces, and grill covers to enhance your grilling experience․ Optional upgrades like replacement grates, brushes, and cutting boards are also available, ensuring compatibility and optimal performance for your Weber Spirit E-210 grill․

8․2 Upgrading Grill Parts

Upgrading parts like stainless steel burners, grates, or ignition systems can enhance performance․ Consider replacing worn components with genuine Weber parts or compatible upgrades to maintain efficiency and extend the grill’s lifespan․ Always follow the manual for proper installation guidance․

8․3 Compatible Cooking Surfaces and Tools

The Weber Spirit E-210 supports various cooking surfaces, including griddles, pizza stones, and cast-iron mats․ Compatible tools like tongs, spatulas, and grill brushes enhance your grilling experience․ Optional accessories, such as rotisserie kits, can expand cooking capabilities․ Always ensure compatibility with your grill model for optimal performance․

Warranty and Support

The Weber Spirit E-210 includes a 10-year warranty on key components like burners and grates․ Weber provides customer support through their website and dedicated service team for assistance․

9․1 Warranty Terms and Conditions

The Weber Spirit E-210 offers a 10-year warranty on burners and grates, 5-year on flavorizer bars, and 2-year on other parts․ Warranty coverage excludes normal wear and tear and requires proper registration and maintenance․

9․2 Contacting Weber Support

For assistance, visit Weber’s official website to access support resources, email, or call their customer service team․ Support is available for troubleshooting, warranty claims, and general inquiries about your Weber Spirit E-210 grill․

9․3 Online Resources and Manuals

Weber offers comprehensive online resources, including PDF manuals for the Spirit E-210, such as the owners guide, installation guide, and troubleshooting guide․ These documents are available on Weber’s official website, providing detailed instructions and support for optimal grill performance and maintenance․

Technical Specifications

The Weber Spirit E-210 features a 450-square-inch primary cooking surface, 26,500 BTU burners, weighs 114 pounds, and measures 32 x 50 x 63 inches, ensuring efficient grilling performance․

10․1 Grill Dimensions and Weight

The Weber Spirit E-210 measures 32 x 50 x 63 inches and weighs 114 pounds․ Its primary cooking surface is 52×45 cm, with a warming rack of 52×12 cm, offering ample space for grilling and food preparation․

10․2 Burner Power and Cooking Surface

The Weber Spirit E-210 features two stainless steel burners with a combined power of 7700 W․ The primary cooking surface measures 52×45 cm, complemented by a 52×12 cm warming rack for efficient grilling and food preparation․

10․3 Fuel Options and Compatibility

The Weber Spirit E-210 is compatible with both LP (liquefied petroleum) gas and natural gas, offering flexibility for different fuel preferences․ The grill is optimized for efficient fuel consumption, ensuring consistent performance while minimizing energy waste․ Always use the fuel type specified for your model to ensure safety and optimal functionality․

User Reviews and Feedback

The Weber Spirit E-210 has an average rating of 8․7 from users, praised for its performance and durability․ The 10-year warranty is a highlight․ Some find assembly challenging and note it’s pricey; Experienced users recommend proper preheating and using a meat thermometer for best results․

11․1 Average Ratings and Common Praise

The Weber Spirit E-210 has an average rating of 8․7, with users praising its performance, durability, and 10-year warranty․ The GS4 grilling system and even heat distribution are frequently highlighted as standout features, making it a reliable choice for outdoor cooking enthusiasts․

11․2 Frequently Mentioned Drawbacks

Some users note that the Weber Spirit E-210 has a complex assembly process and a higher price point compared to similar grills․ Additionally, the compact cooking space may limit capacity for larger gatherings, though this is balanced by its efficient design and performance․

11․3 Tips from Experienced Users

Experienced users recommend preheating the grill for at least 10-15 minutes to ensure even heat distribution․ They also suggest using both burners for indirect cooking and regularly cleaning the grates to maintain optimal performance and flavor․ These tips enhance the overall grilling experience․

Environmental and Energy Efficiency

The Weber Spirit E-210 features energy-efficient burners and a durable design that minimizes waste․ Proper disposal of old parts and regular maintenance help reduce environmental impact and promote sustainability․

12․1 Energy Consumption and Efficiency

The Weber Spirit E-210 operates at 7,700 watts, ensuring efficient energy use while maintaining consistent heat․ Its GS4 grilling system optimizes burner performance, reducing fuel consumption․ The grill’s design minimizes heat loss, enhancing energy efficiency and providing reliable cooking results while balancing performance with eco-friendly operation․

12․2 Eco-Friendly Features

The Weber Spirit E-210 incorporates eco-friendly features like fuel-efficient burners and a heat-retentive design, minimizing gas consumption․ Durable materials reduce waste, and proper disposal options for old parts promote sustainability․ Its energy-efficient performance aligns with environmentally responsible outdoor cooking practices․

12․3 Proper Disposal of Old Parts

Proper disposal of old Weber Spirit E-210 parts involves recycling metal components and safely handling hazardous materials like propane tanks․ Users should consult local recycling programs for guidance․ Donate or responsibly discard non-recyclable items, ensuring environmental safety and compliance with community regulations․

golden companion scooter manual

Golden Companion Scooter Manual: A Comprehensive Guide

The Golden Companion Scooter manual provides essential guidelines for optimal use, featuring detailed instructions, troubleshooting tips, and safety precautions to enhance your mobility experience.

The Golden Companion Scooter is a reliable mobility aid designed to enhance independence and comfort for users. Built for portability and ease of use, it offers a practical solution for daily errands, travel, and outdoor activities. With its durable construction and user-friendly features, the scooter is ideal for individuals seeking freedom and convenience. The companion scooter is available in various models, each tailored to specific needs, ensuring a personalized experience. This guide provides a detailed overview, helping users understand its operation, maintenance, and safety guidelines to maximize their mobility and enjoyment.

Key Features and Benefits of the Golden Companion Scooter

The Golden Companion Scooter is designed for comfort and versatility, offering a weight capacity of up to 300 lbs and a top speed of 4.5 mph. It features a durable frame, adjustable tiller, and a comfortable seat for extended use. The scooter is portable, with easy disassembly for transportation, and includes a digital dashboard for easy controls. Its three-wheel design provides stability, while the anti-tip wheels ensure safety on various terrains. Accessories like baskets and canopies enhance functionality, making it a practical choice for daily use and travel, tailored to meet the needs of users seeking reliable mobility assistance.

Overview of the Golden Companion Scooter Manual

The Golden Companion Scooter manual serves as the primary resource for understanding and maintaining your scooter. It covers essential topics such as assembly, operation, maintenance, and troubleshooting. The manual emphasizes safety precautions and proper usage to ensure longevity and reliability. Detailed diagrams and step-by-step instructions guide users through routine tasks and repairs. Available for free online, the manual is categorized under mobility scooters and has received positive ratings for clarity and helpfulness. Reading the manual thoroughly is crucial for optimizing performance and addressing common issues effectively, making it an indispensable guide for all Golden Companion scooter owners.

Troubleshooting and Maintenance

The manual provides detailed troubleshooting guides and maintenance tips to address common issues, ensuring optimal performance and extending the scooter’s lifespan for reliable daily use.

Common Issues and Solutions for the Golden Companion Scooter

Common issues with the Golden Companion Scooter include battery life problems, scooter not turning on, or difficulty steering. For battery issues, ensure it is fully charged and connections are secure. If the scooter won’t start, check the power button, circuit breaker, and battery level. Steering problems may require adjusting the tiller or lubricating joints. Refer to the manual for troubleshooting steps or contact a service center for assistance. Regular maintenance, like cleaning and inspecting components, can prevent many of these issues, ensuring smooth operation and extending the scooter’s lifespan.

Step-by-Step Guide to Diagnosing Problems

To diagnose issues with your Golden Companion Scooter, start by checking the power source. Ensure the battery is fully charged and connections are secure. If the scooter won’t turn on, inspect the circuit breaker and reset it if necessary. For mobility issues, examine the wheels and tires for blockages or wear. Check the tiller alignment and joystick calibration for proper steering. Review the manual for specific troubleshooting steps or perform a system reset. If problems persist, contact a certified service center for professional assistance. Regular diagnostics help maintain optimal performance and extend the scooter’s lifespan. Always refer to the manual for detailed guidance.

Accessories and Upgrades

Explore a variety of accessories for the Golden Companion Scooter, including docking devices, holders, and bags, to enhance functionality and convenience. Refer to the manual for installation guidance and compatibility.

Available Accessories for the Golden Companion Scooter

The Golden Companion Scooter offers a wide range of accessories to enhance your mobility experience. These include docking devices for easy vehicle loading, holders for canes or bags, and protective covers. Additionally, USB-mounted accessories and convenience bags are available to customize your scooter. The informational DVD provided with your scooter highlights these features, ensuring you can maximize its functionality. For more details, refer to the manual or contact a Golden Technologies representative to explore compatible upgrades tailored to your needs.

How to Install and Use Accessories

Installing and using accessories for your Golden Companion Scooter is straightforward. Begin by securing attachments like docking devices or holders to the scooter’s frame, ensuring they are tightly fastened; For electronic accessories, refer to the manual for wiring instructions to avoid damage. Test the stability of any added features before use. Adjustable accessories, such as USB mounts, can be positioned for convenience. Always follow the manufacturer’s guidelines to ensure safety and optimal performance. Proper installation enhances both functionality and comfort, allowing you to customize your scooter to meet your daily mobility needs effectively.

Transportation and Storage

The Golden Companion Scooter can be transported using mechanical lifts or hoists with docking devices. Store it in a dry, protected area to maintain its condition and functionality.

How to Transport the Golden Companion Scooter

Transporting the Golden Companion Scooter is made easy with its portability and available accessories. Many models come equipped with docking devices, allowing seamless loading onto vehicles using mechanical lifts or hoists. This feature ensures secure and efficient transportation without damaging the scooter. For added convenience, users can fold or disassemble certain models, making them compact for storage in car trunks or other spaces. Always follow the manual’s specific instructions for your scooter model to ensure safe and proper transportation methods. This will help maintain the scooter’s performance and longevity, ensuring it remains a reliable mobility aid for years to come.

Proper Storage Techniques for the Scooter

Proper storage is essential to maintain the Golden Companion Scooter’s condition and performance. Always clean the scooter before storing it to prevent dirt buildup. Use the original shipping carton or a protective cover to shield it from dust and moisture. Store the scooter in a dry, cool place, avoiding extreme temperatures. Ensure the battery is fully charged or disconnected to prevent drain. For extended storage, refer to the manual for specific instructions. Following these steps will help preserve the scooter’s functionality and ensure it remains ready for use when needed, maximizing its lifespan and reliability.

Safety Precautions and Guidelines

Adhering to the Golden Companion Scooter manual’s safety guidelines is crucial for safe operation. Always wear a helmet, follow traffic rules, and avoid uneven surfaces or obstacles. Ensure proper usage to minimize risks and maintain stability. Manufacturer warnings and precautions must be followed strictly to guarantee rider safety and optimal performance.

Essential Safety Tips for Operating the Scooter

Always wear a helmet and ensure the scooter is properly assembled before use. Follow local traffic laws, and avoid operating in extreme weather conditions. Conduct regular inspections of brakes, tires, and electrical components to ensure optimal performance. Keep loose clothing tied back and avoid distractions while driving. Maintain a safe distance from pedestrians and vehicles. Use the scooter on flat, stable surfaces to prevent tipping. Never exceed the recommended weight capacity or modify the scooter without manufacturer approval. Refer to the manual for specific guidelines tailored to your Golden Companion model to ensure safe and enjoyable operation.

Warning Labels and Precautions in the Manual

The Golden Companion scooter manual emphasizes critical safety precautions to avoid accidents. Users are warned against operating the scooter in extreme weather or uneven terrain. Loose clothing or long hair may pose hazards, requiring secure tying back. The manual explicitly states that Golden Technologies is not liable for damages caused by improper use or modifications. It also cautions against exceeding the scooter’s weight capacity and advises against operating the scooter while intoxicated or impaired. Adherence to these warnings is crucial to ensure safe and reliable operation of the Golden Companion scooter, as outlined in the troubleshooting and maintenance sections.

Golden Companion Scooter Models

The Golden Companion scooter is available in models I, II, and III, each offering distinct features tailored to meet different mobility needs and preferences effectively.

Differences Between Golden Companion I, II, and III Models

The Golden Companion scooter models I, II, and III cater to varying mobility needs. The Companion I is designed for essential mobility, offering simplicity and reliability. The Companion II introduces enhanced features like improved maneuverability and comfort. The Companion III boasts advanced upgrades, including a sporty design, upgraded comfort, and additional accessories. Each model builds on the previous one, ensuring users can choose the scooter that best fits their lifestyle and requirements. These distinctions make the Golden Companion series versatile for different user preferences and mobility challenges.

Model-Specific Instructions and Features

Each Golden Companion model offers unique features tailored to user needs. The Companion I provides essential mobility with a focus on simplicity, while the Companion II includes a tiller-mounted USB port and digital dashboard for convenience. The Companion III features a sporty design with enhanced comfort and upgraded accessories. Model-specific instructions in the manual ensure users understand their scooter’s capabilities, such as adjustable settings and accessory compatibility. These features enhance usability and customization, making each model suitable for different lifestyles and preferences. Always consult the manual for detailed guidance on your specific scooter’s operation and maintenance.

Repair and Service

The Golden Companion scooter repair manual highlights troubleshooting techniques, maintenance tips, and warranty details. Service centers provide expert assistance, ensuring your scooter remains in optimal condition.

Golden Companion Scooter Repair Manual Highlights

The Golden Companion scooter repair manual offers a detailed guide for troubleshooting and maintaining your scooter. It includes diagnostic steps, repair procedures, and maintenance tips to ensure optimal performance. The manual emphasizes safety precautions and proper usage to prevent damage. With comprehensive coverage of electrical and mechanical components, it serves as a valuable resource for both users and technicians. Golden Technologies provides clear instructions to address common issues, ensuring your scooter remains reliable. The manual is available online, offering convenient access to prolong the longevity and functionality of your Golden Companion scooter.

Service Centers and Warranty Information

Golden Technologies provides extensive support through authorized service centers nationwide. The warranty covers parts and labor for defects in materials and workmanship. For repairs, contact Golden Technologies or visit their website to locate a certified service center near you. Ensure all maintenance and repairs are performed by authorized technicians to maintain warranty validity. The manual emphasizes adhering to recommended services to uphold your scooter’s performance and longevity. Golden Technologies’ customer service team is available to assist with warranty claims and service inquiries, ensuring your mobility needs are met with reliability and care.

The Golden Companion Scooter manual ensures optimal performance, safety, and longevity. By following its guidelines, users can maximize mobility and independence, enhancing their daily lives effortlessly.

Importance of Following the Manual for Optimal Use

Adhering to the Golden Companion Scooter manual ensures optimal performance, safety, and longevity. It provides clear guidelines for operation, maintenance, and troubleshooting, helping users avoid potential issues. By following the manual, users can maximize their scooter’s functionality, ensuring reliability and durability. Proper usage as outlined enhances mobility and independence, while ignoring manual instructions may lead to damage or unsafe conditions. Regular maintenance and safety checks, as recommended, are crucial for prolonged use. The manual serves as a comprehensive resource, empowering users to make the most of their Golden Companion Scooter experience with confidence and ease.

smart watch manual

Setting Up Your Smartwatch

Charge your smartwatch fully before starting. Download and install the companion app on your smartphone‚ then pair the devices via Bluetooth. Follow on-screen instructions to complete setup.

1.1 Initial Charging and Preparation

Locate the charging cable and connect it to the designated port on your smartwatch. Plug the other end into a power source and allow it to charge fully. Ensure the battery is at 100% before proceeding. While charging‚ familiarize yourself with the device’s design‚ including buttons and sensors. If required‚ insert a SIM card or activate features like Caller ID. Once charged‚ turn on the smartwatch and prepare for setup by ensuring all components are securely in place and the screen is responsive. This ensures a smooth initial setup process.

1.2 Downloading and Installing the Companion App

Open the App Store (for iOS) or Google Play Store (for Android) on your smartphone. Search for the official companion app for your smartwatch‚ such as Android Wear or the Apple Watch app. Select the app from the search results and tap “Get” or “Install” to begin downloading. Once installed‚ launch the app and create an account if required. Grant necessary permissions to ensure proper functionality. Follow the in-app instructions to prepare your smartphone for pairing with the smartwatch. This step is crucial for syncing data and enabling features.

1.3 Pairing the Smartwatch with Your Smartphone

Enable Bluetooth on your smartphone and ensure both devices are in close proximity. Open the companion app and select the option to pair a new device. Your smartphone will search for nearby devices‚ and your smartwatch will appear in the list. Select the smartwatch from the list to initiate pairing. Follow any additional on-screen instructions‚ such as confirming a pairing code or granting permissions. Once connected‚ the app will confirm the successful pairing‚ and your devices will be ready to sync data and functions.

Navigating the Smartwatch Interface

Familiarize yourself with the smartwatch interface by exploring its design and controls. Use swipe gestures to navigate screens‚ and the side button or crown to access menus. Voice commands enable quick actions and app launches‚ streamlining your experience.

2.1 Familiarizing Yourself with the Design and Controls

Examine your smartwatch’s design‚ noting the placement of buttons‚ sensors‚ and the screen type. The side button or digital crown typically accesses menus. A touchscreen allows swipes for navigation‚ while physical buttons provide quick access to features. Familiarize yourself with the charging port and speaker locations. Customize the watch face to suit your style. Explore the app layout and settings menu to understand functionality. Adjust wrist fit for comfort and sensor accuracy. Discover how to activate voice commands or wake the screen with a gesture or tap.

2.2 Basic Navigation Gestures and Commands

Master essential gestures to navigate your smartwatch. Swipe left or right to switch between screens‚ and swipe up or down to scroll through lists. Tap to select options or open apps. Use the back button or swipe back to return to the previous screen. Rotate the digital crown to scroll or zoom. Double-tap the screen to wake it or access shortcuts. For devices with a physical button‚ press once to go home‚ twice for recent apps‚ or hold for voice assistant. Familiarize yourself with these gestures for seamless navigation.

Customizing Your Smartwatch

Personalize your smartwatch by changing watch faces‚ themes‚ and adding widgets. Adjust settings to match your style and preferences for a tailored experience.

3.1 Changing Watch Faces and Themes

To personalize your smartwatch‚ open the companion app and browse the watch face gallery. Select a design‚ customize colors or widgets if available‚ and sync it to your device. Some watches allow theme changes in settings‚ matching your style seamlessly. Regularly check the app store for new designs to keep your smartwatch looking fresh and unique.

3.2 Managing and Downloading Apps

Access the app store through the companion app on your smartphone. Browse categories or search for specific apps compatible with your smartwatch. Select and download apps‚ then sync them to your device. Manage installed apps via the watch settings or the companion app. Enable notifications for apps you want to receive alerts from. Regularly update apps to ensure optimal performance and security. Uninstall unused apps to free up storage space and enhance your smartwatch experience.

Using Key Features of Your Smartwatch

  • Use GPS for navigation and tracking workouts.
  • Control music playback directly from your wrist.
  • Enable mobile payments for convenient transactions.

4.1 Health and Fitness Tracking

Your smartwatch offers comprehensive health and fitness features. Track daily steps‚ calories burned‚ and distance traveled using the built-in pedometer. Monitor heart rate continuously or on-demand. Enable exercise tracking for workouts‚ with options for walking‚ running‚ cycling‚ and more. Set fitness goals and receive alerts when milestones are reached. The companion app stores workout data‚ allowing you to view progress over time. Additionally‚ some models support advanced metrics like sleep quality and stress levels‚ providing a holistic view of your well-being.

4.2 Receiving and Managing Notifications

Your smartwatch allows you to receive notifications from your smartphone. Enable notification alerts in the companion app to stay updated on messages‚ emails‚ and app alerts. Customize settings to filter out unwanted notifications. When a notification appears‚ tap to view details or swipe to dismiss. For messages‚ some models offer quick reply options directly from the watch. Use the app to manage notification preferences‚ ensuring only important alerts appear. This feature keeps you connected without needing to check your phone constantly.

4.3 Using Additional Features (GPS‚ Music Control‚ etc.)

Explore advanced features like GPS for tracking workouts or navigation. Enable GPS in the app to monitor your runs or hikes accurately. For music control‚ pair your watch with Bluetooth headphones or speakers to play and pause tracks. Some models allow storing playlists directly on the watch. Additional features may include voice assistants‚ mobile payments‚ or heart rate monitoring. Access these by swiping through menus or using customizable shortcuts. Ensure your watch is connected to your smartphone for seamless functionality across all features.

Troubleshooting Common Issues

Resolve connectivity problems by restarting your smartwatch and smartphone. Address battery concerns by adjusting settings or clearing cached data. Ensure software is up-to-date for optimal performance.

5.1 Resolving Connectivity Problems

If your smartwatch disconnects‚ restart both devices. Ensure Bluetooth is enabled and your smartphone is compatible. Reset settings or reinstall the companion app if issues persist. Check for software updates.

5.2 Addressing Battery Life Concerns

To improve battery life‚ disable unnecessary features like GPS and Bluetooth when not in use. Lower screen brightness and enable power-saving mode. Close unused apps running in the background. Ensure your smartwatch software is up to date‚ as updates often optimize performance. Avoid overcharging‚ as it can degrade the battery over time. If issues persist‚ reset the device or contact customer support for further assistance.

Maintaining Your Smartwatch

Regularly clean the screen and band with a soft cloth. Update software for optimal performance. Store the device in a cool‚ dry place to preserve battery health.

6.1 Cleaning and Caring for the Device

To maintain your smartwatch‚ gently clean the screen with a soft‚ dry cloth. Avoid harsh chemicals or abrasive materials that may damage the display. For tougher smudges‚ lightly dampen the cloth with water‚ but ensure it’s not soaking wet. Regularly clean the band‚ especially after workouts‚ using mild soap and water. Avoid exposing the device to extreme temperatures or direct sunlight for extended periods. Store your smartwatch in a cool‚ dry place when not in use. This will help preserve its functionality and extend its lifespan.

6.2 Updating Software and Firmware

To keep your smartwatch functioning optimally‚ regular software and firmware updates are essential. Connect your smartwatch to Wi-Fi or pair it with your smartphone. Open the companion app‚ navigate to the settings or update section‚ and check for available updates. Ensure your smartwatch is sufficiently charged (ideally above 50%) before starting the update process; Download and install the update‚ allowing it to complete without interruption. Once done‚ restart your smartwatch to apply the changes. This ensures you have the latest features‚ security patches‚ and performance improvements.

6.3 Optimizing Battery Performance

To maximize your smartwatch’s battery life‚ adjust screen brightness and enable low-power mode. Disable unnecessary sensors like GPS and heart rate monitoring when not in use. Limit notifications and uninstall unused apps. Charge your smartwatch regularly‚ avoiding overcharging‚ which can degrade the battery. Update software and firmware to benefit from optimizations. Avoid extreme temperatures and clean the charging pins to ensure proper connection. Use power-saving watch faces and turn off always-on display. These steps help extend battery life and maintain performance.

tennant t7 service manual

The Tennant T7 Service Manual is an essential guide for understanding the operation, maintenance, and troubleshooting of the machine. It ensures safe and effective use, covering key components and procedures.

1.1 Overview of the Tennant T7 Floor Scrubber

The Tennant T7 is a battery-powered, ride-on floor scrubber designed for industrial and commercial use. It efficiently cleans both rough and smooth surfaces, including concrete, tile, and synthetic materials. Built for durability and performance, the T7 features adjustable brush pressure and a robust design to handle demanding environments. Its compact size and maneuverability make it ideal for large facilities. The machine is intended for wet scrubbing, ensuring thorough cleaning while maintaining surface integrity. Proper operation and maintenance, as outlined in the service manual, are essential to maximize its efficiency and lifespan.

1.2 Importance of the Service Manual

The Tennant T7 Service Manual is a critical resource for ensuring the machine operates safely and efficiently. It provides detailed instructions for maintenance, troubleshooting, and repair, helping users avoid costly downtime. The manual includes essential safety precautions, technical specifications, and maintenance schedules to prolong the machine’s lifespan. By following the guidelines, operators can optimize performance and prevent potential hazards. It serves as a comprehensive reference for both routine care and complex repairs, making it indispensable for anyone working with the Tennant T7. Adhering to the manual ensures compliance with manufacturer recommendations and maintains warranty validity.

1.3 Safety Precautions and Symbols Used

The Tennant T7 Service Manual emphasizes critical safety precautions to ensure safe operation and maintenance. Specific symbols are used throughout the manual to alert users to potential hazards. The WARNING symbol indicates actions that could result in severe injury or death, while FOR SAFETY highlights essential procedures for safe equipment operation. Proper understanding of these symbols is crucial for avoiding accidents. The manual also stresses the importance of following recommended maintenance practices, such as checking belt tension every 100 hours, to prevent mechanical failures; Adhering to these guidelines ensures the safety of both the operator and the machine, minimizing risks and prolonging equipment lifespan.

Machine Design and Features

The Tennant T7 is a battery-powered, ride-on floor scrubber designed for industrial and commercial use. It features a robust design for cleaning various surfaces, including concrete, tile, and stone.

2.1 Key Components of the Tennant T7

The Tennant T7 comprises several essential components, including the control panel, scrubbing brush, water tank, and battery system. The control panel manages operations, while the brush and water system ensure efficient cleaning. The battery powers the machine, and its design allows for easy maintenance and replacement. Additionally, the T7 features a sturdy chassis and durable parts, making it suitable for heavy-duty use. These components work together to provide reliable performance and long service life, ensuring the machine meets industrial and commercial cleaning demands effectively.

2.2 Intended Use of the T7 Rider Floor Scrubber

The Tennant T7 is designed for industrial and commercial cleaning of large floor areas. It is suitable for scrubbing both rough and smooth surfaces, including concrete, tile, stone, and synthetic materials. As a rider machine, it allows the operator to sit comfortably while cleaning, enhancing productivity. The T7 is ideal for use in warehouses, factories, and other commercial spaces requiring heavy-duty floor maintenance. Its versatility and robust design make it an excellent choice for cleaning diverse surfaces efficiently. The machine is built to handle demanding environments, ensuring consistent performance and reliability in various industrial and commercial settings.

2.3 Technical Specifications and Capabilities

The Tennant T7 is a battery-powered, ride-on floor scrubber designed for heavy-duty cleaning. It features a robust construction and advanced engineering for efficient performance. With a brush width suitable for large areas and adjustable brush pressure, it ensures thorough cleaning on various surfaces. The machine is equipped with a large solution tank and a powerful vacuum system for effective water recovery. Its compact design allows easy maneuverability in tight spaces, while the ergonomic controls enhance operator comfort. The T7 is built to handle demanding environments, making it a reliable choice for industrial and commercial cleaning applications.

Regular Maintenance Schedule

Regular maintenance ensures optimal performance and longevity of the Tennant T7. Daily checks, weekly routines, and periodic inspections are outlined to prevent issues and maintain efficiency.

3.1 Daily Maintenance Checks

Daily maintenance checks are crucial for ensuring the Tennant T7 operates efficiently and safely. Begin by inspecting the battery water levels and charging status. Check for loose electrical connections and clean them if necessary. Examine the scrub brush for wear and adjust pressure as needed. Verify proper belt tension and inspect for signs of wear or damage. Ensure all safety features, such as emergency stops, are functioning correctly. Finally, review the operator controls and display for any error messages. Addressing these tasks daily helps prevent downtime and extends the machine’s lifespan.

3.2 Weekly Maintenance Routine

The weekly maintenance routine for the Tennant T7 involves several key tasks to ensure optimal performance. Lubricate all moving parts, such as caster wheels and brush gears, to reduce friction and wear. Check and top off fluid levels, including the recovery tank and detergent dispenser. Inspect and clean the scrub brush and squeegee for debris buildup. Verify and adjust belt tension, ensuring it meets the specified deflection. Finally, run a diagnostic check on the control panel to identify any potential issues. Regularly performing these tasks helps maintain the machine’s efficiency and extends its operational life. Use only Tennant-approved parts for replacements to ensure compatibility and performance.

3.3 Periodic Maintenance Requirements

Periodic maintenance is crucial for the long-term functionality of the Tennant T7. Every 100 hours of operation, inspect and replace the brush belts if worn or frayed. Clean the electrical connections to prevent corrosion and ensure proper conductivity. Replace the scrub brushes every 200 hours or when visibly worn. Lubricate the gearbox every 500 hours to maintain smooth operation. Additionally, check the squeegee blade for wear and replace it if necessary; Always use Tennant-approved parts for replacements to ensure compatibility and performance. Refer to the service manual for specific intervals and procedures to keep the machine in optimal condition. Regular periodic maintenance prevents unexpected downtime and extends the machine’s lifespan.

Troubleshooting Common Issues

This section covers diagnosing and resolving common problems, such as electrical malfunctions, mechanical issues, and battery charging concerns. Refer to the manual for detailed procedures and solutions.

4.1 Electrical System Troubleshooting

The electrical system of the Tennant T7 is critical for its operation. Common issues include power failures, faulty sensors, or malfunctioning control panels. Always start by checking the power source and ensuring the circuit breaker is not tripped. Inspect wiring for damage or loose connections. Refer to the manual for error code interpretations, as they often pinpoint specific electrical faults. Use a multimeter to test voltage levels at key components. If issues persist, consult the troubleshooting guide or contact a certified technician. Never attempt repairs without disconnecting the power source to ensure safety. Genuine Tennant parts are recommended for any replacements to maintain reliability and performance.

4.2 Mechanical System Diagnostics

Regular mechanical diagnostics are crucial for maintaining the Tennant T7’s performance. Start by inspecting the drive system, brush motor, and hydraulic components for wear or damage. Check for unusual noises, vibrations, or leaks, which may indicate faulty bearings or seals. Ensure proper belt tension and alignment, as misalignment can lead to premature wear. Lubricate moving parts periodically to prevent friction-related issues. Refer to the manual for torque specifications and adjustment procedures. If problems persist, consult the troubleshooting section or contact a certified technician. Always use genuine Tennant parts for repairs to ensure compatibility and longevity of the machine.

4.3 Battery and Charging Issues

Battery performance is critical for the Tennant T7’s operation. Common issues include prolonged charging times or reduced battery life. Always use the charger supplied with the machine, as third-party chargers may damage the system. Check connections for corrosion or loose terminals and clean them if necessary. Ensure the water level in each cell is appropriate, as low levels can impair performance. Avoid overcharging, as it can shorten battery lifespan. If issues persist, perform an equalization charge as outlined in the manual. For severe problems, consult a certified technician. Always use genuine Tennant parts for battery replacements to maintain reliability and safety.

Parts and Accessories

This section covers genuine Tennant parts and approved accessories, essential for maintaining the T7’s performance and longevity. Use Tennant-approved parts to ensure optimal operation and durability.

5.1 Approved Parts for the Tennant T7

Using Tennant-approved parts ensures the T7 operates safely and efficiently. These parts are designed to meet exact specifications, maintaining performance and longevity. Always source from Tennant directly or authorized dealers to avoid counterfeit or incompatible components. Non-approved parts may void warranties or compromise machine reliability. Regular maintenance with genuine parts ensures optimal functionality and adherence to safety standards. Refer to the Tennant Parts Manual for a detailed list of recommended components. Proper replacement parts guarantee the T7 continues to deliver exceptional cleaning results while minimizing downtime and repair costs.

5.2 Consumables and Replacement Parts

Regular replacement of consumables like scrub brushes, squeegees, and filters is crucial for maintaining the T7’s performance. These parts wear out over time and must be replaced with Tennant-approved items to ensure optimal cleaning results. The service manual provides a detailed list of recommended consumables and their replacement intervals. Always refer to the Tennant Parts Manual for correct part numbers and sourcing information. Using non-approved consumables can lead to reduced efficiency or machine damage. Schedule regular maintenance checks to identify and replace worn parts promptly, ensuring the T7 continues to deliver reliable and efficient cleaning performance.

5.3 Where to Source Genuine Tennant Parts

To ensure optimal performance and maintain warranty validity, always source genuine Tennant parts from authorized dealers or directly from Tennant’s official website. These channels guarantee authenticity and compatibility with your T7 model. Additionally, trusted online marketplaces may carry Tennant-approved parts, but verify the seller’s credentials to avoid counterfeit products. For accurate ordering, refer to the Tennant Parts Manual for correct part numbers. Genuine parts ensure reliability, safety, and compliance with manufacturer standards, while non-approved alternatives may compromise machine efficiency and void warranties. Always prioritize quality by sourcing from reputable suppliers.

Operating Instructions

This section provides detailed operating instructions for the Tennant T7, including pre-operational checks, manual mode operation, and automatic mode functionality; Follow these guidelines for safe and efficient use.

6.1 Pre-Operational Checks

Before operating the Tennant T7, perform a thorough pre-operational inspection to ensure safety and efficiency. Check the battery level and charge if necessary. Verify that all controls function correctly, including the steering, brakes, and scrubbing systems. Inspect the brush or pad for proper installation and condition. Ensure the water tank is filled appropriately and the solution dispenser is set correctly. Review the floor surface to identify obstacles or hazards. Wear recommended safety gear, such as gloves and protective eyewear. Familiarize yourself with the machine’s controls and settings. Refer to the service manual for specific procedures and guidelines to ensure optimal performance and safety. Always follow safety precautions outlined in the manual.

6.2 Operating in Manual Mode

When operating the Tennant T7 in manual mode, start by ensuring the machine is properly powered on and all controls are accessible. Use the steering wheel to guide the machine and the foot pedal to control the scrubbing function. Adjust the brush or pad pressure as needed for different surfaces. Monitor the water and cleaning solution levels to maintain optimal cleaning performance. Use the manual mode for precise control over the machine’s movements and settings. Always follow the service manual guidelines for safe and effective operation. Ensure proper training is completed before operating in manual mode to achieve consistent results and prevent damage to the machine or floor surfaces.

6.3 Switching to Automatic Mode

To switch the Tennant T7 to automatic mode, ensure the machine is powered on and stationary. Locate the mode switch, typically found on the control panel, and toggle it to the automatic mode position. The machine will activate its pre-programmed settings for speed and cleaning functions. Monitor the display for confirmation and adjust settings if necessary. Always follow the service manual guidelines for proper operation. Ensure operators are trained on automatic mode to maximize efficiency and safety. Regularly review the manual for updated procedures to maintain optimal performance and extend the machine’s lifespan. Proper use of automatic mode enhances cleaning consistency and reduces operator fatigue.

magic chef mini refrigerator manual

Welcome to the Magic Chef Mini Refrigerator Manual, your comprehensive guide to understanding and optimizing your compact cooling solution. This manual covers essential features, safety guidelines, and setup instructions to ensure optimal performance and longevity of your appliance. Designed for efficiency and durability, Magic Chef mini-fridges offer versatile storage solutions for modern kitchens. By reading this manual, you’ll gain insights into proper installation, maintenance, and troubleshooting, ensuring your mini-fridge operates at its best.

Importance of Reading the Manual

Reading the Magic Chef Mini Refrigerator Manual is crucial for safe and effective operation. It provides essential safety precautions, installation guidelines, and maintenance tips to ensure optimal performance. Understanding the manual helps prevent accidents, reduces energy consumption, and extends the appliance’s lifespan. Familiarize yourself with features, troubleshooting, and warranty details to make the most of your mini-fridge experience.

Overview of the Magic Chef Mini Refrigerator Models

Magic Chef offers a diverse range of mini-fridge models, including compact, top-freezer, and specialty designs. Models like the MCR1010WEF, HMR440BE, and HMBR265BE1 provide varying capacities and features to suit different needs. These refrigerators are engineered for efficiency, with glass shelves, adjustable temperature controls, and compact footprints. Whether for small kitchens, offices, or dorms, Magic Chef mini-fridges deliver reliable performance and versatile storage solutions.

Installation and Setup Instructions

Proper installation ensures optimal performance. Place the mini-fridge upright, level, and on a firm surface. Plug into a grounded outlet, then allow 24 hours to cool before use.

Positioning and Leveling the Mini Refrigerator

Proper positioning and leveling are crucial for optimal performance. Place the mini refrigerator on a firm, level surface to ensure even cooling and prevent damage. Transport the appliance only in an upright position to avoid compressor damage. Use adjustable legs to balance the unit, ensuring the door seals tightly. Leave at least 1 inch of space around the sides and back for ventilation. Allow the fridge to stand upright for 24 hours before first use to ensure proper cooling efficiency.

Connecting the Appliance to Power

To power your Magic Chef mini refrigerator, plug the appliance into a dedicated 120V electrical outlet. Ensure the outlet is grounded and not shared with other high-power devices. Avoid using extension cords to maintain safety and efficiency. Once connected, allow the unit to cool for 24 hours before adding food. This ensures proper cooling efficiency and prevents damage to the compressor. Always follow the manual’s electrical safety guidelines for optimal performance.

Safety Precautions and Warnings

Ensure safe operation by reading all instructions carefully to reduce fire, electrical shock, or injury risks. Adhere to electrical safety guidelines and avoid hazardous practices to protect both users and the appliance.

General Safety Guidelines for Operating the Mini Fridge

To ensure safe and efficient operation, always follow these guidelines: transport the mini-fridge upright to avoid compressor damage, keep vents clear for proper airflow, and avoid exposing the appliance to extreme temperatures. Regularly clean the interior and exterior to maintain hygiene and performance. Never remove the back panel during installation, and ensure the power supply is stable before use. Adhere to these precautions to prevent hazards and extend appliance longevity.

Electrical Safety and Precautions

Ensure your Magic Chef mini-fridge is plugged into a reliable, grounded power source. Avoid using extension cords to prevent electrical hazards. Keep the power cord away from water to reduce shock risks. Never use damaged plugs or frayed cords, as they can cause fires or electrical faults. Always unplug the appliance before cleaning or maintenance. Ensure children cannot access the power cord to avoid accidental shocks.

Features and Specifications of the Magic Chef Mini Refrigerator

The Magic Chef mini-fridge offers compact designs with capacities like 2.6 Cu. Ft., adjustable shelves, and reversible doors for versatile storage solutions, ensuring efficient performance in small spaces.

Key Features of Compact and Mini Fridge Models

Magic Chef mini-fridges feature compact designs with capacities like 2.6 Cu. Ft., reversible doors for flexible placement, and adjustable shelves for customizable storage. Models include self-cleaning condensers, door racks, and intuitive temperature controls. Some units offer dual-door designs, while others provide freezer compartments for added convenience. These features ensure efficient cooling, space-saving functionality, and easy maintenance, making them ideal for small kitchens, dorms, or offices.

Technical Specifications and Capacities

Magic Chef mini-fridges offer capacities ranging from 2.6 to 4.5 Cu. Ft., with models like the MCBR445B1 and HMBR265BE1. These units feature energy-efficient compressors, reversible door hinges, and adjustable thermostat controls. Dimensions vary, with widths around 19-24 inches and depths of 20-25 inches, ensuring a compact fit. Some models include freezer compartments, while others provide door storage for added convenience, catering to diverse storage needs in small spaces.

Operating Instructions for Optimal Performance

For optimal performance, set the thermostat between 37-40°F and allow the unit to cool for 24 hours before adding food. Regularly clean and maintain the appliance.

Understanding the Control Panel and Settings

The control panel on your Magic Chef mini refrigerator is designed for easy operation. It typically features a temperature adjustment dial, a light switch, and indicators for different modes. The temperature dial allows you to set the ideal cooling level, while the light switch controls the interior light for better visibility. Familiarize yourself with these settings to customize your appliance’s performance. Key features include:

  • Temperature control for precise cooling adjustments.
  • Lighting options to illuminate the interior.
  • Energy-saving modes to optimize power consumption.

Always refer to the manual for specific model details and ensure settings align with your storage needs for optimal performance.

Temperature Management and Adjustments

Proper temperature management is crucial for optimal performance. The Magic Chef mini refrigerator features a temperature control knob that allows you to adjust the cooling level. Set the dial to the middle for general use, lower for colder settings, or higher to conserve energy. Ensure the fridge is plugged in and pre-cooled for 24 hours before adding food. Regularly check and adjust settings to maintain ideal storage conditions and prevent freezing or spoilage.

Maintenance and Cleaning Tips

Regularly clean the interior with a moist cloth and wipe the exterior with a soft, dry cloth. Check and replace worn door seals to maintain efficiency. This ensures optimal performance and longevity.

Regular Cleaning of the Interior and Exterior

For optimal performance, clean the interior with a damp cloth and the exterior with a soft, dry cloth. Remove shelves and drawers for thorough cleaning. Regularly inspect and replace worn door seals to maintain efficiency. Avoid harsh chemicals, as they may damage surfaces. Defrost the freezer compartment periodically to prevent ice buildup. Always ensure the appliance is unplugged before cleaning to avoid electrical hazards. Follow these steps to keep your mini-fridge in excellent condition.

Defrosting and Ice Management

Regular defrosting is essential to maintain your mini-fridge’s efficiency. Turn off the appliance and allow it to thaw completely before cleaning. Use a soft cloth to wipe away ice and condensation. Avoid using harsh chemicals or abrasive tools, as they may damage surfaces. Ensure the drain is clear to prevent water accumulation. After defrosting, dry the interior thoroughly before reconnecting power. This process helps prevent ice buildup and maintains optimal cooling performance.

Troubleshooting Common Issues

Identify and resolve common malfunctions such as unusual noise, temperature fluctuations, or excessive ice buildup. Check power connections, ensure proper ventilation, and avoid overstocking to maintain performance.

Identifying and Resolving Refrigerator Malfunctions

Common issues include temperature fluctuations, noise, or excessive ice buildup. Start by checking power connections and ensuring proper ventilation. Defrost the appliance if ice accumulates excessively. Verify door seals are tight to prevent cold air escape. If problems persist, consult the manual or contact customer support for assistance. Regular maintenance and proper usage can prevent most malfunctions, ensuring optimal performance and longevity of your mini-fridge.

Addressing Noise, Temperature Fluctuations, and Other Concerns

If your mini-fridge is noisy, ensure it’s properly leveled and placed on a stable surface. For temperature fluctuations, check the settings and ensure the door seals are tight. If the appliance is producing excessive ice, defrost it regularly. Addressing these issues promptly can prevent further complications. Always refer to the manual for specific troubleshooting steps or contact Magic Chef support for professional assistance if needed.

Warranty and Customer Support Information

Your Magic Chef mini-fridge is backed by a comprehensive warranty covering parts and labor. Register your product for extended protection. For inquiries or assistance, contact Magic Chef support via phone or their official website.

Understanding the Warranty Coverage

Magic Chef mini-refrigerators are covered by a limited warranty ensuring defect-free performance. The warranty typically lasts for one year from purchase, covering parts and labor. Models like MCBR445W1 and HMBR265WE1 are included, with specific terms outlined in the manual. Proper product registration enhances warranty benefits. Keep your purchase receipt and manual for warranty claims. This coverage provides peace of mind, safeguarding your investment in Magic Chef appliances.

How to Contact Magic Chef Customer Service

For assistance with your Magic Chef Mini Refrigerator, contact customer service via phone at 1-888-991-7355 or email at customer.service@magicchef.com. Visit their official website for live chat support, FAQs, and warranty information. Representatives are available Monday–Friday, 8 AM–5 PM EST, to address inquiries, troubleshooting, and service requests. Ensure to have your model number and purchase details ready for efficient support.

Best Practices for Long-Term Use

For long-term performance, clean your Magic Chef mini-fridge regularly, removing dust from vents and ensuring proper airflow. Store food in sealed containers to maintain freshness and prevent odors. Keep the appliance upright during transport to avoid compressor damage. Set the temperature between 37°F and 40°F for optimal cooling. Avoid overloading shelves to ensure even air circulation. Always unplug the fridge before cleaning or defrosting. Follow these practices to extend the lifespan of your Magic Chef mini-fridge and enjoy reliable service.

Additional Resources for Further Assistance

For further guidance, visit the official Magic Chef website or download the PDF manual specific to your model. Resources like ManualsLib and authorized service centers offer detailed support. Refer to model-specific guides, such as the MCBR445B1 or HMBR265BE1 manuals, for tailored instructions. Contact Magic Chef customer service for personalized assistance or warranty inquiries. These resources ensure you maximize your mini-fridge’s performance and address any concerns effectively.

m1 garand manual

The M1 Garand, a groundbreaking gas-operated, semi-automatic rifle, revolutionized military firepower during World War II. Adopted by the U;S. Military in 1936, it replaced the bolt-action M1903, offering greater efficiency and firepower for soldiers. Known for its reliability and durability, the M1 Garand became iconic, serving through WWII, Korea, and beyond. Its innovative design and .30-caliber firepower made it a trusted companion for soldiers and a favorite among civilian shooters and collectors. This manual provides essential guidance for safe operation, maintenance, and optimal use of the M1 Garand rifle.

1.1 Historical Background and Development

The M1 Garand rifle was developed in the 1930s by John C. Garand, a Canadian-American firearms designer. It was the first gas-operated, semi-automatic rifle adopted by the U.S. Military, replacing the bolt-action M1903 Springfield. The M1 Garand was officially adopted in 1936 and became a cornerstone of American military firepower during World War II. Its development marked a significant shift in military firearms technology, offering greater firepower and efficiency. The rifle’s innovative design, including its en bloc clip system, made it reliable and user-friendly. It served through WWII, the Korean War, and beyond, earning a reputation as a durable and effective weapon. Its historical significance endures among collectors and shooters today.

1.2 Key Features and Design Overview

The M1 Garand is a semi-automatic, gas-operated rifle chambered in .30-06 Springfield. Its key feature is the en bloc clip system, which loads eight rounds at once. The rifle’s gas system, powered by a muzzle blast, cycles the action automatically. It features a wooden stock with an ergonomic design for comfortable handling. The M1 Garand weighs approximately 9.5 pounds unloaded and has a 24-inch barrel. Its sights include an adjustable rear aperture and a fixed front post. The rifle’s design emphasizes durability and reliability, with a focus on simplicity and ease of maintenance. Its robust construction and innovative features made it a groundbreaking firearm for its time, suitable for both military and civilian use.

1.3 Purpose and Intended Use

The M1 Garand was primarily designed as a military service rifle, intended to provide U.S. forces with a reliable, semi-automatic firearm capable of delivering accurate and sustained firepower. Adopted in 1936, it was the first standard-issue, gas-operated rifle for the U.S. Military, replacing the bolt-action M1903. Its primary purpose was to enhance infantry effectiveness on the battlefield, offering a higher rate of fire compared to earlier bolt-action rifles. The M1 Garand saw extensive use in World War II and the Korean War, becoming a symbol of American military ingenuity. Today, it is popular among civilian shooters, collectors, and enthusiasts for its historical significance and shooting sports.

Understanding the M1 Garand Manual

The M1 Garand manual is a comprehensive guide for rifle operation, maintenance, and safety. It provides detailed instructions for handling, loading, and troubleshooting, ensuring safe and effective use.

2.1 Importance of the Manual for Owners

The M1 Garand manual is essential for owners to ensure safe and effective operation. It provides detailed instructions on handling, maintenance, and troubleshooting, preventing accidents and prolonging the rifle’s lifespan. Understanding the manual’s guidance helps owners master the rifle’s mechanics, from loading to firing, and proper storage. It also includes critical safety precautions to avoid misuse. For both experienced shooters and newcomers, the manual serves as a vital reference, enhancing proficiency and ensuring the rifle functions reliably. Regular review of the manual is recommended to maintain familiarity with its contents and adhere to best practices.

2.2 Structure and Content of the Manual

The M1 Garand manual is organized to provide comprehensive guidance, starting with safety precautions and moving through operational procedures. It includes detailed sections on loading, firing, and unloading, as well as maintenance routines like cleaning and lubrication. Troubleshooting tips address common issues such as jamming and accuracy problems. The manual also covers storage and long-term care to preserve the rifle’s condition. Accessories and authorized modifications are discussed to enhance functionality without compromising safety. Clear diagrams and step-by-step instructions make the content accessible to both novice and experienced users. This structured approach ensures owners can safely and effectively operate and maintain their M1 Garand rifle.

Safety Precautions and Guidelines

Always handle the M1 Garand with care, ensuring the muzzle is pointed safely. Keep fingers off the trigger until ready to fire. Store unloaded in a secure location, using locks if necessary. Use only authorized .30-caliber ammunition to prevent damage. Regularly inspect the rifle for wear or damage. Follow all manual instructions to avoid accidents. Never leave the rifle unattended or accessible to unauthorized individuals. Adhere to local laws and safety regulations when transporting or storing the firearm.

3.1 General Safety Rules for Handling the M1 Garand

Always treat the M1 Garand as if it is loaded. Keep the muzzle pointed in a safe direction, away from people and valuables. Ensure the rifle is unloaded before cleaning or storing; Use the safety catch when not firing, but never rely solely on it. Wear eye and hearing protection during use. Keep fingers outside the trigger guard until ready to fire. Avoid handling the rifle when fatigued or under the influence of substances. Regularly inspect the rifle for damage or wear. Use only authorized .30-caliber ammunition to prevent malfunctions. Always follow proper loading and unloading procedures as outlined in the manual.

3.2 Safe Storage and Transportation

Store the M1 Garand in a dry, secure location, unloaded and separated from ammunition. Use a gun safe or locked cabinet to prevent unauthorized access. When transporting, keep the rifle in a sturdy, padded case to protect it from damage. Ensure the rifle is unloaded with the chamber open and the safety engaged. Avoid leaving the rifle in extreme temperatures or humidity. Regularly inspect storage areas for signs of moisture or pests. Always transport the rifle with the muzzle down to prevent debris accumulation. Use a gun sling or strap for secure carrying. Follow local laws and regulations for firearm transportation and storage.

Operating the Rifle

Mastering the M1 Garand involves understanding its loading, firing, and unloading processes. Always ensure the rifle is safe to handle, with the muzzle pointed in a safe direction. Load the en bloc clip carefully, chamber a round smoothly, and fire with controlled aim. After firing, unload the rifle by removing the clip and ejecting any remaining rounds. Regular practice and adherence to safety protocols ensure effective and responsible operation of the M1 Garand rifle.

4.1 Loading and Chambering a Round

Loading the M1 Garand involves inserting an 8-round en bloc clip into the magazine. Ensure the rifle is pointed in a safe direction and the bolt is open. Place the clip into the magazine well, aligning it with the guide rails. Gently push the clip down until it clicks into place. Close the bolt by pulling the operating rod handle back and releasing it, allowing it to chamber a round. Always verify the chamber is loaded by visually inspecting or feeling the bolt. Keep the muzzle pointed in a safe direction during this process to prevent accidental discharge.

4.2 Firing the Rifle

To fire the M1 Garand, ensure the rifle is properly shouldered with a firm grip. Aim using the rear sight and front sight, aligning them with your target. Squeeze the trigger smoothly to discharge the round. The rifle operates in semi-automatic mode, so after firing, the bolt will cycle, ejecting the spent casing and chambering the next round from the en bloc clip. Note that the M1 Garand does not have a fully automatic setting. After firing, always maintain control of the muzzle and keep it pointed in a safe direction. Be prepared to reload when the clip is exhausted or to unload the rifle after use.

4.3 Unloading the Rifle

Unloading the M1 Garand requires careful attention to ensure safety. Always treat the rifle as if it is loaded. Begin by pointing the muzzle in a safe direction and engaging the safety catch. Place the rifle on a flat surface, barrel down, to prevent accidental discharge. Open the bolt slowly and lock it to the rear. Remove any remaining rounds from the chamber or magazine. Ensure no rounds are left in the rifle before storing or transporting it. Always double-check the chamber and magazine to confirm the rifle is unloaded. This step is critical for maintaining safety and preventing accidents.

Maintenance and Care

Regular maintenance ensures the M1 Garand’s optimal performance and longevity. Clean the rifle thoroughly, paying attention to the barrel, chamber, and gas system. Lubricate moving parts regularly to prevent wear and corrosion. Store the rifle in a dry, secure location, away from direct sunlight and moisture. Follow the manual’s guidelines for disassembly and reassembly to avoid damage. Proper care extends the rifle’s service life and maintains its reliability for future use.

5.1 Cleaning the M1 Garand

Cleaning the M1 Garand is essential for maintaining its performance and longevity. Start by ensuring the rifle is unloaded. Remove the magazine and check the chamber. Use a cleaning rod with a bore brush to scrub the barrel, focusing on the chamber and muzzle. Apply a solvent like Hoppes No. 9, let it sit, then patch the barrel until clean. Clean the gas system by brushing the cylinder and piston, wiping with a cloth. Lubricate moving parts lightly. Refer to the manual for specific steps and tools, ensuring each component is properly maintained to keep the rifle operational and reliable.

5.2 Lubrication and Preservation

Proper lubrication is crucial for the M1 Garand’s smooth operation and longevity. Apply a high-quality gun oil to moving parts, such as the bolt, operating rod, and trigger mechanism. Avoid over-lubrication, as it can attract dirt and impair functionality. For long-term preservation, use a rust-inhibiting coating on metal surfaces and store the rifle in a dry, cool environment. Keep the firearm in a protective case or wrapped in a breathable material to prevent moisture damage. Regularly inspect and reapply lubrication as needed, especially before extended storage. Always follow the manual’s guidelines for recommended products and techniques to ensure the rifle remains reliable and well-maintained.

5.3 Storage and Long-Term Maintenance

Store the M1 Garand in a dry, cool environment to prevent rust and degradation. Use a protective case or gun safe to shield it from dust and unauthorized access. Before long-term storage, clean and lubricate the rifle thoroughly, paying attention to metal surfaces to prevent corrosion. Apply a rust-inhibiting coating if storing for extended periods. Avoid storing the rifle with a loaded magazine, as this can cause spring fatigue. Check the rifle periodically to ensure proper condition and reapply lubrication as needed. Store ammunition separately in a cool, dry place, away from flammable materials. Always follow safety guidelines to maintain the rifle’s reliability and longevity.

Troubleshooting Common Issues

The M1 Garand may experience jamming or accuracy issues due to improper maintenance or worn parts. Regular cleaning and inspection can prevent most malfunctions. Consult the manual for detailed troubleshooting steps to address these problems effectively.

6.1 Identifying and Resolving Jamming Problems

Jamming issues with the M1 Garand can occur due to improper maintenance, worn parts, or incorrect ammunition use. Common causes include dirt buildup, fouling, or misaligned components. To address jams, ensure the rifle is unloaded and follow proper clearing procedures. Tap the base of the magazine gently to ensure it is fully seated. Pull the charging handle to the rear and release slowly to eject any stuck rounds. Inspect the chamber and barrel for obstructions. Clean and lubricate the rifle thoroughly after resolving the issue. Regular maintenance and inspection can prevent recurring problems. Always refer to the manual for detailed troubleshooting steps.

6.2 Addressing Accuracy Issues

Accuracy issues with the M1 Garand can arise from misaligned sights, barrel wear, or improper maintenance. Start by ensuring the rear sight is correctly aligned with the front sight post. Clean the barrel thoroughly to remove fouling, as residue can affect precision. Inspect the barrel for wear or damage, which may require replacement. Check the stock for loose fittings, as this can disrupt aim. Verify that the ammunition used meets specifications, as incorrect rounds can cause inconsistent performance. If issues persist, consult the manual for detailed adjustment procedures or seek professional gunsmithing. Regular maintenance and proper handling are key to maintaining accuracy.

Accessories and Modifications

The M1 Garand can be enhanced with various accessories, such as slings, scopes, and muzzle devices, to improve functionality. Modifications should be done cautiously to maintain reliability and safety, ensuring compliance with original specifications. Always use authorized parts and follow manual guidelines for any customizations. Accessories like gun slings and optics can enhance user experience without compromising the rifle’s integrity. Proper installation and testing are essential to ensure optimal performance. Consulting the manual or a professional is recommended before making significant changes.

7.1 Recommended Accessories for the M1 Garand

Recommended accessories for the M1 Garand include a high-quality gun sling, such as the M1 improved web sling, for comfortable carrying. Optics like scopes or aperture sights can enhance accuracy. Muzzle devices, including flash suppressors, reduce recoil and muzzle rise. Magazine pouches and ammo boxes are essential for carrying extra ammunition. Cleaning kits and lubrication tools ensure proper maintenance. A soft or hard case protects the rifle during storage or transport. Additionally, a bipod or shooting rest can improve stability for precise shooting. Always choose accessories that align with the rifle’s original design and purpose to maintain its functionality and historical integrity.

7.2 Safe and Authorized Modifications

When modifying the M1 Garand, prioritize safety and adherence to authorized guidelines. Installing aftermarket barrels, triggers, or stocks can enhance performance but must be done by skilled gunsmiths. Upgrading to a scope mount for improved accuracy is popular, but ensure it doesn’t compromise the rifle’s historical integrity. Replacing original parts with genuine or high-quality alternatives is recommended. Avoid unauthorized alterations that could void warranties or jeopardize functionality. Always refer to the manual and consult experts before making changes. Modifications should align with the rifle’s intended use and legal standards, preserving its reliability and heritage.

ice maker general electric manual

GE ice makers are popular for their reliability and innovative features‚ offering convenient ice production in various models․ Designed with advanced technology‚ they ensure efficient performance and ease of use․ The user manual provides essential details for setup‚ operation‚ and troubleshooting‚ ensuring optimal functionality and longevity of the appliance․

1․1 Overview of GE Ice Maker Models

GE offers a range of ice maker models‚ including countertop and freestanding options‚ designed for convenience and performance․ Popular models like the Profile Opal OPAL01NSS and XPIO13SCSS produce nugget ice‚ a favorite for its chewable texture․ These models often feature side tanks‚ Bluetooth connectivity‚ and smart controls‚ catering to modern households seeking efficient and customizable ice production solutions․

1․2 Key Features of GE Ice Makers

GE ice makers boast key features such as nugget ice production‚ side tanks for portability‚ and smart connectivity options․ Models like the Profile Opal 2․0 offer Bluetooth functionality‚ enabling app control․ Energy-saving modes and customizable settings allow users to adjust ice thickness and production speed․ These features enhance usability and ensure high-quality ice production tailored to individual preferences․

Safety Instructions

Always follow safety guidelines when using your GE ice maker․ Ensure proper installation‚ avoid damaged cords‚ and keep the appliance out of reach of children to prevent accidents․

2․1 General Safety Precautions

Read the manual thoroughly before using your GE ice maker․ Ensure all cords are undamaged and properly connected․ Avoid submerging the unit in water or exposing it to extreme temperatures․ Keep children away from the appliance and its moving parts․ Regularly inspect for wear and tear‚ and never use damaged components․ Follow installation guidelines precisely to ensure safe operation and longevity․

2․2 Electrical Safety Guidelines

Always read the manual before operating your GE ice maker․ Use a grounded electrical outlet and avoid extension cords․ Inspect power cords for damage and ensure proper installation․ Never submerge the unit in water or operate with damaged components․ If issues arise‚ discontinue use and contact GE support for assistance․

Installation and Setup

Follow the manual for proper installation․ Unpack carefully‚ place on a level surface‚ and ensure adequate ventilation․ Connect water and electrical supplies as instructed for safe operation․

3․1 Unpacking and Preparing the Ice Maker

Begin by carefully unpacking the ice maker from its box․ Inspect for any damage and ensure all components‚ including the water reservoir and drain pump‚ are included․ Refer to the manual for specific unpacking instructions․ Before installation‚ clean the unit and prepare the area to ensure proper ventilation and accessibility for future maintenance․

3․2 Connecting Water Supply Lines

Connect the water supply lines to the ice maker as per the manual․ Ensure the water source is turned off before attaching the lines․ Use genuine GE water filters for optimal performance․ Secure all connections tightly to prevent leaks․ Refer to the installation guide for specific fitting sizes and recommended water pressure levels to ensure proper function․

3․3 Electrical Installation Requirements

Ensure the ice maker is connected to a dedicated 120V electrical circuit․ Use a grounded outlet to meet safety standards․ Avoid shared circuits to prevent power overload․ The unit requires consistent voltage to function correctly․ Consult the manual for specific power requirements and ensure all connections comply with local electrical codes for safe operation․

First-Time Use and Basic Operations

After setup‚ turn on the ice maker and allow it to initialize․ Follow the control panel instructions to start ice production․ Monitor the process for smooth operation․

4․1 Initial Setup and Calibration

Before first use‚ ensure the ice maker is properly installed and leveled․ Plug in the unit and allow it to stabilize for 24 hours․ Read the manual for specific calibration steps‚ such as setting water hardness and ice thickness․ For models like GE UNC15NJBII‚ follow the control panel prompts to complete initial setup․ Ensure water supply lines are securely connected to avoid leaks․ Allow the system to run a initial cycle to prepare for ice production․ Refer to the GE Profile Opal manual for detailed calibration instructions to optimize performance․

4․2 Understanding Control Panel Functions

The control panel on GE ice makers features intuitive buttons for starting ice production‚ adjusting settings‚ and navigating options․ Models like the GE UNC15NJBII have buttons for cycle start/stop‚ ice size selection‚ and mode toggling․ The display screen shows real-time status updates and error codes․ Familiarize yourself with these functions to customize ice production and monitor performance efficiently․ GE designs these panels for easy navigation and user convenience․

4․3 Starting Ice Production for the First Time

Before first use‚ ensure the ice maker is properly installed and the water supply is connected․ Turn on the unit‚ allow it to cool for 24 hours‚ then press the start button․ Monitor the ice production cycle and clean the ice bin and water reservoir as instructed in the manual for optimal performance․ Always follow safety guidelines during initial setup․

Customizing Ice Maker Settings

Adjust ice thickness‚ production speed‚ and timers to suit your preferences․ Use the control panel to customize settings for optimal ice production and energy efficiency․

5․1 Adjusting Ice Thickness Settings

Adjust ice thickness by selecting from predefined settings using the control panel․ Thicker ice is ideal for slower melting‚ while thinner ice is better for drinks․ Ensure the ice maker is turned off before making adjustments․ Refer to the user manual for specific button sequences and guidelines to achieve desired ice thickness efficiently․

5․2 Setting Ice Production Speed

Adjust the ice production speed using the control panel․ Press the ‘Select’ button to navigate to the ‘Ice Production Speed’ setting․ Use the ‘+’ or ‘-‘ buttons to choose between ‘Fast Ice’ for quicker production or ‘Standard’ for regular use․ The ice maker will adjust its cycle time and capacity based on your selection․ Refer to the manual for exact button sequences․

5․3 Scheduling Ice Production Timers

Use the control panel to schedule ice production timers․ Access the timer settings via the menu‚ select ‘Timer’ using the navigation buttons‚ and adjust the start and stop times using ‘+’ or ‘-‘ buttons․ Set the delay start feature to begin ice production at a specific time․ Confirm your settings to activate the timer․ Refer to the manual for detailed button sequences․

Maintenance and Cleaning

Regular maintenance ensures optimal performance․ Clean the ice bin and water reservoir‚ sanitize surfaces‚ and replace water filters․ Refer to the manual for detailed cleaning instructions․

6․1 Cleaning the Ice Bin and Water Reservoir

Regularly clean the ice bin and water reservoir to prevent mold and bacteria growth․ Empty and wipe the bin with a soft cloth and mild detergent; Drain the reservoir and rinse thoroughly․ Ensure all parts are dry before reassembly․ Refer to the user manual for detailed cleaning instructions to maintain hygiene and optimal performance․

6․2 Sanitizing the Ice Maker

To sanitize your GE ice maker‚ mix a solution of water and white vinegar․ Run this through the machine‚ then rinse thoroughly․ Regular sanitizing prevents bacteria growth and maintains hygiene․ Always follow the user manual’s specific instructions for your model to ensure effectiveness and safety․

6․3 Replacing Water Filters

Regularly replace the water filter in your GE ice maker to ensure clean ice production․ Turn off the power‚ locate the filter‚ and remove it․ Install a genuine GE water filter by aligning and twisting it into place․ Flush the system by running a few cycles to clear any air or debris․ This maintains performance and water quality․

Troubleshooting Common Issues

This section helps diagnose and resolve common problems with your GE ice maker‚ such as low ice production or unusual noises‚ ensuring optimal performance and longevity․

7․1 Diagnosing Ice Production Problems

Identify issues with ice production by checking water supply lines‚ filter status‚ and sensor functionality․ Ensure the ice maker is properly calibrated and free from blockages․ Refer to the manual for specific error codes and solutions to restore functionality efficiently and effectively‚ ensuring consistent ice output and maintaining appliance performance․

7․2 Resolving Water Supply Issues

Check water supply lines for kinks or blockages and ensure they are properly connected․ Verify the water filter is clean and not clogged‚ as a dirty filter can restrict flow․ Replace the filter if necessary and ensure the water supply valve is fully open․ Refer to the manual for specific guidance on resolving water-related issues effectively․

7․3 Addressing Noise or Vibration Concerns

Ensure the ice maker is installed on a level surface to minimize vibration․ Check for loose components or worn-out parts‚ as these can cause noise․ Clean or replace the evaporator and condenser fans if dirty or damaged․ Refer to the manual’s troubleshooting section for specific guidance on resolving noise-related issues effectively and safely․

Understanding Error Codes

GE ice makers display error codes to indicate specific issues․ These codes help diagnose problems like sensor malfunctions or water supply disruptions․ Refer to the manual for detailed solutions and troubleshooting steps to address each error code effectively and restore proper functionality to your appliance․

8․1 Common Error Codes and Solutions

GE ice makers may display error codes like E1 or EC‚ indicating issues such as low water pressure or sensor malfunctions․ Refer to the manual for specific solutions‚ such as checking water supply lines or restarting the device․ Each code corresponds to a particular problem‚ ensuring targeted troubleshooting for optimal repair and resumed ice production․

8․2 Resetting the Ice Maker After an Error

To reset your GE ice maker after an error‚ unplug it from the power source for 30 seconds․ Plug it back in and press and hold the reset button (if applicable) for 5 seconds․ This process clears error codes and restores normal operation․ If issues persist‚ consult the user manual for specific reset instructions or contact GE support for assistance․

Water Filter Maintenance

Regularly maintaining your GE ice maker’s water filter ensures clean ice production and prevents issues․ Replace the filter every 6 months or as indicated in the manual․ Use only genuine GE water filters for optimal performance and to maintain warranty validity․ Always refer to the manual for specific replacement instructions․

9․1 Importance of Using Genuine GE Water Filters

Using genuine GE water filters ensures optimal performance‚ clean ice production‚ and protects your appliance from potential damage․ These filters are designed to work seamlessly with GE ice makers‚ removing impurities effectively․ Non-genuine filters may compromise water quality and void your warranty․ Always choose authentic GE filters for reliability and durability․

9․2 Steps to Replace the Water Filter

To replace the water filter‚ turn off the water supply and locate the filter․ Remove the old filter by turning it counterclockwise․ Dispose of it properly‚ then insert the new genuine GE filter and turn it clockwise until it clicks․ Flush the system by running a few cycles to ensure clean water flow․ Regular replacement ensures optimal performance․

Warranty and Support Information

GE provides a limited warranty for ice makers‚ covering defects in materials and workmanship․ Contact GE Appliances at 1․866․907․6718 for support and warranty inquiries․

10․1 GE Ice Maker Limited Warranty Details

The GE Ice Maker Limited Warranty covers defects in materials and workmanship under normal use for a specified period․ The warranty typically lasts one year from the purchase date‚ with certain parts and labor costs included․ For full details‚ refer to the warranty section in the user manual or visit the GE Appliances website․ Proper registration and maintenance are required to uphold warranty terms․

10․2 Contacting GE Customer Support

For assistance with your GE Ice Maker‚ contact customer support at 1․866․907․6718 or visit geappliances․com/support․ Have your model number ready for efficient service․ Representatives are available to address questions‚ repairs‚ and warranty inquiries․ Ensure your appliance is properly registered and refer to the user manual for troubleshooting before contacting support․

Advanced Features

GE ice makers offer advanced features like smart connectivity for app control‚ energy-saving modes‚ and customizable settings․ Models such as the Opal Nugget Ice Maker showcase these innovations effectively․

11․1 Using Smart Connectivity Options

GE ice makers with smart connectivity allow users to control settings via smartphone apps․ Features like scheduling ice production and monitoring machine status enhance convenience․ Bluetooth-enabled models‚ such as the Opal Nugget Ice Maker‚ provide seamless integration‚ ensuring optimal performance and customization․ These advanced features make managing your ice maker effortless and efficient from anywhere in your home․

11․2 Energy-Saving Modes and Settings

GE ice makers feature energy-saving modes that reduce power consumption while maintaining performance․ These settings‚ detailed in the manual‚ include low-power standby and adaptive sensors․ Users can customize energy usage without compromising ice quality‚ ensuring eco-friendly operation․ Refer to the manual for specific instructions on enabling these modes to optimize energy efficiency and lower utility bills․

GE ice makers offer innovative features‚ reliable performance‚ and energy efficiency․ By following the manual‚ users can enjoy convenient ice production while maintaining optimal appliance functionality and longevity․

12․1 Summary of Key Features and Benefits

GE ice makers deliver exceptional convenience‚ producing high-quality ice efficiently․ Models like the Profile Opal offer nugget ice‚ smart connectivity‚ and energy-saving modes․ Durable construction ensures long-term performance‚ while user-friendly controls simplify operation․ Regular maintenance and genuine filters maintain ice quality․ GE’s commitment to innovation and reliability makes their ice makers a top choice for home and commercial use․

12․2 Final Tips for Optimal Performance

For optimal performance‚ regularly clean the ice bin and water reservoir․ Replace water filters as recommended․ Check and maintain proper water supply lines․ Sanitize the unit periodically․ Ensure proper installation and follow the manual’s care instructions․ These steps will help maintain efficiency and extend the lifespan of your GE ice maker․