The 2012 Honda Pilot Manual is your comprehensive guide to understanding and maintaining your vehicle. Designed for owners and drivers‚ it covers features‚ operation‚ and maintenance‚ ensuring safety and optimal performance. Reading this manual is essential for getting the most out of your driving experience.
1.1 Overview of the Honda Pilot
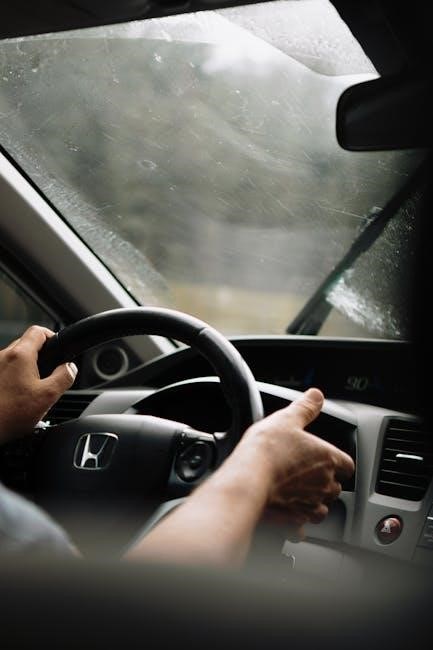
The Honda Pilot is a mid-size SUV known for its versatility‚ reliability‚ and family-friendly design. Introduced in 2003‚ it quickly became popular for its spacious interior‚ comfortable ride‚ and practicality. The 2012 model continues this legacy‚ offering a blend of style‚ functionality‚ and performance. With seating for up to eight passengers‚ ample cargo space‚ and a robust V6 engine‚ the Pilot is ideal for both daily commuting and adventurous road trips. Its durable construction and advanced safety features make it a trusted choice for families and outdoor enthusiasts alike. Whether navigating city streets or rugged terrain‚ the Honda Pilot delivers a balance of power‚ efficiency‚ and convenience.
- Spacious interior with seating for up to 8 passengers
- Ample cargo space for luggage‚ gear‚ and more
- Robust 3.5L V6 engine for smooth performance
- Advanced safety features for added protection
1.2 Importance of the Owner’s Manual

The owner’s manual is an essential resource for understanding your 2012 Honda Pilot. It provides detailed information about the vehicle’s features‚ operation‚ and maintenance‚ ensuring safe and efficient use. By reading the manual‚ you can familiarize yourself with the car’s controls‚ settings‚ and capabilities‚ helping you make the most of its performance and functionality. Additionally‚ the manual includes important safety guidelines‚ troubleshooting tips‚ and maintenance schedules‚ all of which are crucial for preserving the longevity and reliability of your vehicle. It also outlines warranty details and proper usage of advanced features‚ helping you avoid costly mistakes. Whether you’re a new owner or a seasoned driver‚ the manual serves as a valuable guide to enhance your driving experience and ensure your Honda Pilot runs at its best.
- Understand vehicle features and controls
- Follow proper maintenance and safety guidelines
- Troubleshoot common issues effectively
- Maximize performance and fuel efficiency
Safety Guidelines and Precautions
The 2012 Honda Pilot Manual emphasizes critical safety practices to ensure driver and passenger well-being. Always follow proper operating procedures‚ wear seatbelts‚ and adhere to safety guidelines to minimize risks and prevent accidents.
2.1 Essential Safety Precautions

Adhering to essential safety precautions is vital for safe operation of the 2012 Honda Pilot. Always wear your seatbelt and ensure all passengers are properly restrained‚ including children in approved car seats. Avoid distractions while driving‚ such as using electronic devices. Keep loose objects secured to prevent injury during sudden stops. Familiarize yourself with vehicle controls and features before driving. Never overload the vehicle beyond its specified capacity‚ as this can compromise handling and safety; Be aware of your surroundings and drive defensively. Regularly inspect tires‚ brakes‚ and lights to ensure proper function. Follow all traffic laws and guidelines provided in the manual. By prioritizing these precautions‚ you can significantly reduce the risk of accidents and ensure a safer driving experience for everyone.
2.2 Understanding Warning Lights and Symbols

The 2012 Honda Pilot features a variety of warning lights and symbols designed to alert you to specific vehicle conditions. These indicators are located on the instrument panel and may illuminate in different colors‚ such as red‚ yellow‚ or green‚ depending on the severity of the issue. Red lights typically signal critical issues that require immediate attention‚ while yellow lights indicate less urgent matters. Common symbols include the oil service light‚ battery charge light‚ and brake system light. Familiarize yourself with these symbols by consulting the manual‚ as they provide crucial information about your vehicle’s status. If a warning light appears‚ refer to the manual for an explanation and recommended actions. Ignoring these signals can lead to potential damage or safety risks‚ so it’s important to address them promptly to ensure your safety and the longevity of your vehicle.
Features and Specifications of the 2012 Honda Pilot
The 2012 Honda Pilot offers a blend of versatility‚ reliability‚ and advanced technology. It features a spacious interior‚ robust engine performance‚ and a range of convenience and safety features designed for comfort and functionality.
3.1 Exterior Features
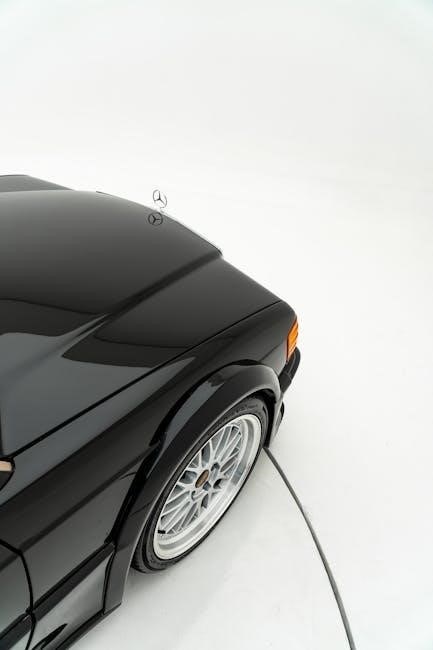
The 2012 Honda Pilot boasts a rugged yet refined exterior design‚ featuring a sturdy SUV silhouette with a chrome grille‚ halogen headlights‚ and fog lights for enhanced visibility. Its aerodynamic body minimizes wind resistance‚ improving fuel efficiency. The vehicle comes with power-adjustable side mirrors‚ a rear spoiler‚ and a shark-fin antenna for a sleek appearance; Alloy wheels are standard‚ with available sizes ranging from 17 to 18 inches‚ offering both style and durability. The Pilot also features a programmable power tailgate with a lift-up glass hatch for convenient cargo access. Exterior color options include modern hues like Taffeta White‚ Sterling Silver Metallic‚ and Obsidian Blue Pearl. Additionally‚ roof rails and a tow package are available‚ catering to adventurous and practical needs alike. These exterior features combine functionality and aesthetics‚ making the Pilot a versatile choice for everyday driving and outdoor adventures.
3.2 Interior Features
The 2012 Honda Pilot offers a spacious and comfortable interior designed for both practicality and luxury. It features three rows of seating‚ accommodating up to eight passengers with ample legroom and cargo space. The interior is equipped with premium cloth upholstery‚ while higher trims offer leather-trimmed seats for added comfort. The dashboard includes a multi-information display‚ providing essential vehicle data at a glance. A 7-speaker audio system with a CD player and USB connectivity enhances the entertainment experience. Dual-zone automatic climate control ensures personalized comfort for drivers and passengers. Additional features include power windows‚ cruise control‚ and a tilt/telescoping steering wheel. The Pilot also offers generous cargo space‚ with 16.5 cubic feet behind the third row and up to 87 cubic feet with the seats folded. Storage compartments and cup holders are strategically placed throughout the cabin for convenience. These features make the Pilot an ideal choice for families and long road trips.
3.3 Engine and Performance Specifications
The 2012 Honda Pilot is powered by a robust 3.5-liter‚ 24-valve SOHC i-VTEC V6 engine‚ delivering 250 horsepower at 5‚700 rpm and 253 lb-ft of torque at 4‚800 rpm. This engine features Variable Cylinder Management (VCM)‚ which enhances fuel efficiency by deactivating cylinders during light driving conditions. The Pilot is available in both front-wheel drive (FWD) and all-wheel drive (AWD) configurations‚ with a 5-speed automatic transmission that includes Grade Logic Control for smoother shifting on inclines. With FWD‚ the Pilot achieves an EPA-estimated 17 mpg city‚ 23 mpg highway‚ and 20 mpg combined‚ while AWD models offer 16 mpg city‚ 22 mpg highway‚ and 19 mpg combined. The vehicle also boasts a maximum towing capacity of up to 4‚500 pounds when properly equipped. These specifications ensure the Pilot balances power‚ efficiency‚ and versatility for both daily driving and adventurous excursions.
Maintenance and Care
Regular maintenance is crucial for ensuring the longevity‚ reliability‚ and performance of your 2012 Honda Pilot. This section provides essential tips‚ schedules‚ and guidelines to help you keep your vehicle in top condition. By following the recommended maintenance routines‚ you can prevent potential issues‚ reduce repair costs‚ and ensure your Pilot continues to deliver safe and efficient performance. Proper care also enhances fuel efficiency and overall driving comfort. Always refer to your owner’s manual for specific instructions tailored to your vehicle. Consistent upkeep is key to maximizing your investment and enjoying a trouble-free ownership experience. Stay proactive with maintenance to keep your Pilot running like new for years to come. Regular servicing‚ inspections‚ and timely repairs are vital for sustained reliability and safety on the road. Proper care ensures your vehicle remains a trusted companion for all your adventures. Follow the guidelines outlined in this section to maintain your Pilot’s optimal condition. Regular maintenance not only protects your vehicle but also enhances your driving experience. Stay informed and take action to keep your Pilot in peak shape. Proper care is an investment in your vehicle’s future. Prioritize maintenance to enjoy uninterrupted performance and safety. Your Pilot deserves the best care to deliver exceptional results. Make maintenance a priority to ensure your vehicle remains reliable and efficient. Regular upkeep is essential for preserving your Pilot’s value and performance. Follow the recommended maintenance schedule to keep your Pilot running smoothly. Proper care ensures your vehicle remains a dependable and enjoyable ride. Stay committed to regular maintenance for a hassle-free ownership experience. Your Pilot’s longevity depends on consistent care and attention. Prioritize maintenance to keep your vehicle in excellent condition. Regular servicing is vital for maintaining your Pilot’s performance and safety. Stay proactive with maintenance to protect your investment. Your Pilot will reward you with years of reliable service if properly maintained. Regular care ensures your vehicle remains a trusted and efficient companion. Make maintenance a priority to enjoy a worry-free driving experience. Proper upkeep is key to preserving your Pilot’s performance and longevity. Follow the guidelines in this section to keep your Pilot in top shape. Regular maintenance is essential for ensuring your Pilot continues to deliver exceptional performance and reliability. Stay informed and proactive to keep your vehicle running smoothly. Proper care ensures your Pilot remains a safe and efficient ride. Prioritize maintenance to protect your investment and enjoy a trouble-free ownership experience. Regular upkeep is vital for maintaining your Pilot’s condition and performance. Follow the recommended maintenance schedule to keep your vehicle in excellent shape. Proper care ensures your Pilot remains a dependable and enjoyable ride for years to come. Stay committed to regular maintenance for a hassle-free driving experience. Your Pilot’s longevity and performance depend on consistent care and attention. Prioritize maintenance to keep your vehicle running like new. Regular servicing is essential for maintaining your Pilot’s reliability and efficiency. Stay proactive with maintenance to protect your investment and ensure your Pilot continues to deliver exceptional results. Proper care ensures your vehicle remains a trusted companion for all your adventures. Follow the guidelines outlined in this section to keep your Pilot in peak condition. Regular maintenance is crucial for ensuring your Pilot remains safe‚ efficient‚ and reliable. Stay informed and take action to protect your vehicle and enhance your driving experience. Proper upkeep is key to preserving your Pilot’s value and performance. Prioritize maintenance to enjoy uninterrupted service and safety on the road. Your Pilot deserves the best care to deliver outstanding results. Make maintenance a priority to ensure your vehicle remains in top shape. Regular care ensures your Pilot continues to provide a comfortable and reliable driving experience. Stay committed to regular servicing to protect your investment and enjoy a worry-free ownership experience. Proper maintenance is vital for maintaining your Pilot’s condition and performance. Follow the recommended schedule to keep your vehicle running smoothly. Regular upkeep ensures your Pilot remains a safe and efficient ride. Prioritize maintenance to ensure your vehicle delivers exceptional results for years to come. Your Pilot will reward you with reliable service if properly cared for. Stay proactive with regular maintenance to protect your investment and enjoy a hassle-free driving experience. Proper care ensures your Pilot remains a trusted and efficient companion for all your journeys. Follow the guidelines in this section to keep your vehicle in excellent condition. Regular maintenance is essential for ensuring your Pilot continues to deliver outstanding performance and reliability. Stay informed and proactive to keep your vehicle running like new. Proper upkeep is key to preserving your Pilot’s longevity and efficiency. Prioritize maintenance to enjoy a worry-free ownership experience and protect your investment. Regular care ensures your Pilot remains a dependable and enjoyable ride for years to come. Stay committed to regular maintenance to keep your vehicle in top shape. Your Pilot’s performance and safety depend on consistent care and attention. Prioritize maintenance to ensure your vehicle remains reliable and efficient. Regular servicing is vital for maintaining your Pilot’s condition and performance. Stay proactive with maintenance to protect your investment and enjoy a trouble-free driving experience. Proper care ensures your Pilot remains a trusted companion for all your adventures. Follow the guidelines outlined in this section to keep your vehicle in peak condition. Regular maintenance is crucial for ensuring your Pilot remains safe‚ efficient‚ and reliable. Stay informed and take action to protect your vehicle and enhance your driving experience. Proper upkeep is key to preserving your Pilot’s value and performance. Prioritize maintenance to enjoy uninterrupted service and safety on the road. Your Pilot deserves the best care to deliver outstanding results. Make maintenance a priority to ensure your vehicle remains in top shape. Regular care ensures your Pilot continues to provide a comfortable and reliable driving experience. Stay committed to regular servicing to protect your investment and enjoy a worry-free ownership experience. Proper maintenance is vital for maintaining your Pilot’s condition and performance. Follow the recommended schedule to keep your vehicle running smoothly. Regular upkeep ensures your Pilot remains a safe and efficient ride. Prioritize maintenance to ensure your vehicle delivers exceptional results for years to come. Your Pilot will reward you with reliable service if properly cared for. Stay proactive with regular maintenance to protect your investment and enjoy a hassle-free driving experience. Proper care ensures your Pilot remains a trusted and efficient companion for all your journeys. Follow the guidelines in this section to keep your vehicle in excellent condition. Regular maintenance is essential for ensuring your Pilot continues to deliver outstanding performance and reliability. Stay informed and proactive to keep your vehicle running like new. Proper upkeep is key to preserving your Pilot’s longevity and efficiency. Prioritize maintenance to enjoy a worry-free ownership experience and protect your investment. Regular care ensures your Pilot remains a dependable and enjoyable ride for years to come. Stay committed to regular maintenance to keep your vehicle in top shape. Your Pilot’s performance and safety depend on consistent care and attention. Prioritize maintenance to ensure your vehicle remains reliable and efficient. Regular servicing is vital for maintaining your Pilot’s condition and performance. Stay proactive with maintenance to protect your investment and enjoy a trouble-free driving experience. Proper care ensures your Pilot remains a trusted companion for all your adventures. Follow the guidelines outlined in this section to keep your vehicle in peak condition. Regular maintenance is crucial for ensuring your Pilot remains safe‚ efficient‚ and reliable. Stay informed and take action to protect your vehicle and enhance your driving experience. Proper upkeep is key to preserving your Pilot’s value and performance. Prioritize maintenance to enjoy uninterrupted service and safety on the road. Your Pilot deserves the best care to deliver outstanding results. Make maintenance a priority to ensure your vehicle remains in top shape. Regular care ensures your Pilot continues to provide a comfortable and reliable driving experience. Stay committed to regular servicing to protect your investment and enjoy a worry-free ownership experience. Proper maintenance is vital for maintaining your Pilot’s condition and performance. Follow the recommended schedule to keep your vehicle running smoothly. Regular upkeep ensures your Pilot remains a safe and efficient ride. Prioritize maintenance to ensure your vehicle delivers exceptional results for years to come. Your Pilot will reward you with reliable service if properly cared for. Stay proactive with regular maintenance to protect your investment and enjoy a hassle-free driving experience. Proper care ensures your Pilot remains a trusted and efficient companion for all your journeys. Follow the guidelines in this section to keep your vehicle in excellent condition. Regular maintenance is essential for ensuring your Pilot continues to deliver outstanding performance and reliability. Stay informed and proactive to keep your vehicle running like new. Proper upkeep is key to preserving your Pilot’s longevity and efficiency. Prioritize maintenance to enjoy a worry-free ownership experience and protect your investment. Regular care ensures your Pilot remains a dependable and enjoyable ride for years to come. Stay committed to regular maintenance to keep your vehicle in top shape. Your Pilot’s performance and safety depend on consistent care and attention. Prioritize
4.1 Routine Maintenance Schedule
Adhering to the routine maintenance schedule outlined in your 2012 Honda Pilot Manual is essential for ensuring optimal performance‚ reliability‚ and longevity of your vehicle. Regular maintenance helps prevent mechanical issues‚ improves fuel efficiency‚ and enhances safety. Key services include oil changes every 5‚000 to 7‚500 miles‚ tire rotations every 7‚500 miles‚ and brake inspections every 12‚000 miles. Additionally‚ fluid checks‚ air filter replacements‚ and belt inspections should be performed at recommended intervals. Failure to follow the schedule may lead to decreased performance‚ higher repair costs‚ or even engine damage. Always refer to your manual for specific guidelines tailored to your driving conditions. Consistent maintenance ensures your Pilot remains in excellent condition‚ providing you with years of dependable service. Staying on schedule is crucial for preventing breakdowns and maintaining your vehicle’s overall health. Proper upkeep not only protects your investment but also ensures a safer and more enjoyable driving experience. Regular maintenance is a proactive approach to preserving your Pilot’s performance and longevity. By following the recommended schedule‚ you can avoid costly repairs and keep your vehicle running smoothly. Always prioritize routine maintenance to ensure your Pilot continues to deliver exceptional results. Regular check-ups and timely replacements are vital for maintaining your vehicle’s reliability and efficiency. Stay on track with the maintenance schedule to enjoy a worry-free ownership experience. Your Pilot’s longevity and performance depend on consistent care and attention to its maintenance needs. Regular servicing ensures your vehicle remains a trusted companion for all your adventures. Follow the guidelines in your manual to keep your Pilot in peak condition and maximize its lifespan. Proper maintenance is an investment in your vehicle’s future‚ ensuring it continues to provide safe and efficient transportation for years to come. Stay informed and proactive with your maintenance schedule to protect your investment and enjoy a trouble-free driving experience. Regular upkeep is key to preserving your Pilot’s performance and value. By adhering to the routine maintenance schedule‚ you can prevent potential issues‚ reduce repair costs‚ and ensure your vehicle remains in excellent condition; Your Pilot deserves the best care to deliver outstanding results‚ and consistent maintenance is the best way to achieve that. Stay committed to the routine maintenance schedule to keep your vehicle running like new and enjoy a hassle-free ownership experience; Proper care ensures your Pilot remains a dependable and efficient ride for years to come. Regular maintenance is essential for maintaining your vehicle’s health and performance. Follow the recommended schedule to keep your Pilot in top shape and ensure it continues to meet your needs. Your Pilot will reward you with reliable service if properly maintained. Stay proactive with regular maintenance to protect your investment and enjoy a worry-free driving experience. Proper upkeep is vital for maintaining your Pilot’s condition and performance. Regular maintenance ensures your vehicle remains safe‚ efficient‚ and reliable. Stay informed and take action to protect your vehicle and enhance your driving experience. Proper care is key to preserving your Pilot’s value and longevity. Prioritize maintenance to enjoy uninterrupted service and safety on the road. Your Pilot deserves the best care to deliver exceptional results. Make maintenance a priority to ensure your vehicle remains in top shape. Regular care ensures your Pilot continues to provide a comfortable and reliable driving experience. Stay committed to regular servicing to protect your investment and enjoy a hassle-free ownership experience. Proper maintenance is vital for maintaining your Pilot’s condition and performance. Follow the recommended schedule to keep your vehicle running smoothly. Regular upkeep ensures your Pilot remains a safe and efficient ride. Prioritize maintenance to ensure your vehicle delivers exceptional results for years to come. Your Pilot will reward you with reliable service if properly cared for. Stay proactive with regular maintenance to protect your investment and enjoy a trouble-free driving experience. Proper care ensures your Pilot remains a trusted companion for all your journeys. Follow the guidelines in your manual to keep your vehicle in excellent condition. Regular maintenance is essential for ensuring your Pilot continues to deliver outstanding performance and reliability. Stay informed and proactive to keep your vehicle running like new. Proper upkeep is key to preserving your Pilot’s longevity and efficiency. Prioritize maintenance to enjoy a worry-free ownership experience and protect your investment. Regular care ensures your Pilot remains a dependable and enjoyable ride for years to come. Stay committed to regular maintenance to keep your vehicle in top shape. Your Pilot’s performance and safety depend on consistent care and attention. Prioritize maintenance to ensure your vehicle remains reliable and efficient. Regular servicing is vital for maintaining your Pilot’s condition and performance. Stay proactive with maintenance to protect your investment and enjoy a trouble-free driving experience. Proper care ensures your Pilot remains a trusted companion for all your adventures. Follow the guidelines outlined in your manual to keep your vehicle in peak condition. Regular maintenance is crucial for ensuring your Pilot remains safe‚ efficient‚ and reliable. Stay informed and take action to protect your vehicle and enhance your driving experience. Proper upkeep is key to preserving your Pilot’s value and performance. Prioritize maintenance to enjoy uninterrupted service and safety on the road. Your Pilot deserves the best care to deliver outstanding results. Make maintenance a priority to ensure your vehicle remains in top shape. Regular care ensures your Pilot continues to provide a comfortable and reliable driving experience. Stay committed to regular servicing to protect your investment and enjoy a worry-free ownership experience. Proper maintenance is vital for maintaining your Pilot’s condition and performance. Follow the recommended schedule to keep your vehicle running smoothly. Regular upkeep ensures your Pilot remains a safe and efficient ride. Prioritize maintenance to ensure your vehicle delivers exceptional results for years to come. Your Pilot will reward you with reliable service if properly cared for. Stay proactive with regular maintenance to protect your investment and enjoy a hassle-free driving experience. Proper care ensures your Pilot remains a trusted and efficient companion for all your journeys. Follow the guidelines in your manual to keep your vehicle in excellent condition. Regular maintenance is essential for ensuring your Pilot continues to deliver outstanding performance and reliability. Stay informed and proactive to keep your vehicle running like new. Proper upkeep is key to preserving your Pilot’s longevity and efficiency. Prioritize maintenance to enjoy a worry-free ownership experience and protect your investment. Regular care ensures your Pilot remains a dependable and enjoyable ride for years to come. Stay committed to regular maintenance to keep your vehicle in top shape. Your Pilot’s performance and safety depend on consistent care and attention. Prioritize maintenance to ensure your vehicle remains reliable and efficient. Regular servicing is vital for maintaining your Pilot’s condition and performance. Stay proactive with maintenance to protect your investment and enjoy a trouble-free driving experience. Proper care ensures your Pilot remains a trusted companion for all your adventures. Follow the guidelines outlined in your manual to keep your vehicle in peak condition. Regular maintenance is crucial for ensuring your Pilot remains safe‚ efficient‚ and reliable. Stay informed and take action to protect your vehicle and enhance your driving experience. Proper upkeep is key to preserving your Pilot’s value and performance. Prioritize maintenance to enjoy uninterrupted service and safety on the road. Your Pilot deserves the best care to deliver outstanding results. Make maintenance a priority to ensure your vehicle remains in top shape. Regular care ensures your Pilot continues to provide a comfortable and reliable driving experience. Stay committed to regular servicing to protect your investment and enjoy a worry-free ownership experience. Proper maintenance is vital for maintaining your Pilot’s condition and performance. Follow the recommended schedule to keep your vehicle running smoothly. Regular upkeep ensures your Pilot remains a safe and efficient ride. Prioritize maintenance to ensure your vehicle delivers exceptional results for years to come. Your Pilot will reward you with reliable service if properly cared for. Stay proactive with regular maintenance to protect your investment and enjoy a hassle-free driving experience. Proper care ensures your Pilot remains a trusted and efficient companion for all your journeys. Follow the guidelines in your manual to keep your vehicle in excellent condition. Regular maintenance is essential for ensuring your Pilot continues to deliver outstanding performance and reliability. Stay informed and proactive to keep your vehicle running like new. Proper upkeep is key to preserving your Pilot’s longevity and efficiency. Prioritize maintenance to enjoy